Friday, March 15, 2013

Introduction to Xeriscape

It was a short night, so this will be a short blog today.  :)   Last evening, I traveled to a small town on the Montana - North Dakota border to do a presentation on xeriscape gardening.  It was an enthusiastic group of gardeners and a fun evening, but it is a long way from home. 

Xeriscape gardening is a concept that was developed in Colorado in the early 1980's to address water issues in the front range area.  It is drought tolerant gardening, based on proper garden design, good quality soil, using the correct plant material, irrigating appropriately, and mulching effectively.  It is an approach to gardening that allows me to have lush, beautiful gardens in the semi-arid North Dakota climate without spending all my time and money watering.

We'll talk more about xeriscaping in future blogs, because it really is the cornerstone of Wiese Acres.  In the meantime, here are a few pictures of  what xeriscaping can look like.


Wiese Acres Nostalgia Garden


Mom's Garden


Wiese Acres Native Garden


Thursday, March 14, 2013

Caring for Your Hardy Roses

Wiese Acres north gardens at sunset

Even if you choose rose cultivars that are easy care and disease resistant, they still may need some special attention.  Choosing a rose cultivar that is reasonable for your location is number one on the list.  Then comes planting the rose correctly; followed by correct fertilization, watering and disease control; and finally, putting it to bed for the winter properly.

I start by choosing only cultivars that are hardy to zone 4.  I know that there are people in my area who bravely plant zone 5 roses, and even some zone 6.  But, then we are back to the “if it requires more nurturing than my children did…”  The next thing I look for is to make sure that the rose is grown on its own root, rather than as a grafted rose. 

 I have planted a couple grafted roses in my gardens over the years.  One of them was a gorgeous copper color, the other beautiful sunny yellow.  Both were absolutely loaded with large, wonderfully fragrant blossoms nearly the entire summer their first year in my garden.  “Ah, yes”, I thought when each of them put on their display, “this is a keeper”.   The following spring , each plant came back with beautiful foliage but was very slow to bloom.  They did finally bloom, and just imagine my dismay when my gorgeous copper and yellow flowers had become a dull, puny, blah-smelling pink.  The grafted portion of the roses, which produced the gorgeous copper or yellow flowers, had died out over the winter and left me with the flowers from the hardy root stock to which my prize had been grafted.  Now, there are only so many dull, puny, blah-smelling pink roses one needs in a garden so they both were replaced with own-root roses the following spring.

 How does one know if the rose is grafted or own-root?  Most own-root roses are identified as such on the plant marker.  If it is not, you can look for the graft union – a larger, bulbous looking area towards the root.  There will be the slimmer stalk of the hardy root rose below it and the stems of the grafted desirable rose above that bulbous area.  Sometimes you can see a stub of the original stem of the root stock sticking up just above the graft union, also.  Own-root roses will have a smooth, uniform stem all the way to the root flare.

 Now, all this doesn’t mean that you absolutely cannot plant grafted roses in your northern gardens.  It does mean, though, that if you want to keep them looking like the beautiful rose you purchased, you will need to give it some extra tender loving care at winter time, mulching the crown and the canes to protect them from the elements.

When purchasing plants, look for a nicely balanced plant with strong, thick canes and a good, solid root system.  Look for signs of disease or pests and opt to leave those at the store.  Yes, you can spray or otherwise treat them when you get them home, but unless you get a deal that just cannot be refused, like they are willing to pay you to take it out of their garden center, let them deal with their own problems and you go shopping for a healthy rose.

Next comes proper planting.  Roses need at least six hours of direct sun a day to do their best.  They will grow and bloom some with slightly less than that, but you won’t get the profusion of blooms with less sun.  They also must be planted in an area where there is good air circulation, so a protected corner of the house might not be the optimum location.  To tell if you are giving your roses enough space for adequate air circulation, look to see if overhead light is able to touch all sides of your rose.  If it does, then you should have adequate air circulation. 

Adding some organic matter to the top foot of soil in your planting area will be welcomed by your roses.  They require well-drained, light soil.  Most sources will tell you to plant the graft union or the crown about one inch below the surface of the soil, or in the case of potted roses, even with the depth of the soil in the container.  I think most gardeners who grow roses successfully in northern climates will tell you that is a rule meant to be broken. 

I plant my roses with the crown four to six inches below the surface of the soil.  That assures that they will be protected from frost heaving, freeze and thaw cycles,  and excessive cold.  It does not affect the growth of the rose, other than to make the appearance of the first foliage of spring somewhat later, but that is also a good thing in an area that is prone to late spring frost.

Roses like about 4 inches of organic mulch to keep the soil cool and evenly moist.    They do not like rock mulch so try to avoid that, no matter how much you might love rocks.  I guarantee you, that love will not be shared by your roses.  Rocks collect heat from the sun, transfer it to the soil, and the soil transfers it to your rose roots.  They also weigh down and compact the soil.  Imagine having your feet in uncomfortably hot water all day long, weighed down with a heated concrete block; finally the water begins to cool and you think you are going to get some relief, that your feet will finally cool off.  Then, someone comes and pours another bucket of boiling water over the concrete block in the foot basin and your misery begins all over again.  That’s what the sun rising and setting on the rocks around your roses does to their “feet”.

I create a ring around the stems of the roses using plastic lawn edging to keep the organic mulch from getting pushed up against the stems themselves.  Mulch too close to the stems fosters rot and allows pests and rodents to hide in the mulch while they have your rose stems for dessert.  I prefer cedar mulch because it looks and smells great, lasts a long time, and may repel some pests.

Roses need one inch of water each week to thrive and bloom their best.  Watering with a soaker hose is going to give you the best results.  Roses don’t like water setting on their foliage and are very susceptible to fungal and bacterial diseases if this happens regularly.  If you must use overhead watering, it is best done in the mornings so that the sun will dry the water from the foliage more quickly.

Roses can be fed with a slow release, low nitrogen fertilizer, such as a 10-20-10 formulation, in the early spring, as soon as you start to see growth.   Repeat bloomers should receive another application of slow release fertilizer right after the first bloom.  If you don’t use slow release fertilizers, roses should be fertilized with a 10-20-10 formula every month from first sign of growth in the spring through July.  Roses should not be fertilized in the fall – the first part of August is the latest they should ever be fertilized in this part of the country.  In other parts of the country, the rule of thumb is that your roses should have at least six weeks of time prior to killing frost without fertilizing to “harden off” for the winter months.

 If you buy disease resistant shrub roses, you are less likely to have trouble with diseases like black spot and powdery mildew, but in extreme conditions, even “resistant” varieties are not absolutely fool – proof.  Watch your roses for signs of infections or pest infestations and then treat sooner rather than later.

Come fall, if your hardy roses are well established and healthy, you probably don’t have a lot of work left to do with them.  If they are not reliably hardy for your area, or if it is their first year in the gardens, winter mulching should be done once the ground is frozen and all foliage has died for the year.  

You can use foam rose cones to protect your roses.  You won’t see any of these at Wiese Acres, though.  I find that with our clay soil they hold too much moisture, fostering the growth of molds and other diseases.  Not to mention the fact that, in spite of anchoring them down with rocks, bricks and other heavy objects, I often used to find myself doing search and rescue missions from the neighbor’s swimming pool after a good strong wind. 

I prefer good, clean wheat straw or leaves.  The wheat straw tends to stay in place better even if a good wind manages to find its way into the yard.  If necessary, I will anchor the straw with branches trimmed off the old Christmas tree when we are finished with it or other trimmed branches.  A couple of pieces of 2 x 4’s also do the job but must be placed carefully to avoid breaking the canes. 

You can trim the canes of the roses back some to make the mulching process easier, but shrub roses are best trimmed in the spring to promote the greatest flush of blooms.    When I do mulch roses for the winter, I tuck about 10 to 12 inches of straw in around the crown and the lower canes and just leave the taller canes exposed.  These help keep the straw in place and can be easily pruned down in the spring.

For more vulnerable roses, you can use the Minnesota Tip Method, where you tie the canes together, dig a trench deep enough and long enough to hold the entire rose, “tip” the rose down into the trench and cover the entire crown and canes with several inches of soil, followed by several inches of leaves or straw mulch.  In the spring, you dig the branches out of the trench and let it grow. 

If you’re like me and you love roses but just aren’t willing to do the work of growing the more “finicky” cultivars, there are some good options for us.  We can wander through our garden of hardy, disease resistant, tough as nails but beautiful as, well, as roses, plantings and enjoy what we have accomplished.


Wednesday, March 13, 2013

Hardy Roses

 
Who doesn't love the sight of roses?  And the fragrance - oh, my, it's like a little bit of heaven on earth!  But the pain of growing them, well, that's not always so special.
 
My philosophy of gardening is that if a plant requires more care to thrive than my children did, it doesn’t belong in my garden.  So, that has eliminated a lot of roses from Wiese Acres.  There are some roses that are bred to be hardy and care-free, however, and more and more of these are showing up at Wiese Acres.


Easy Elegance "Music Box"
This year’s addition will be the shrub rose “Music Box”, which will go in The Music Garden (you probably guessed that, huh?)  Music Box is a 2012 introduction from Easy Elegance roses, a line of hardy, disease resistant, own-root roses that bloom all season long.  It will join other Easy Elegance roses in my garden, such as “All the Rage”, “Paint the Town”, “Sunrise Sunset” and “Yellow Submarine”. 


Easy Elegance "Yellow Submarine"
 
Easy Elegance is a hybridizer from Newport, Minnesota, so they fully understand the challenges of a zone 4 winter and summer.  That is why all their roses are on their own roots rather than grafted to another hardy rose root.  This is a good thing in areas that have harsh winters.  With grafted roses, all parts of the desirable rose are above ground while what is planted below the ground is a non-descript, often non-blooming rose root.  Unfortunately, in many winters, what is above ground doesn’t survive, leaving you without that beautiful rose you so highly prized last summer and with something that slightly resembles a rose - maybe.   In addition to being own-root, the Easy Elegance roses are resistant to the most common diseases that affect roses -  black spot and powdery mildew.  They need very little pruning to keep a nice shape and are nearly continuous blooming.  Most of them are fragrant, which is a plus for hardy roses.  Another beauty about Easy Elegance roses - the breeders are so confident of their product, they offer a two year guarantee.  That's a plus, but even with several Easy Elegance cultivars in my gardens, I've not ever had to test that promise.


William Baffin rose in Wiese Acres Memorial Garden
 Another great group of hardy roses is the Canadian Explorer series, about 22 cultivars bred in Ontario and Quebec.  Canadian Explorer roses are mostly available in pinks and reds, but there are a few yellow cultivars.  While they don't bloom continuously, they do have a long initial bloom period and most will provide a repeat bloom later in the season if they are deadheaded.  They are reliably hardy, even in zones 2 and 3.


I have a few favorites from the Explorer series, because they have done well in my garden with very little help from me.  “William Baffin”, is one of them.  Baffin is a long-cane rose that climbs beautifully in the Memorial Garden, providing a lovely backdrop for the memorial bench. 
 
“J.P. Connell” is a lovely light yellow and when it is in full bloom, it perfumes nearly the entire area of Wiese Acres. 
 
“Champlain” is a dependable, rock solid shrub rose that provides dark, velvety red clusters of flowers with a light fragrance.  The Canadian Explorer series are all bred to survive not only the cold winters of the north country, but also the hot summers.  They are resistant to diseases, as well.  It doesn’t get any better than that!
 
Morden roses are another series of winter hardy, own root roses.  Bred in Morden, Manitoba, they are reliably hardy to zone 3.  Many of the Morden series have the look of a tea rose and are nicely fragrant.  The downside of the Mordens is their susceptibility to disease, particularly black spot.  Some of the newer cultivars, like “Morden Sunset” and “Morden Snowbeauty” have had stronger resistance to black spot bred into them.  “Morden Centennial” is a gorgeous pink, and “Morden Ruby” is a deep red.   Both are almost pretty enough to make up for the fact that they require almost constant attention in hot, humid weather to keep from being decimated by black spot disease. 

Morden’s “Hope for Humanity”, part of its Parkland shrub rose series, is noticeably more resistant to black spot than earlier introductions and with its deep wine-colored, double flowers, it is definitely worth the little extra care it requires during periods of high heat and humidity.


Many of these are hardy to warm zones as high as 9, so they are versatile, easy to grow, long lasting beauties.

Tomorrow we'll discuss planting and caring for hardy roses.

Tuesday, March 12, 2013

Echinacea Cheyenne Spirit and Aster Yellows

Wiese Acres All Creatures Great and Small Garden
Another of the plants I'm anxiously awaiting is a 2013 All America Selections Flower Award winner, "Cheyenne Spirit" echinacea. 

First, a little bit about All America Selections (AAS).  AAS is a non-profit organization that independently tests new culitvars and then promotes as AAS winners only those that perform at very high levels.  Trials are conducted across North America so chances are pretty good that if an AAS winner is hardy to your zone, it will perform in your garden, provided you can offer the growing conditions that plant requires.

Now, back to Cheyenne Spirit.  Brilliant hues of orange, red, yellow, purple or white surround a large brown cone.    Coneflowers are great, long-blooming, drought tolerant, wind-resistant, and deer resistant work horses in my gardens.  Deadheading prevents self- seeding, but I leave the seed cones standing for winter interest and for birds.  Birds love the seeds and usually clean up enough of them that I don't need to worry about my coneflowers self-seeding themselves to pestiness. If you must, remove only the flower stalk and leave the foliage at the base of the plant to protect the root from winter's freeze and thaw cycles. Coneflowers are slow to emerge in the spring, so you might want to mark where they are planted. They rarely if ever need to be divided, but they can be divided in early spring or early fall, if you need more plants.

Cheyenne Spirit blooms its first year from seed, making it a necessary addition to my garden this year.   Last year I lost all my coneflowers to Aster yellows disease.

Aster yellows is a systemic disease that affects many species of plants, especially members of the Asteraceae family, such as coneflowers.   Aster yellows is spread by leaf hoppers and while it doesn't kill the plant, it keeps it from blooming as it should.  Leaves and flowers may be distorted and stunted. 

Early aster yellows infection
Late aster yellows infectiom
There is no treatment for Aster yellows.  Affected plants should be dug out and destroyed at the first signs of infection to keep it from spreading further.  The earliest sign of infection is a change in the green color of the foliage from a darker true green to lighter, yellow green.  This color change usually begins with the lower foliage.  Unfortunately, much of the time it has spread widely before the first symptoms are noticed. 

It broke my heart to destroy all my beautiful coneflowers, but my hope is that I can rebuild my collection this year.  Aster yellows does not live in the soil,air, or even in dead foliage so destroying the plants should take care of the problem.  I will need to watch closely for signs of the infection in other plants and destroy them right away if necessary so I don't lose my new coneflowers.


Monday, March 11, 2013

Sedum

Well, after several days of "technical stuff", it's time for something a little more fun today.  Last Friday, I was able to drive to and from work in daylight.  Today, it will still be dark when it's time to leave for work.  Yup - daylight savings time- it's a sure sign spring must be on the way.  Spring on its way means time to start dreaming of digging in the dirt.

It will still be several weeks before my plant orders begin to arrive, but I'm excited for a few new plants I will try this year.  I ordered three new sedums, commonly called stonecrop, that will be great additions to two different theme gardens.

Sedum "Harvest Moon" and "Sunset Cloud" will go in the Sun, Moon and Stars Garden and "Blade Runner" will go in the Children and Butterflies Garden.

Sedum "Harvest Moon"


Harvest Moon is a ground cover sedum, growing only 4 to 6 inches tall.  Its small, succulent type foliage is silver and purple.  It is topped with stars of bright yellow flowers in late summer to fall.


Sedum "Sunset Cloud"
Sunset Cloud is a low growing sedum, about 6 to 8 inches tall.  It will form a nice mound of steel blue rosettes with plum accents on the edges of the leaves.  In late summer, it will put out a mass of rosey red flowers that will last late into the fall.


Sedum "Blade Runner"


Blade Runner is an upright sedum that will grow 12 to 18 inches tall.  Its leaves are bright green with a serrated edge.  In late summer and fall, it will burst forth with large umbels of purple red flowers that are held upright on red stems.


Sedum is a wonderful plant for harsh, dry climates. Most cultivars are hardy to zone 3 and all are very drought tolerant once their root system is well-established.  They prefer well-drained soil, which I have been able to accomplish by adding a great deal of organic ammendments to my heavy clay over the years.  They don't like added fertilizer and tend to get leggy and spindly if fed too well.  Sedum blossoms will last about four to six weeks, and they do not need to be dead-headed.  The spent flower heads add nice winter interest to the garden.  Sedum foliage is a beautiful addition to the garden even when it is not in bloom.  It thrives in places hot, dry places where many other plants complain.  Sedum are not attractive to deer and rabbits, although a deer or rabbit that is hungry enough will eat anything.  The blossoms of sedum are very attractive to butterflies and bees.  I will often walk through the garden and see butterflies clustered all over the tops of the sedum blossoms while the bees are busily buzzing from petal to petal collecting pollen.

Wiese Acres Children and Butterflies Garden


It's hard for me to choose a favorite plant because there are so many that I love and my favorite changes from season to season, even from day to day.  But, sedum is a group that will almost always end up on that list somewhere.


Sunday, March 10, 2013

Growing African Violets, part 6 – Pests and Diseases


 The great things about African violets are that they are relatively easy to grow and they will bloom nearly year round, allowing even the harshest climates to experience a little bit of summer all the time.    The not so great thing is that they are prone to diseases and pests.  Virtually all the common problems, however,  can be avoided with proper growing practices we’ve been discussing.  When disease and pest problems occur, they are serious.

Brown center and collapsing leaves indicating Crown and Root Rot
One of the most serious conditions is Crown and Root Rot.  This is first noticed when the crown of the plant becomes mushy , the older stems droop because their attachment to the crown is compromised, and new growth is stunted and eventually turns black and dies.  Crown rot is caused by a fungus that takes hold when plants are allowed to remain too wet, either through over-watering or poorly draining pots or potting mix, or when  African violets are planted too deep. 

The only cure for Crown and Root Rot is prevention.  I have never succeeded in saving a violet once evidence of Crown Rot exists.  It is best to put the rotting plant and soil into a sealed plastic bag and throw it in the garbage.  If you are using a porous, clay type pot, it is recommended that you even destroy the pot because of the difficulty of killing any of the Phytophthora fungus that causes the rot.    If you don’t wish to throw the pot, you need to give it a good long soak totally submerged in a 10% bleach solution for enough hours to allow the bleach to completely permeate the pot, usually around 12 to 16 hours.  Then,  remove the pot from the bleach solution and soak it in clean, clear water for that same amount of time.

If you must try to save the affected violet, completely isolate it from all other plants.  Trim off all decaying tissue from the plant and the roots,  dust the plant and root ball with plant grade sulfur, then replant in a sterilized pot with very porous, sterilized potting mix that has been treated with an anti-fungal such as Benomyl.  I don’t know about you, but that violet would have to be pretty precious for me to bring Benomyl into my home in any form.

Botrytis lesions on leaves

Botrytis blight is another disease caused by a fungus.  Its first appearance may be in the form of lesions on the underside of the leaves that are similar in appearance to water damage.  The leaves and stems turn a dark, greenish-brown color and may begin to look like they have a fuzzy coating on their surfaces.  Flowers will develop brown spots or the entire flower will turn brown and appear wilted.    Botrytis is also difficult to treat but, unlike with Crown Rot, you may have a chance of saving your violet. 

First, isolate the violet from all other plants.  Violets are not the only plants affected by Botrytis and it can be spread through air movement.  Remove, bag, and destroy all dead and dying tissue from the plant.  Make sure the remaining plant has good air circulation around it.  Botrytis must be treated with a fungicide.  Both Benomyl and Captan are effective against Botrytis.  Again, unless this is a very special violet, I would opt for throwing it out and starting over rather than using fungicides in my home environment.


Powdery Mildew

Powdery Mildew can appear similar to the gray mold of Botrytis, but instead of being spots of fuzzy gray mold on the leaves, Powdery Mildew generally is a white, dusty appearing powder that covers the entire plant.  Left untreated, Powdery Mildew will cause discoloration of the leaves and flowers, as well as distortion of the flower and stem.  Powdery Mildew is more common than Botrytis in most home environments and can almost always be prevented with proper watering and adequate air circulation. 

Again, isolate the affected plant(s) to prevent the spread of Powdery Mildew.  Remove any dead or dying tissue and place the plants in an area where the humidity is consistently less than 60% and the temperature stays at a consistent 70 degrees.  If the infection is particularly bad, or if you see no improvement after two to three days of the reduced humidity and consistent temperature, spray the entire plant with Lysol disinfectant spray.  The Lysol will cause discoloration of the flowers, but will not do any harm to the plant and is safer for you than chemical fungicides.  Plant grade sulfur dusted on the entire plant, or a mixture of one teaspoon of baking soda mixed in one quart of room temperature water and sprayed over the entire plant can also be used in place of fungicides.  If these treatments do not cause noticeable improvement within the first week of treatment, your only other option will be to treat with Benomyl or Captan if you want to save the plant.


Center showing cyclamen mite damage

Cyclamen mites are partial to African violets as well as cyclamen.  They are microscopic spider-like pests and, next to Crown Rot, are the most serious thing that can happen to your African violet.  Damage to your violet is the first indication that mites are at work.  They prefer the new growth, so damage will show up first in the center of your violet, with stunting of the new leaf growth, curling of the edges of the leaf and a very hairy appearance on new leaves.  Flowers will also become stunted and deformed and will not open fully, if at all.

Mites prefer very high humidity and low temperatures.  They don’t like light, so they hide in the leaf folds or right up against the crown of the plant.  They suck the sap from the plant, and in the process inject a toxic substance that causes the growth deformities that are the hallmark of mite infestation.

Isolate the plant at the first sign of infection, as mites spread very easily from plant to plant.  Because greenhouse conditions are often perfect for the development of mite infestations, it is a very good idea to isolate any new violets you bring home for several weeks, until you can see for sure that new growth is normal. 

The only way to get rid of mites is to spray them.  You can try spraying with Azadirachtin (Neem), which has some systemic insecticidal properties but works primarily by making your violet taste bad to the mites, but will not kill them immediately.  I’ve had minimal success with this, but it is a more human friendly approach than chemical miticides.  Generally, if you want to save the plant, you will need to resort to chemical miticides, such as Bonide Mite-X or Dicofol.  Whatever product you use must be rated for indoor, household use.

You’ll need to spray all surfaces of the plant, making sure to get into the folds of the leaves and the undersides, especially where the leaves attach to the crown.  Spraying needs to occur once every four days for three times, or every fourth day over a twelve day time period.  Then watch closely for signs of continued infestation.  It’s important to keep the plant isolated for the entire time until you clearly see healthy new growth.

Mealybug on back of leaf

Mealybugs are tiny bugs that collect on the undersides of leaves and near where the stem attaches to the leaf or to the crown.  They are visible to the human eye and look like a tiny speck of cotton or white dust.  Root mealybugs look essentially the same, but are found collected in the root ball of the violet.  They suck the juices from the plant and will eventually kill the plant if left untreated.  As they feed, they excrete honeydew, which makes a sticky mess on the leaves and on the surface of the plant’s table or stand. 

The best way to treat mealybugs is to never bring them home in the first place.  Inspect all plants carefully for those tiny white fluffballs, including looking at the root ball, either by lifting it out of the pot or inspecting through the drainage holes.  The adult bugs have a waxy coating that makes them impermeable to contact pesticides, so the best way to treat them is to physically remove them with a cotton swab dipped in rubbing alcohol.  The immature mealybugs do not yet have that coating, so they are susceptible to insecticides and can be destroyed with insecticidal soap, which is generally rated safe for use in a home.

Whenever you trim tissue from your plants, it is critical that you disinfect your equipment between plants to avoid spreading even more disease.  You can do this by wiping or rinsing in a 10% bleach solution.  Ready to use disinfectant wipes may also be used if you can get to all surfaces of your tools adequately.  It’s also important to wash your hands between plants to avoid carrying any unwanted “stuff” from one plant to another when you are having disease or pest problems.

There are other common African violet problems that are not disease or pest related, but rather are caused by improper environmental conditions.  Buds may turn brown and fall off before opening if the temperature is too cold, if they are over-watered, or if the humidity in their environment is too low.  Exposure to fumes from gas fired cook stoves or heaters will also cause the flower buds to drop before opening.

A rust colored spot that appears where the stem or the leaf touches the pot is called petiole rot, but is not a bacterial or fungal rot.  These spots occur when the leaf or stem touches fertilizer salts that have accumulated on the rim of the pot.  This can be prevented by proper fertilizing and leaching the soil periodically, as well as using a salt –free source of water.
Cold water damage


Yellow or white spots or lines on the leaves of African violets is caused by contact with cold water.  Keeping the leaves dry when watering and using room temperature water is guaranteed to avoid this problem.


Truthfully, African violets are pretty cheap and readily available.  The only violet I’ve had that I attempted to treat disease or pests in has been the one I received from my mother-in-law’s collection when she passed away in 1982.  I’ve always kept several starts of the plant growing so that I was less likely to lose it.  Other than that, I’ve opted to throw and replace if I see any signs of problems.  I think that has not only saved me a lot of time and headache, but has also saved many of my healthy plants in the long-term.

If you follow the guidelines for appropriate water, temperature, air movement, humidity, and fertilization and repot your African violets whenever they need it, they will reward you with years of trouble-free blooms.


Saturday, March 9, 2013

Growing African Violets, part 5 - Repotting

Some growers recommend repotting African violets with fresh soil twice a year.  As I’ve told you before, I am an essentially lazy gardener, so that almost never happens at my house.  Instead, I watch carefully for evidence that the violet is becoming root bound, e.g. failure to thrive, or visible roots growing around the sides of the pot or through the drainage hole.  Sometimes that is twice a year, but generally I really only have to repot my African violets once a year.  Contrary to what you might have heard, African violets do not like to be root bound.  They do, however, like to grow in the right shape and size pot.

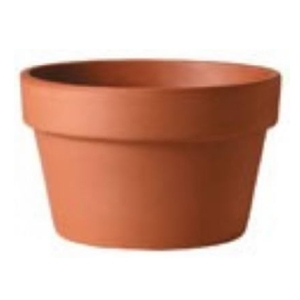
Azalea pot
The pot your African violet is going to appreciate most will be relatively shallow, with a height that is roughly three-fourths the size of the diameter of the pot’s opening.  Most planters are roughly the same height as the diameter, which is not the preferred style for violets.  Roots of African violets grow out from the center more than they grow down.  If you plant your violet in a pot that is as deep as it is wide, the roots will fill the diameter but will not get down to the lower part of the potting soil.  That means there won’t be any roots in that bottom one-fourth of the planter to drink up the excess moisture.  The bottom potting soil will stay soggy, interfere with the aeration the roots receive, and foster the growth of Root Rot or other fungal or bacterial diseases.  And yes, I know – many of the pots marketed as “African violet pots” are the same depth as the diameter – another reason I am not a huge fan of them.  Pots marketed as “Azalea Pots” do have the correct dimensions for African violets.

There is an easy method to determine the appropriate size pot for your African violet.  The size of the pot should be about one-third the diameter of the leaves.   For example, if the diameter of the leaves is 12 inches, your violet will be happiest in a 4 inch diameter pot that is 3 inches deep.  If you don’t want to do any measuring and your violet is already in a pot, increasing your pot size by one inch each time you replant is a good rule of thumb.

Whether you plant your violet in a clay pot or plastic pot is really up to you.  I prefer porous clay because I have fewer disease problems related to the soil retaining too much moisture.    I also prefer the look of clay to plastic.  The downside of clay pots is that they tend to accumulate fertilizer salts more quickly than non-porous plastic, but this is easily remedied by occasional leaching.  Clay is heavier than plastic, but that generally isn’t an issue with the size pot needed for an African violet.

Regardless of the type of pot you use, it must be disinfected before planting African violets.   Unsterilized pots can harbor nematodes and other microorganisms that are especially deadly to African violets.  Disinfecting is simple – just soak the pot in a solution of one part bleach to 9 parts water for a half hour or so, then rinse with clear water before use.

The type of potting soil you use is very important.  African violets have very tender roots which are easily crushed by heavy potting mixes.  A good African violet potting soil contains no soil at all.  It is almost all sphagnum peat moss.  It may contain some perlite but by far the largest component should be peat moss.  As we learned with fertilizer, just because the manufacturer says it is for African violets doesn’t necessarily mean it is so.  Look at the ingredients on the potting mix bag and choose one that has only peat moss and maybe perlite listed.  No bark and no soil.  You may see calcium carbonate or some type of lime listed in the ingredients, also.  Peat moss has a relatively low pH (high acid content) and African violets prefer a more neutral environment so the calcium carbonate or lime is added to lessen the acidity of the mix.

Even if you just opened a brand new bag of potting mix, you should sterilize the soil before planting.  We talked in an earlier blog about how to accomplish this.

African violets and their tender roots can be easily damaged during the transplanting process if proper care is not taken.  I prefer to transplant my violets when the potting mix is on the dry side and then water after the planting is completed.  There are times, though, when you need to moisten the root ball to get it out of the pot.  Either way works fine. 

The easiest way to transplant is to take your new pot, which is approximately one inch larger than your old pot and measure the difference in depth of the two pots.  Place potting mix to the depth of that difference in the bottom of the new pot, e.g. if the new pot is ¾ inch deeper than the old pot, place ¾ inch potting soil in the bottom of the new pot.  I also like to cover the drainage hole with a coffee filter disc to allow drainage but keep the soil from sifting out through the opening.  A tissue or paper towel also works for this.  Loosely pack the new soil. 

Remove the violet from the old pot by making a “V” with your fingers and gently sliding them under the leaves, sliding the stem of the violet into the crook of the “V”.  Turn the pot upside down and gently shake the violet loose.  If it won’t release, you can use a blunt object like a pencil to very gently push on the root ball through the drainage hole.  Do not push the object up into the soil, though, as that will damage the roots.  If you are still unable to loosen the root ball, try soaking the soil, and if that doesn’t work, as a last resort, take a sharp knife and run it between the soil and the edge of the pot.  This is a last resort because it almost guaranteed to cause root damage.

Set the violet and intact root ball aside and place the old, now empty pot inside the new pot, centering it.  Pack potting mix in between the inner edge of the new pot and the outer edge of the old pot, to approximately ½ inch below the edge of the new pot’s rim.  After it is packed, remove the old pot.  The potting mix should stay in place along the side of the new pot and you can slip the root ball right into the new pot and just gently settle the soil in around it.  The top of the soil should be approximately 1/2 to 3/4 inch below the rim of the pot.  Do not tease the African violet roots to loosen them - simply place the root ball into the new pot in the exact same condition in which you removed it from the old pot.  Place your newly potted violet in a saucer of water and allow it to absorb whatever water it needs, then move it to its home.

If you had to disrupt the root ball during the repotting process, you may need to place the plant in a humidity cocoon for the first week after transplanting.  If you were able to easily remove the root ball from the old pot and it stayed intact during the transplanting process, this probably isn’t necessary but it certainly won’t hurt anything if you wish to do it.

If your potting mix remains chronically soggy even though your pot drains well, your violet may be in too large a pot and it isn’t able to establish a cohesive root ball.  In this case, you would transplant it into a pot one or more sizes smaller than its current pot.  Use the pot that is ¼ the diameter of the leaves to find the correct size.  Brush off the excess potting mix and pat the root ball into the soil of the new pot.  There is a lot of disruption to the roots during this process, so you will need to place the plant into a humidity cocoon for a week after transplanting when this method is used.


"Gooseneck" on African violet
Another situation that might require you to repot your African violet is you find yourself with an African violet with a long skinny “neck” that is bare of leaves on the lower part and has an “umbrella” of leaves at the top of the neck.  Most of us don’t really like the look of a violet that grows in this fashion, and all new growth for violets occurs at the crown so there is no hope it will “grow out” of its bare neck.  But we don’t need to throw it away.  We can “pot down” that gooseneck and make our violet look perfectly normal again.

Potting down is a very easy and successful process.  To do this, you remove your violet from its pot and clean the pot well, including sterilizing because it is sometimes a disease process that causes the lower leaves to drop, leaving the elongated neck.  You are going to repot your violet in the same pot (unless you want to move it to a different pot of the same size as the old one).

Once you’ve removed the plant and its root ball from the pot, starting from the bottom of the root ball, trim away a section of the rootball that is equal to the length of the neck which you are going to immerse in the potting mix.  When you return the violet to the pot, the bottom of the root ball should be roughly ½ inch from the bottom of the pot and the neck should be covered with soil, with the lowest leaves now resting on the rim of the pot.  Add potting mix up to the level where leaves start from the main stem and press the potting mix firmly around the neck and root ball.  Place the pot in a watering tray, allow it to absorb as much water as it can and let excess water drain away.  Place the repotted plant in a humidity cocoon for one week, remove it and resume normal care.

Tomorrow we’ll cover some common pests and diseases that attack African violets.

Friday, March 8, 2013

Growing African Violets, part 4 – Fertilizing

A good fertilizer for African violets is a well-balanced formulation of the “primary” elements of nitrogen (N), phosphorus (P), and potassium (K).  A 14-12-14 formulation is recommended for standard size violets planted in 3 inch or larger pots.  Miniatures or any violet in less than a 3 inch pot should be fed with a 7-9-5 formulation. 

 In addition to these primary elements, African violets need “secondary” elements in their feed.  There are 13 secondary elements essential to healthy African violets:  boron (B), calcium (Ca), carbon (C),  chlorine, (Cl), copper (Cu), hydrogen (H), iron (Fe), magnesium (Mg), manganese (Mn), molybdenum(Mo), oxygen (O), sulfur (S), and zinc (Zn).    Carbon, hydrogen and oxygen are generally referred to as “free elements”, since the plant readily obtains them from water and air and they are rarely listed in plant food.  The other elements should be listed on the plant food label.   Some of them may be listed as “macronutrients” or those nutrients that plants need in larger quantities, such as N, P, K, Ca, C, Mg,  and S.  Others are “micronutrients” because the plant needs very small amounts for healthy growth. 

In addition to micronutrients, some fertilizers may list “trace elements”.  Trace elements are different than micronutrients, even though some people use the two terms interchangeably.  Trace elements are not critical to the life of the plant; micronutrients are.  There are four trace elements, in particular, that may be beneficial to your African violets.  Those are cobalt, (Co), nickel (Ni), silicon (Si), and sodium (Na). 

Even though some are macro and others are micronutrients, a proper balance of all is critical to the well-being of the plant.   In addition, it is important that everything you feed your African violet is fully water soluble.   All plants absorb nutrients through their roots and if the fertilizer elements are not fully dissolved in the water, the violets will not be able to absorb them.    This is especially true if you use self-watering planters or water only from the bottom.  Any fertilizer that is not fully water soluble will sit in your watering tray and not be available to the roots of your plants. 

 So, if you just buy a bottle or box of fertilizer labeled as “African Violet Food” you should be safe, right?  Not necessarily.  Urea is a common source of nitrogen in plant foods because it is cheap and readily available.  The problem with urea and African violets is that urea is known to cause root burn on violets.  Root burn prevents the violets from properly absorbing water and nutrients, eventually causing the death of the plants.

Guaranteed Analysis label of urea free fertilizer
 How do you know if your food contains urea nitrogen or some other type of nitrogen?  It should be listed on the “Guaranteed Analysis” label on your fertilizer container.  I checked the label on the most popular brand of liquid African violet fertilizer.  It contains 9.6% urea nitrogen.  Hmm.  Probably not the best for my African violets.  So, I was challenged to find a different fertilizer that obtained its nitrogen from another source, such as ammoniacal nitrogen or nitrate nitrogen, or a combination of these two.  I found it was not so easy to do.  I finally found a few options.  Peter’s Specialties produces a line of urea free fertilizers, as does Dyna-Gro.  The most readily available source of urea free fertilizer I found was the Optimara line, which sort of makes sense since Optimara is the most widely known breeder and producer of African violets. 

Once you’ve found the right fertilizer, how should it be used?   Neither under or over fertilizing are good for your plants.  Over-fertilizing will cause the leaves to become cracked and brittle and may produce lesions or “sores” on the stems.  Droopy or yellowing leaves, leaf tip burn, and reduced flowering are all signs of fertilizer overload.

To avoid these problems, always fertilize according to the label on your particular brand of fertilizer.  Different formulations require different dilutions or application procedures.    About every three months, you should completely drench the soil in your African violet pot and let it drain freely until the excess water is completely gone.  This will leach excess fertilizer salts away from the roots.  At the same time, wipe any visible salt build-up away from the rim of the container.

Who would have ever thought feeding your plants was so complicated?  Well, it really isn’t.  Just take time to look at the “Guaranteed Analysis” to see that it contains the critical macro and micronutrients, that it says it is “water soluble” and that urea is not listed as one of the sources of nitrogen.  The feed as directed on the label, leach your potting soil four times a year, and enjoy your healthy, productive African violet.

Tomorrow's news?  What to do when your health African violet outgrows its home.

Thursday, March 7, 2013

Growing African Violets, part 3 – Temperature and Air

For most of us, if we are comfortable in our home environment, our African violets will be quite happy there as well.  However, if you are one of those folks who thrive in cooler or warmer than normal temperatures, or like abnormal amounts of humidity, you might need to make some adjustments to keep your African violets thriving.

African violets are happiest when their air temperature is kept at a fairly consistent 70 degrees.  They tolerate some variation in that, but will suffer if their air temperature drops below 60 degrees or rises above 80 degrees, even for very short periods of time.  They also don’t appreciate drafts of either hot or cold air.  That is why my African violets never get the chance to enjoy the outdoors with the rest of their plant neighbors.  

Most African violets, however, will tolerate a drop of up to 10 degrees from daytime to nighttime temperatures.  In fact, some of the newer hybrids require that change in temperature from day to night to produce flowers.

If the temperature is consistently too warm, the violets will stop flowering and become rangy; leaves will shrivel and turn yellow; and flowers and buds will drop off.  African violets kept in too warm an environment will also require more watering to maintain adequate moisture levels.  If your African violet is showing signs of heat stress, gradually reduce its surrounding temperature, either by turning down heat sources in winter, increasing air conditioning in summer, or moving your plant to a location further from heat sources.  It is important to do this gradually rather than all at once to avoid pushing your violet into a state of shock.

African violets will complain about conditions that are too warm, but they are not as likely to die from warmth as they are from conditions that are too cold.  The least effect of temperatures below 60 degrees will be cessation of flowering and slowing of foliar growth.  In more extreme cases, the leaves and flowers wilt and drop; the plant goes into shock, and dies.  In less extreme cold temperatures, e.g. consistent temps just below 60 degrees, the violet may not die, but it will be much more susceptible to deadly diseases, such as Crown Rot, especially if the soil stays on the moist side.

The bad news about African violets is that once they are showing signs of cold stress, it is often too late because it takes up to 36 hours for any symptoms to appear.  There has already been a lot of tissue damage by that time.  It doesn’t hurt to try to salvage your plant, though, especially if it is one of those prized heirlooms from your grandmother.  The first step is to move it immediately to a location with the appropriate temperature.  You don’t need to introduce it to its new environment slowly like you do with heat stress.  With cold, the shock of the move will do much less harm than the cold temperatures themselves.   If any tissue is discolored, floppy, or mushy, trim that away.  Stop all watering and fertilizing, but maintain humidity at approximately 70 to 80%.  In most homes, you’ll need a humidity cocoon to accomplish that level of humidity consistently.  A cloche, tabletop greenhouse, or a plastic bag large enough to hold the entire plant without the leaves touching the plastic that can be sealed closed are all good methods to use.  If your violet is going to survive its chill, you should see signs of recovery in three to four days.  Even after recovery is apparent, keep your violet in its humidity cocoon for at least a week.    After that, move your violet to an appropriate location and begin watering and fertilizing as usual.

In their native environment, African violets enjoy 70 to 80% humidity all the time.  Most of us are not able to keep that high humidity level in our homes, but it is important to not allow humidity around the African violets to drop below 50%.  Below that level, the violet will stop growing, buds will not form or will not open after forming, and leaves will begin to shrivel and dry.

African violets are communal plants – they like to be grouped together.  This will help create a microclimate around them and may increase their surrounding humidity by as much as 15%.  That in itself may be enough to keep your violets happy.  If you need to add more humidity, though, you can provide it by placing containers of water around the plants where its evaporation will increase the air moisture. 

You can also use a small humidifier in the area of your African violets.  In the winter, warm mist humidifiers are best to avoid cooling the air around the plants too much and in the summer, a cool mist humidifier will keep the temperature from warming as much.  Now, that seems like more rigamarole than I am willing to put forth, even for my treasured African violets.  We keep the overall humidity level in our home at about 55%.  I keep my African violets clustered together in a location in our dining room, which is open to the kitchen where the humidity tends to be slightly higher than the rest of the house.  That keeps my violets perfectly happy without having to invest in two different types of humidifiers and then remember which to use when.

Clustering is good for your violets, but touching is not.  It is essential to maintain good air circulation around your African violets to prevent diseases such as Botrytis or Powdery Mildew.  They need sufficient room between them to assure that their leaves never touch, even with growth.  Air must be able to circulate freely amongst them. 


If you’ve done everything right with watering and temperature and your violet is still producing only small, pale leaves and flower buds either aren’t forming or are dropping before opening, and you have natural gas or propane-fired appliances of any kind, your violet might be trying to tell you that there are gas fumes escaping into the air.  African violets are very sensitive to gas and chemical fumes and may show signs of stress long before a human can detect any of these odors.  If you have a gas range in your kitchen, especially the older types that still have a pilot light, that might not be the ideal location for your African violet.   And if your home has a gas leak, it might not be a good place for you either.