Friday, April 12, 2013

Container Gardening - Environmental Factors

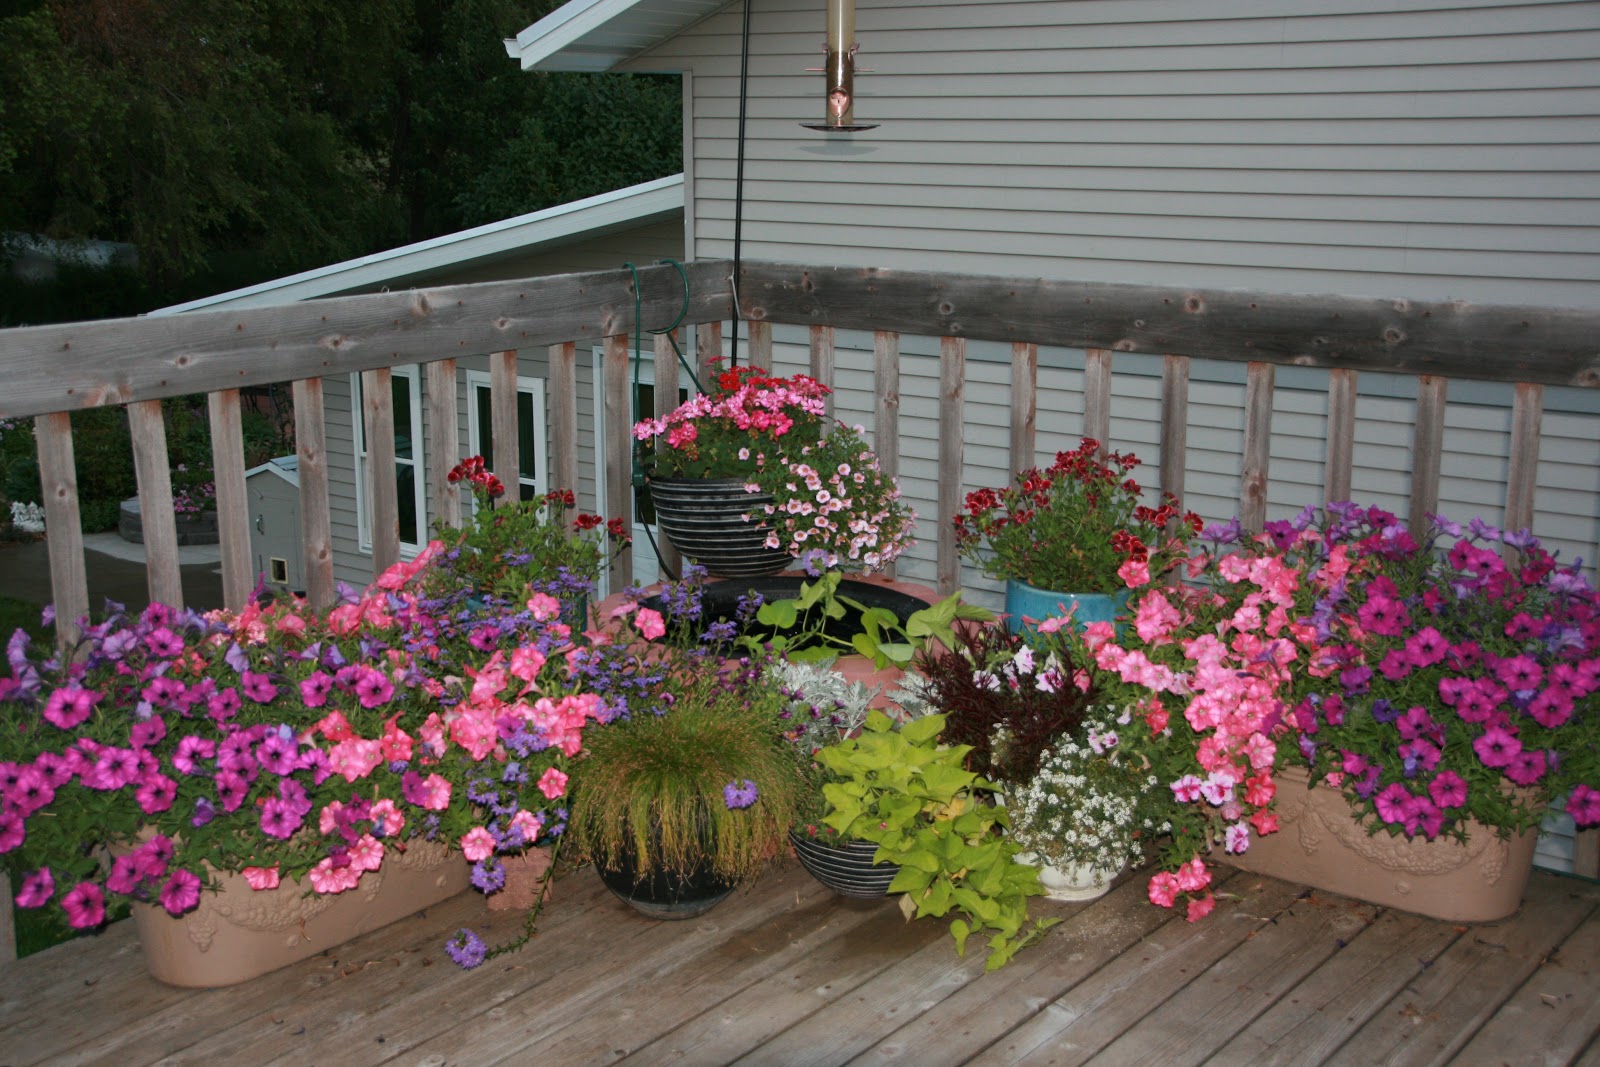
Wiese Acres Container Gardens
One of the things I've learned from speaking with a lot of gardeners from all across the country is that we all face challenges of one kind or another.  I teach a class whose description begins:  "It's often said, if you can garden in North Dakota, you can garden anywhere."  I'll talk about the challenges of gardening in our climate and invariably, someone will say, "But, let me tell you about gardening in (insert name of their home)..." 

There are some universal challenges when doing container gardening, that's for sure.  Light, temperature, and wind need to be paid attention to if you want to successfully container garden.  All three of these need to be considered before you choose the plants for your container garden. 

Proper light for your container gardens may be the easiest to master.  Containers are generally pretty portable, so if your container is in the perfect lighting conditions in the spring, but not quite right for the depths of summer, you can simply adjust the location of your container.  That is the beauty of having larger containers with wheeled bases or that can rest on a dolly.

Temperature may be a bit harder to control, but there are some tricks you can use to make temperature and your plants more compatible.  In climates where frost looms before you are finished enjoying your container gardens, those on dollies or wheeled bases are easily moved inside to a safe location.  Others generally lend themselves well to being covered with a blanket.  If necessary, small, tall dowels can be inserted along the edges of the pot to hold the frost blanket off the plants, protecting them from weight damage and creating a nice, warm coccon for them inside the blanket.

In areas where summers are very hot, using light colored, large sized containers helps keep the soil, and therefore the roots of the plants, cooler.  In large containers, you can spray the inside of the container with a spray foam insulation product to add another layer of protection.  The spray foam insulation is available at most home centers in small aerosol cans that are usually quite reasonably priced.  Be careful to maintain the drainage or, in the case of self-watering containers, the water wicking, ability of the container.

Dark colored containers may be beautiful and fit nicely with your decor, but they are harder on your plants.  When a dark-colored container sets in full summer sun, the soil can become so hot that it actually scorches the roots of the plants.   Ideally, dark colored containers should be used in shadier, cooler locations.  If you need to use one in a full sun location, consider growing a light colored trailing plant such as dichondra or licorice vine that will grow densely enough to shade the container.  If you don't wish to use a trailing plant, herbs and succulents will tolerate much hotter soil conditions and may be an option for the dark planters.

The hotter the temperature and the warmer your soil gets, the more water the container is going to need to keep the soil from drying out.  Containers in full sun may require watering multiple times on a hot, sunny, and windy day.

Wind is a problem not only with drying out, but also can cause plant damage or even blow the container over.  Before the trees grew large enough to provide some windbreak at Wiese Acres, I would get home from work to find empty containers littering the driveway and the dried out soil and plant mass that had been in them somewhere further away.  Trees and larger, heavier containers have solved that issue for me, but the wind damage to the foliage can still be a problem.

Plants, especially those with large leaves, can be damaged by strong winds.  Flowers and buds can become dried out to the point where they drop or fail to open.  Stems can be broken off completely.  The best way to deal with this is to relocate the containers to an area that is protected from the wind, either closer to the buildings, protected by a fence or trees, or moved inside on those days when high winds are predicted.  And, if none of those strategies work, you may just need to give up on growing certain plants.  I love the majestic look of cannas but there is no place in my yard that receives enough sun and is still protected from the wind.  So, I have learned to live without them.  There are lots of other plants to choose from that are more ideally suited to my location.

Our next container gardening blog will be about strategies for choosing the right plants for your containers, but that won't be until Monday, April 15.  This weekend is the huge Dakota Garden Expo and I will be busy with that this evening and all day Saturday.  Sunday I will be recovering but will be ready to blog away again by Monday.  I will be posting the handouts from my session on the blog.


Thursday, April 11, 2013

Container Gardening - Using the Right Soil

Succulent Dish Garden (Wiese Acres photo)
Well prepared garden soil is great - if you are growing plants in a garden.  In a container?  Not so much. 

Soil in containers becomes compacted much more easily than in large garden beds.  Potted soil needs to be well-aerated and well drained, but still hold adequate moisture to support the moisture needs of the containerized plants.  Garden soil just won't do that for you.

Most potting soils are actually soilless mixes of peat moss, finely shredded bark, and vermiculite or perlite.  These work for the majority of plants, however, for succulents, you may want to change to a soil with less or no peat and more perlite or vermiculite.  It might be ok to add a little bit of sand to the potting mix for succulents, but be cautious. Sand adds a fair amount of weight to the mix and could potentially crush the more tender roots of your plants.  Tropicals or bog plants may be happier in a soilless mix that contains more peat moss that will retain moisture more aggressively.


WieseAcres Containers

Fill the pot to within about an inch from the top and moisten the potting mix before planting.  Leaving that inch of head space makes it easier to water without having your soil bubble over the top each time you water.  It also allows for a "collection basin" for the water as it drains through and moistens the soil below the surface.  Moistening the potting mix and allowing it to settle before planting allows you to make sure that one inch of head space stays at one inch.  The drier your planting medium is when you fill the pot, the more it is going to settle when you moisten it, and you may need to add to the top to keep the soil surface from being way down from the top edge of the container.

Potting mix can be expensive and larger containers can take a lot of it. I don't replace my potting soil in my containers every year.  If I had disease problems with any of the plants, I will discard the soil to the garbage dumpster.  If the plants were healthy, I will reuse the potting mix for three to four years.  Generally you need to add some replacement potting mix to the container before planting, so I do that and leave an extra one inch of space to topdress the container with a good, healthy dose of compost.  

When the potting soil seems to be worn out, as evidenced by the collapse of all the perlite or vermiculite balls or compaction of the peat and bark mix  which makes for slower drainage and poorer growth of your plants, I empty the pots into the vegetable garden and till it in with the rest of my organic matter, if the plants that grew in it last year were healthy.  Remember, though, if you had disease problems in your container plants, you'll want to destroy the potting mix to avoid perpetuating those diseases.

Wiese Acres concrete planters
There are some gardeners who tell you it is fine to use garden soil, at least in small amounts, in containers.  I have not had good luck with that, with one exception.  I have some very, very large containers that are built almost like raised beds, using landscape blocks.  Because of the sheer volume of soil in those planters, I have been able to use about 1/4 well ammended garden soil, mixed in with potting mix.  I mix fresh soilless mix into these planters each year to replace what's been lost in the previous year, and add about two inches of compost to the tops before planting.  I can add enough of both the potting mix and compost each year, that I don't have the issue of the mix "wearing out" and needing to be fully replaced.  Most containers don't hold enough volume for this method to work, though.

With what is spent on plants for containers, it only makes sense to invest in good quality potting mix that is made for use in containers.

Tomorrow we'll discuss some environmental factors to consider in successful container gardening.

Wednesday, April 10, 2013

Container Gardening - Choosing the Right Container

Container Plantings at Wiese Acres
I receive a lot of requests for information on container gardening, especially this time of year.  As time and space become more limited for a lot of people, or as aging or other health concerns begin to limit our mobility, having large,in-ground flower beds may not be practical.  If the desire is there, however, most anyone can handle some container gardens. 

Containers also allow you to grow specialty plants that otherwise might not thrive in your climate, like my plumeria and mandarin orange trees.  I can move those containers indoors before first frost and keep them safe and warm until the last frost of the next spring happens and I am able to move them back outdoors.  Container gardens can also supplement colors, textures, and designs when strategically placed amongst the plantings of in-ground beds.  Uses of and places for containers is really limited only by your imagination.

Container Planting at Wiese Acres
Successful container gardening begins with proper container selection.  Anything that holds soil and will drain excess water away is suitable for a container.  Containers can be salvaged from other discarded items, like old cooking pots, or they can be purchased at garden shops for many hundreds of dollars.  The "eye appeal" of your planter is simply that - the plants will not care one way or another what the outside of their home looks like.

While I certainly want my containers to look attractive, I am really more concerned with their functionality.  I want containers that stay where I put them.  I don't want to have to collect them from around the yard after a good, strong wind storm, so I want something heavy enough to stay put but not so heavy that I can't move it if I need to.  One solution is to place large planters on dollies with good sturdy, locking casters under them.  Then I can simply unlock the casters, move the plant to where I need it to be, then re-lock the casters to hold it in place.

For very large containers, you can reduce the weight by packing styrofoam peanuts (not the water soluble kind) or crushed plastic soda bottles in the bottom 1/3 or so of the container, then placing your potting mix on top.  This not only lessens the weight, it decreases the volume of potting soil you need to purchase.  Most plants suitable for containers will do just fine with about 12 inches of potting soil.  It will also, however, allow the planter to dry out more quickly, because you've removed 1/3 of the soil mass.

That is another one of my criteria for a good container - it has to hold enough soil to maintain adequate moisture for my plants without me having to be out there watering it two or three times a day in the heat of summer.  For this same reason, I also favor non-porous materials for most of my outdoor containers.  Porous containers, like clay, peat or coco moss,  lose water more quickly than non-porous (plastic, ceramic,  metal, etc.) containers.  They can be lined with plastic to help them retain water, as long as there are drainage holes in the plastic, but that is an extra step I'm not willing to take unless it's a really special container.

Larger pots will keep the roots cooler, making for healthier plants.  Using light colored pots also helps keep the soil cool.  The darker the color, the more of the sun's heat the container will hold to be absorbed by the soil.  The more heat absorbed by the soil, the more water the plant's roots require to keep the plant alive.

Good drainage is critical for healthy container gardens.  Try to select only planters that have drainage holes or in which you can easily drill drainage holes.  Look also for containers that have either no saucers to catch excess water or saucers that can be easily detached and emptied.  I prefer no saucers  on outdoor containers.  I can't control how much rain Mother Nature might provide and I don't want to have to worry about not getting around to emptying standing water from drainage saucers.  Standing water is not good for the plants - it creates ideal conditions for root rot.  It also isn't good for us humans - it creates ideal conditions for mosquito larvae to develop into blood thirsty little mosquitoes.

If your favored container doesn't have drainage holes, there are some things you can consider to be able to use the container for plantings:  you can drill drainage holes; you can use the container for a water garden; or you can plant bog plants that don't mind having soggy feet.  The one thing you shouldn't do is add a layer of gravel to the bottom of the container and consider that it will now have adequate drainage to use as a regular container.  Instead of the water draining down into the gravel like we've been led to think, it actually pools in the soil on top of the gravel until there is no air space left in the soil.  Then it eventually is forced down into the gravel, where it becomes musty and may harbor fungal or bacterial diseases.

If you have your heart set on a non-draining container and don't want to drill a hole in it, there is one other thing you can do.  Instead of planting directly in the container, you can "double-plant".  This involves placing the soil and the plants in a smaller container that fits inside the decorative one you wish to use.  The inner container needs to be sturdy enough to lift out when watering so it can be allowed to drain before being placed back inside the decorative outer container.  (I would have to really, really love that outer container to deal with all that fuss and bother).

Self-watering container with bottom reservoir - (Wiese Acres photo)
I do like self-watering containers.  These are containers that have some method of drawing water from an enclosed bottom reservoir to help maintain more consistent moisture in the soil.  The reservoirs typically only need to be filled every few days, or at most, daily in very hot, windy weather, making it less labor intensive to have container plantings.  Self-watering containers work especially well for vegetable container plantings as vegetable production tends to rely heavily on consistent moisture supplies.

Once you've selected your container, you're ready for the next critical decision:  what kind of soil? 

More about that tomorrow. 


Tuesday, April 9, 2013

Spring and Cold Weather

Wiese Acres Tulips
Well, I was beginning to get excited about spring after a day with temperatures in the low 50's on Sunday, but yesterday burst my bubble.  By the time I got home from teaching a garden class last night, my entire yard was under a 3 inch blanket of wet, slippery, white stuff again.  Now, in North Dakota, I've learned to never complain about moisture, regardless of the form in which it arrives, but I would like to let Mother Nature know that when it comes to April, I really do prefer rain!  And it is far past the time for below zero wind chills!!

On those first nice days of spring, it's hard to resist getting out into the yard and starting on the spring beautification process .  But, if the soil in the garden is wet, try to resist that urge.  Walking on the water-soaked soil causes compaction of the soil particles, compressing the air and moisture essential to plant life and making the soil hard and unworkable.

I am always anxious to get out and remove all the dead foliage that I've become very tired of looking at over the long winter.  Since I am in an area that often has surprise drops in temperature (like last night's 18 degrees), leaving that old foliage just a little bit longer helps protect the vulnerable crown and new growth of the plants.

Very soon, the garden centers will begin to receive shipments of plants from places like Tennessee and Texas.  These are warm blooded plants and garden center staff hate it when they arrive this early.  It makes a lot of extra work for them trying to save the plants from these cold snaps.  As gardeners, we should pay attention to their concerns. 

Chances are pretty good that if you put vegetable or other annual plants outdoors before the middle to the end of May in North Dakota, or around whatever date is average last frost date for you particular area, you'll end up making another contribution to the garden center a short while down the road.  If you simply can't resist bringing those cute little plants home, keep them in a warm, secure location for awhile or plant them in a location where you can easily cover them with blankets. 

Covering will protect your plants from light frost, but if the temperatures gets to the mid-20's it is hard to cover them well enough to keep them from having at least some frost damage.  A horticulturalist I work with quite often, when asked what should be used to cover plants, says "Think about if you were out in the garden, naked, when the temperatures get down below freezing.  What would you like to be covered with?"  The answer is nice, soft, warm cloth - not plastic.  Plastic can actually draw cold to your plants and damage the tender plant cells.

If there is someone in your household who loves to mow grass, this is a good time to restrain them, too.  Lawn mowing can wait until there is a little bit of new growth.  And it should be done at about the 2 1/2 to 3 inch long level, especially the first couple mowings.  With all the brown, dead stuff that hangs around in the spring, it's tempting to really lower that lawn mower blade and "scalp" the grass.  Doing so opens the crown to weather damage.  It also allows weed seeds that are lurking in the depths of your lawn to see the light of day.  And when weed seeds see the light of day, they want to party.  You'll be so busy trying to get rid of them that you won't have any time for partying yourself.

Aerating and coring should not be done until after the lawn has been mowed a couple times, usually towards the end of May.  I know a lot of lawn care companies tell you it's better to do it earlier rather than later.  That is true to a certain extent, but most grass specialists will tell you it shouldn't be done until the new growth grass is pretty well established and has "toughened" some - usually after the first couple mowings.

Fertilizing grass, in colder climates, also shouldn't be done too early.  The rule of thumb in North Dakota, where average last frost in the spring is mid-May, is to do your spring lawn fertilizing around Memorial Day.  That rule of thumb can equate to about two to three weeks after last frost in other areas.  Fertilizing too early causes a flush of new, tender growth that is often damaged by cold weather, stunting the growth and again, paving the way for grass damage and weed growth.

So, as tempting as it is to get out there and really start digging in the dirt in earnest with the first signs of warm weather, brewing a good cup of coffee and reading a good book instead will pay you great returns in the future.

Monday, April 8, 2013

Damping Off and Chamomile Tea

German Chamomile
I spent part of yesterday afternoon brewing chamomile tea.  I occasionally actually drink the stuff, but what I brewed yesterday will get fed to the seedlings growing on my greenhouse shelves.  My seedlings all look nice and healthy and I want them to stay that way.  There is nothing more discouraging than going out one morning and seeing some of my beautiful little seedlings, collapsed and lying on their death beds. 

Damping off is a fungal disease that strikes seedlings.  They appear perfectly healthy and then all of a sudden, the base of the stem shrivels, and the seedling collapses and dies.  Damping off is especially prevalent if the air around the seedlings is too calm, or if the soil is kept too moist.

Prevention is the only way to save your seedlings - once damping off is evident, it is too late.  Starting with sterile seed starting medium and clean pots is essential.  Placing an oscillating fan in the area where the seeds are kept will help maintain adequate airflow.  One organic prevention is a mixture of one tablespoon of 3% hydrogen peroxide per quart of water, lightly misted on the seedlings every other day.  My favorite, though, is, chamomile tea.

Brew tea using one tea bag (any kind will do), or the equivalent amount of crushed chamomile flowers if you grow your own, to two cups of water.  I usually brew enough at one time to last me about a week.  That is about the longest time I keep the tea around to assure that it doesn't lose its anti-fungal properties and actually start harboring fungus itself.

The initial dosing, I dilute the chamomile tea to about half strength and water my seedlings with that mixture.  After that, I use the full strength chamomile in a spray bottle and mist the seedlings every other day or so. 

Chamomile tea isn't 100% effective against damping off, but it definitely helps keep it at bay but it is probably as effective as chemical fungicides, and a whole lot safer and cheaper. 

Sunday, April 7, 2013

Propagating Echeveria

Rose echeveria
Yesterday as I was watering plants in the 4-Season room, I heard a "plop" and looked over to see my rose echeveria lying on the floor.  It had gotten so top-heavy that it had crashed through the wooden dowels I used to support it, and broke the stem off close to the soil line.  It truly was a magnificent echeveria that graced the patio with beautiful pink flowers most of the winter.  After a long moment of sadness,  I decided to make the best of it.  I will start myself a whole bunch of new rose echevarias.

I grabbed hold of each of the leaves that weren't damaged in the fall and twisted them away from the stem, leaving a small piece of the stem attached to each leaf.  These were set aside to dry and form a "callous" over the raw edge.  That process will take anywhere from a couple days to a couple weeks, so I'll check my cuttings daily.  When the raw edges are calloused over, I'll dip them in some rooting powder and lay them on top of dry cactus mix soil.  The rooting powder may not actually encourage root development, but it does have anti-bacterial properties which help keep the cutting healthy.  Then I'll place my pot of cuttings in a location with moderate temperature and normal light conditions.  Drying out seems to encourage rooting in these succulents, so even though it seems counter-intuitive to everything I know about plants, I won't water the soil until the roots are well-developed in my new starts. 

Within a couple months, I should see tiny pink roots beginning to form on top of the soil.  Some of these roots are smart and find their way down into the soil themselves.  Others need some gentle encouragement to dig into the soil.  Eventually, new rosettes will form and can be transplanted into their new home. 
I'll also lay the stem pieces on top of some dry potting soil and wait for tiny new rosettes to begin forming where the leaves had been attached.  When these rosettes have four to six leaves, I'll use a sharp knife to cut the rosettes free of the old stem and plant them in their own pots.

The head of my echeveria is still nicely shaped and looks perfectly healthy.  I'll trim all but  about 2 to 3 inches of bare stem at the bottom of the rosette, allow the cut edge to callous over, dip the end in rooting powder, set the stem end of my echeveria "head" on dry potting soil and wait for new roots to form.

Evheveria tend to lose their bottom leaves as they grow. "Decapitating" it and planting the head will renew the plant, even if it hasn't crash landed on the floor.

Certainly not every leaf or stem cutting will produce roots and become a viable new echeveria.  I am confident, though, that I will have at least enough plants to add some nice rose color to my succulent dishes this summer.


Saturday, April 6, 2013

Spring Cleaning

Wiese Acres Tulips

In addition to trimming the ornamental grasses back to make way for their new growth, the rest of the gardens need to be cleared of dead foliage and winter mulch soon.

It's important to remove any straw, leaf or other mulch that covered plants to protect them for the winter, before the spring dampness causes mold to start growing and before the plant begins its active spring growth cycle.   If mulch is left too long, growth starts, but is very anemic and susceptible to sun and wind damage from being left in the dark too long.  When you remove the mulch, that tender new growth is damaged and may die back.  That doesn't always kill the plant, but it does set it back.  And after a long, cold, dreary winter, I sure don't want to wait even longer to see my beauties begin to perform their summer rituals again.

If the straw mulch that I used for winter cover is still in good condition,  I rake it off to the side to use for mulching the walkways in the vegetable garden,  or around the raspberries and blackberries, to suppress weed growth over the summer.

I really like years when the snow melts early enough before new growth starts that I can get into the perennial beds with my push type lawn mower.  I make sure the blades are good and sharp and set to about 2 inches high.  I remove the tougher, larger stalks like daylily scapes and other lily stalks.  Then, I take the mower and run across all the remaining dead foliage several times, until it is chopped fine.  It makes a nice, compostable mulch and saves a tremendous amount of work.

If I can't get in with the mower, I knock down as much of the dead foliage as I can with a rake, use a sharp trimmer to cut the rest, rake it into piles, and carry it off to the compost bin.    You can see that it is a lot more work this way, so I always hope for the mud to dry before new growth begins.

I also trim back spirea shrubs to the ground each spring.  This keeps their growth habit nice and compact, and makes for a cleaner, neater looking shrub that can really show off its beautiful leaves and flowers.  Potentilla also get cut back to the ground every couple years to keep them from getting too lanky and other summer or fall blooming shrubs get whatever pruning they need.  Spring-blooming shrubs, such as forsythia or lilacs, should only be trimmed immediately after they finish flowering.  These shrubs begin to set the buds for the next year's blossoms over the summer.  Trimming them too late in the summer or in the spring will prune away next year's show.

While spring cleaning isn't my favorite job in the garden, I love it when it is all done and things are neat, clean, and ready to burst into a brilliant field of greens and other beautiful colors.

Friday, April 5, 2013

Birdhouse Gourds

Birdhouse Gourd
I like to grow a few things in my vegetable garden just for fun and ornamental gourds are always a hit.    I have a large basket full of "birdhouse gourds" that are ready to be made into bird houses. 

Birdhouse gourds are also known as bottle gourds because they are shaped like a bottle.  I think they could also be called snowman gourds - sure, they only have two sections, but they have potential in the snowman realm.  They are easy to grow and fun to watch as they develop and mature on the vine.  The only downside of growing bottle gourds is their need for a long growing season, which North Dakota usually doesn't offer. 

I start the gourd seeds indoors in peat pots the first part of April and then transplant them, pot and all, when danger of frost has passed.  Growing them in peat pots that can be planted as is lessens the transplant shock and provides a better success rate.  I protect them the first week or so after transplanting by placing a plastic one gallon plant pot, that I've cut the bottom from, over the plant.  (These make great plant protectors and re-using them keeps me from feeling so guilty about all that wasted plastic).

Then just allow them to grow until the first frost of Autumn threatens.  They need consistent moisture and full sun to do their best and lots of room to spread.  Their growth habit is similar to winter squash or pumpkins.  As the gourds are forming, it's a good idea to set them upright to help them keep a nice shape.  You can also grow the vines on trellises where the gourds can hang free. 

Leave several inches of stem on the gourd when picking.  The gourds need to be thoroughly dried.  This can be done outdoors in the sun, if you live in a warm, dry climate.  Here, I dry them by spreading them on the wire greenhouse shelves.  You can lay the gourds on several layers of newspaper in a warm, dry location, or tie a piece of twine around the stem and hang them to dry.  The outside of the gourds will turn dark and mildew will form on them, but this does not affect the quality of the gourd.  If soft or rotting spots develop on the gourd, remove them from the rest of the gourds and throw away.  Every few days, it's a good idea to check the gourds for spoilage and turn them to help them dry more evenly.  The drying process can take several months.  You will know the gourd is dry when you can hear the seeds rattling inside it as you shake it.

Once they are dry, you are ready to prepare them for use as a birdhouse.  Mix a 10% bleach solution (1 part bleach to 10 parts water) and wipe the mildew off the outside of the gourd.   I use a very fine sandpaper to remove any loose skin particles or remaining mildew spots.  

Use a drill bit or small circular saw to drill an entrance hole in the widest part of the gourd.  The size hole depends on the type of birds you wish to invite into your gourd house.  Shake the dried seeds and any other debris out of the inside of the gourd.  You may need to take a table knife or other slim, dull implement to scrape any excess that doesn't shake loose from the sides of the gourd. 

Drill a one-quarter inch or smaller hole through the top portion of the gourd, being sure to stay low enough to maintain the strength of the gourd's head, but not so low that a bird could get tangled in the wire when they are inside the house.  Drill a couple small drainage holes through the bottom of the gourd.  If you wish, you can drill a small hole just below the entrance hole and glue a twig or small dowel in place as a perch.

Spray paint the entire outside of the gourd with a water-proof exterior paint.  Light colors are best, as the birdhouse will stay cooler inside than if they are painted with dark colors.   You can also use a clear, marine varnish if you prefer a more natural look.

After the paint is completely dried, insert a picture hanging wire or other sturdy wire through the small holes you drilled near the top of the gourd, and create a loop for hanging.  Twist or tie the wire to secure it, then find a place to hang the new birdhouse.

Gourd birdhouses are not as durable as wooden or plastic birdhouses, so they should be hung in a protected area.  They also should be placed where you can watch the birds as they make their homes and raise their family in their new house. 

And, one of these years, I'm going to paint one white, with a corncob pipe and a button nose and two eyes made out of coal....

Thursday, April 4, 2013

Ornamental Grass Care


Wiese Acres Miscanthus purpurascens
I love ornamental grasses - they sway gracefully in the summer breezes, provide structure in the garden, and offer landscape interest no matter what the North Dakota winter brings. 

I leave the dead foliage on the perennial gardens, except for iris and peonies, because the foliage protects the crown from the freeze and thaw cycles of a North Dakota winter.  It catches snow to provide a warm blanket for the plants through the winter and moisture in the spring.   Iris and peony foliage gets taken off after a killing frost, bagged and destroyed because of their propensity to harbor bacterial and fungal diseases. 

Most of the dead foliage looks... well... dead.  The ornamental grasses, on the other hand, work as hard to provide a lovely backdrop in the winter garden as they do in the summer.  The pheasants and the wild turkeys, as well as a few blue jays, love the seeds that hang on through much of the winter, too.  Now it's time to say good-bye to last year's grasses and make way for the new spring growth. 

The best time to cut back the old foliage is early spring before any new growth begins, so as soon as the mud dries a bit, I'll be out there with my hedge trimmer.  A good, sharp scissors also works, but some of the clumps become quite large after a few years.  I've learned to wear a good heavy pair of garden gloves when I work with the grasses.  The edges of the blades of grass are quite sharp and feel a lot like a paper cut if you happen to catch the edge just right. 

Wiese Acres Calamagrostis "Karl Foerrester"
I tape the clumps together with a few strips of compostable paper masking tape, about one-third of the way from the top of the blades and then again about two-thirds of the way from the top.  That way, the blades aren't flopping onto my head while I'm down at the base with my hedge shears and I can take the clumps away to the compost bin without losing half of them along the way. 

Trim the grass to about two inches from the ground.  If you aren't able to get to the trimming before the new growth starts, you can trim a little higher to protect the tips of the new growth, if necessary.  The new foliage will grow in thick enough to cover a few inches of old stem.

Carry the old foliage to the compost pile or the garbage can and you're ready to enjoy another season of beautiful grasses.

Wednesday, April 3, 2013

Vegetable Seed Viability


Wiese Acres Vegetable Garden
 As the water is pooling in the gardens from the melting snow, it's time to start getting ready for seeding season.  I ordered my new vegetable seeds a long time ago, but over the years I have learned that even though there is enough swiss chard or leaf lettuce seed in each packet to cover the entire county, it is not a good idea to plant it all at once.  So, there is always some seed left over for the next year.  There is nothing more disappointing, though, than to take the time and energy to plant seeds, eagerly wait for germination to occur, only to see nothing but black soil day after day after day.

To avoid that, it's always a good idea to keep track of exactly how old your seeds have become.  There are general rules of thumb for how long various seed types will remain viable, if stored in proper conditions.

Lettuce seeds are tough little things and remain viable for up to six years.  Seeds for cole crops, such as cabbage, cauliflower, broccoli, and kohlrabi will remain viable for up to five years.  Other five year keepers are celery, cucumber, eggplant, kale, muskmelon, radishes, rutabagas, spinach, squash, turnips and watermelon.  Oh - and the infamous swiss chard.  Beets, brussel sprouts, peppers, pumpkins and tomatoes last up to four years and beans, carrots and peas can remain viable up to three years.  Okra can last up to two years, but corn, onions, leeks, and parsnips are best replaced with new seed every year. 

Dill, basil and cilantro are long-lasting seeds, with viability up to five years after collection.  Parsley can last for up to three years, but most other herbs should be purchased or saved new every year or at least every other year.

All seed viability depends on them being stored properly in a cool, dry location.  If you collect your own seeds, they should be dried well before storage and then stored in a dark, dry envelope or container.

If seed is a left-over from previous years, or if you save your own seed, it's a good idea to do a germination test before planting.  You can do this with all seed, but it usually isn't necessary with newly purchased seed since the companies test germination of batches before packaging.  To do your own germination test of small seeds, moisten a paper towel, fold it in half, then place a few seeds on one half of the half.  Carefully fold the other half over the top of the seeds.  Seal the paper towel and seeds in a plastic bag and place it in the conditions recommended for germination for that particular seed type, for the length of time it generally takes for germination to begin.  For example, if the seed requires warm, dry conditions for 7 to 10 days to germinate, place the plastic bag inside a darkening paper bag and place the entire package near a heat source.  After seven days, carefully unfold the paper towel and check for germination.  If the majority have germinated, you're probably ready to plant them in your garden.  If germination is poor, wrap them up and give them the additional three days or so that it might take them to germinate.  After that time, the germination is probably as good as it's going to get.

I always try to test germinate a quantity of seeds that is divisible by 10.  That makes  it easier for me to determine a percentage of germination.  If I test 10 seeds and one germinates, I have a 10% germination rate.  My rule of thumb is that if the germination rate is 75% or more (for most seeds), I'm good to go.  If the germination rate is 45 to 75%, I'll still plant but will seed more heavily to make up for poorer germination.  If the test germination rate is less than 45 to 50%, I will just throw the seeds and buy new.  I don't believe in doing useless work.  :)

For large seeds like peas, beans, and corn, you can test for viability by immersing them in a bowl of room temperature water.  If they float, it's because they do not contain the weight of an embryo and are sterile.  If they stay on the bottom submerged in water, they are likely viable.

Armed with viable seeds, I'll be ready to get those vegetables growing - as soon as the snow is gone!


Tuesday, April 2, 2013

Blue Daylilies and April Fools' Day

 
Wiese Acres "Rhapsody" clematis, mature blossoms
I hope all survived April Fool's day.  One of the mail order nursery sites I like to frequent posted a photo of a new introduction "true blue" daylily called "Blue Delusion".  Now, every dedicated daylily enthusiast out there covets a truly blue daylily and thousands of combinations have been hybridized in an attempt to get there, with minimal success.  So "Blue Delusion" caused quite a stir on their website.  I was suspicious when I saw that one of the "parent" plants was Nikko blue hydrangea.  Now, I'm not a hybridizer so I don't know for sure if it is possible to cross pollinate a daylily and a hydrangea, but I am relatively certain that if you could, the end result would not look like a perfectly formed, sky blue daylily flower.  I was quite tickled when they posted a bit later that it was April Fool's but in honor of the day, they were offering 10% off the total cost of any order today.  But, no, they wouldn't be shipping any "Blue Delusion", so I guess I won't get a blue daylily this year, either.

True blue flowers are a little hard to find.  Most have purple tones rather than true blue and are quite lovely, but not that true sky blue which many of us wish to grow.  Often, when I speak to groups about blue flowers, one of the first they will mention is the large leaf hydrangeas that we often see in the garden centers, covered with large balls of a brilliant blue (Endless Summer comes to mind here in the north country).  We take them home and plant them in our gardens and are very disappointed when the new flowers are pink or at the very least a blah, muddy looking blue-gray.  Hydrangeas require acidic soil - a pH of 5.0 to 5.5.  In much of North Dakota, the soil is highly alkaline, with a pH ranging anywhere from 7.5 to 8.5. It is almost impossible to add enough soil acidifier to get the true, brilliant blue hydrangea blooms in our gardens. 

Wiese Acres Blue Delphinium
So, if hydrangeas aren't our best bet for blue flowers, what should we plant?  Delphiniums offer some of the truest blue flowers in the garden.  They send up tall, striking spires covered with true blue petals.  They can grow to six feet tall, so they need to be staked to stay upright, especially in windy locations.  They are hardy in zones 3 to 7, so they prefer cold temperatures to very warm temps and while they like lots of bright sun, they will also tolerate light shade.

Brunnera "Jack Frost"
For a shadier, moister location, brunnera is a good choice.  Brunerra offers light blue flowers in early spring.  The heart shaped leaves are attractive all year long, and a variegated leaved variety, "Jack Frost", provides a lovely, light effect in the darker shade gardens.  It grows in a nice compact form, approximately 18 to 24 inches tall and across.  Brunnera are also hardy in zones 3 to 7.


Blue star (amsonia) and columbines are a great texture combination and both have varieties that bloom in a clear, true blue.  Amsonia has blade like foliage that is a lovely, bright green in spring and summer and turns a striking shade of Autumn yellow by mid-September.  The clusters of blue flowers appear in spring.  Amsonia is tough, deer and rabbit resistant, and doesn't mind heat or drought.  It can't get much better than that in North Dakota.  It is hardy in zones 3 to 9, so can be grown just about anywhere.  It's a well-behaved perennial, staying mostly where you plant it, in a clump about 2 feet tall and wide. 

Columbines, or aquilegia, are another easy to grow,  short-lived perennial that blooms in spring and comes in virtually all colors.  There are varieties that bloom in striking blue or blue and white combinations.  They prefer well-drained soil in part shade from zones 3 to 9.  They like to be kept evenly moist, but not soggy.  They have cute little shamrock shaped leaves so add a nice textural element to the garden.  One downside of columbines is their tendency to provide a home for leaf miners.  The leaf miners don't hurt the plant but they leave white "doodles" throughout the leaves, which is sometimes seen as unsightly.

Some varieties of salvia and morning glories also bloom in a true blue, but many of the other plants that tout "blue" flowers, such as perennial geraniums, campanula and platycodon (Balloon flowers) have a definite violet hue. 

I have found one "blue" clematis, that is a true blue when the blossom first opens, but as the blossom ages, the blue becomes more of a violet.  Regardless of the fact that it loses some of its attractiveness with age, Clematis "Rhapsody" is still a must in my garden.

So, if we want the cool, refreshing hues of blue in our gardens, we do have these and many more options.  But, as of yet, we don't have a true blue daylily.


Monday, April 1, 2013

Building Another Memorial Garden

Wiese Acres Nostalgia Garden
Easter was a wonderful day for us.  We spent the day with family and after a wonderful brunch, used the  afternoon to work on the design of a memorial garden to be built at the nursing home where my mother spent the last two years of her life.  That home has many residents who lived their lives working the soil; raising grains, food, and beautiful flowers.  The care center garden became our vision when we were discussing distribution of Mom's memorial money.  After designating some dollars for a start to the garden, we met with the care center's Foundation Board of Directors to present our vision.  They quickly embraced it and began the process of raising money to complete the project. 

Members of our family have been involved in the process from the beginning, with my sister and brother-in-law who live close by the care center taking the lead with the care center's management and Board.  My nephew, who is a professional landscaper, and I have been refining the original space designs and deciding on plant materials to recommend.  Others have been involved in making final decisions and in providing the funding needed for our family's part of the garden

As a family, we have decided to take full responsibility for financing, designing and building a small portion of the garden, to showcase a water feature using a native granite rock.  It will be located in a private, shady area where residents and families can sit to visit, with the sound of moving water to soothe them.    This area is in an alcove that will also be visible to the residents from two of the dining rooms of the care center, so even those who aren't able to be outside will be able to enjoy the view.   There will be old-fashioned bleeding hearts planted there, since that was one of the plants that Mom really loved to see blooming in her garden.  One of my fondest memories is of watching the huge "harvest moon" rising above the massive cottonwood and box elder trees on the farm while standing outside with Dad after a long day of harvesting wheat or oats, so the hosta "August Moon" will be incorporated into the planting design of that area.  We will honor Mom and Dad with a plaque built into that garden area's design.

In addition, there will be a gazebo that can be used for outdoor meals and other activities with residents and families.  Raised beds will be built on wheels to allow them to be moved to the best sun locations at different times of the growing season and the care center's activities department plans to use those to plant lettuce, radishes, and other suitable vegetables that residents can assist with from planting through harvesting.  There will be two theme gardens, one designed around men's interests, where we are hoping to find a small, antique plow to use as a centerpiece.  The other will be designed around women's interests and will incorporate items that were used by the women in their various activities in their homes and on the farms.  

We will use low maintenance shrubs such as spirea and ninebark.  Perennial plantings will also be low-maintenance plants, that will be familiar to most of the gardeners who see them.  We plan to incorporate ornamental grasses in areas to give the feeling of the flowing prairies that are such a part of our North Dakota heritage.  All the gardens will be visible and accessible to wheelchair bound residents.

Our little vision has grown into a community project that will benefit the folks who live at the care center and the family members who come to visit them.   Construction is slated to begin in June, and we are so excited to see that happen. 

Saturday, March 30, 2013

Easter Lilies


Easter lilies (Lilium longifolium) are unarguably, the most popular plant this time of year.  The home stores, grocery stores, and even gas stations have had racks of lilies in various stages of bloom for the past few weeks. 

Getting the most enjoyment out of an Easter lily begins with the selection process.  It's tempting to choose one whose bright white, trumpet like flowers are open in their full glory.  If your lily is for "right now" enjoyment, that is a good way to go.  If you are looking for a longer term commitment from your lily, choose one that has buds in various stages of development, from tight bud to partially open flower.  Look for a plant with dark green leaves the entire length of the stem and and a plant that is about twice as tall as the pot in which it is planted.  A lily planted in a pot too small is likely to be stressed, even if the foliage and flowers are not yet showing signs of it.  Inspect the leaves and stems carefully for eggs, webbing, bugs, or chewed leaves, all signs of insect infestation.  Look also for signs of disease, such as dark spots, crinkling or wilting of the leaves.  Leaves that are beginning to yellow are often signs of stress from being kept in too cool or too dark storage for too long and may affect the long term health of your plant, including keeping buds that are partially formed from completing their life cycle.

Once your Easter lily is home, place it in a spot with bright, indirect light and free from drafts.  If you can keep temperatures around 60 to 65 degrees, the blossoms will last longer.  Another way to extend the life of each bloom is to remove the anthers with the yellow pollen on the ends as soon as the flower opens.  Removing them will also keep the pollen from dropping on your furniture or getting on your clothes and causing staining.  And I can tell you from first hand experience that lily pollen is one of the best permanent clothing dyes you can find - especially if you don't want it on your clothes or table clothes.  :) 

Water the lily when it becomes dry to touch and don't ever allow it to get overly dry.  If the pot is in a decorative foil cover, make sure water does not stand in the foil.  Either remove the foil completely, punch holes in the bottom of the foil to allow drainage, or remove the foil and empty the water from it after each watering.

Remove all flowers as they wither to keep your plant healthy and looking nice.  This will also help extend the life of the other blooms as the plant won't be trying to put energy into seed pod development on the spent stems.

Easter lilies grow from bulbs and they can be saved and re-bloomed from year to year.  They are hardy outdoors to zone 4, so even as far north as North Dakota, they can be planted in the garden just like other lilies.  Their natural bloom time is June to July, so you'll never have an "Easter" lily grown that way, but you will have a beautiful, snow white lily growing amongst your other lilies.

All parts of the Easter lily are toxic to animals, especially cats.  Ingesting of any part of the plant can cause kidney failure and death.  Most animals are savvy enough to know not to eat things that will kill them, but if your Fido or Garfield find green stuff irresistible, you may want to reconsider bringing an Easter lily home, or at least keep it in a room where your pets can't get to it.

In honor of Easter (and because I will be busy with sunrise services at church and Easter brunch), there won't be a new blog posting tomorrow.  Happy Easter to all of you!

Friday, March 29, 2013

More on Theme Gardens - Zoos, Dr. Suess and World Travels

Wiese Acres "Christmas Carol" daylily
There are a few more theme gardens at Wiese Acres, but I will introduce you to them over time, as they begin to produce all their glory for this growing season.  The snow is beginning to melt - slowly but it's melting - so I am hopeful that we will actually have a growing season this year...

Today, I want to mention some ideas for theme gardens that we don't have at Wiese Acres.  Yesterday we talked about the children's themed garden at Wiese Acres, that was designed around children using it, small statuary of children in various forms of play, and plants with a children's theme.  There are many other ways to create a children's theme in the garden. 

 
Tiger lilies and phlox - Wiese Acres gardens

A zoo garden, incorporating statuary of animals and plants, such as Elephant's ear (colocasia), Hens and Chicks,  Lamb's ears, Monkey flower (mimulus), Tiger lilies, Kangaroo's Paw, Turtle Head (chelone), Ostrich fern - the list goes on and on.  You can find a nice selection of hardy and warm zone perennials and annuals that will fit
the zoo animal theme. 

Another idea for a children's garden might be a Dr. Suess garden, incorporating some of the most beloved characters from Dr. Suess's many books.  There are a number of weeping and contorted trees and shrubs which can set the tone.  Contorted hazelnuts, twisted  and pruned Dwarf Alberta Spruce, and weeping cherry, or in colder zones weeping carragana, will make you smile.  Green and red zinnias can reflect green eggs and ham,  large football type mums or the seedheads of clematis can give you that shaggy hair look so often associated with Dr. Suess characters, and catnip can remind you of the Cat in the Hat.  Creeping rosemary can look almost like spiky fingers crawling across the surface of your garden.  A ground cover juniper can be trimmed to resemble a snuffleupagus.  Add to those plants a little bit of Dr. Suess whimsy in the forms of garden statuary and you can create a garden that is fun for children and adults alike.

Wiese Acres "Thunder Patch" daylily
On a more grown-up track, a traveling daylily garden might be a good fit for other daylily addicts like me.  A friend of mine created this garden using daylilies named after locations she's visited on her travels around the world.  She built a replica steamer trunk out of cedar, in which she plants annuals that are allowed to spill out of the trunks like swaths of fabric and then adds strands of "pearls" and other jewels that she purchases in bulk at craft stores.  This is surrounded by daylilies aptly named City of New Orleans, Irish Veil, Mandalay Bay, Hollywood Lights, Mauna Loa, Broadway Phantom, and many others.  It is a great way for her to commemorate her travels and share them with anyone who visits her lovely garden.

The possibilities for theme gardens are endless.  Simply think of what you like and then let your imagination soar!

Thursday, March 28, 2013

Theme Garden Design - Children and Butterflies Garden

Wiese Acres Children and Butterflies Garden
Butterfly gardens are fairly common.  Who doesn't love the sight of butterflies flitting through the air, stopping for a sip of nectar at every petal?  To me, they seem so carefree, which  made it a natural to combine the butterfly theme with a children's theme.

A successful butterfly garden requires two commitments from the gardener:  the right plants to attract the butterflies and restraint in the use of chemical pesticides.

As nasty as those grasshoppers, flea beetles, or spider mites become, spraying pesticides to rid yourself of them will also kill all your butterflies and other beneficial insects.  A butterfly gardener has to be willing to put up with some imperfections - ragged leaves, stripped stems, pock-marked petals.  In exchange, you'll be rewarded with many beautiful butterflies.

The Wiese Acres Children and Butterflies Garden is made to meander through.  There are lots of pathways and seating areas for children and adults.  There are a few statues of children playing and some child-sized gardening tools left lying about.  Under the large cottonwood tree, two children run a sack race, mother and baby rest on a park bench beside gramma and grampa, while dad gives a piggy-back ride to another youngster.  I keep a large shallow bowl filled with play sand covered with water and a few small rocks for butterfly resting places setting in amongst the flowers for the butterflies to stop and sip water from.  Otherwise, most of the decor in this garden comes from the flowers and the butterflies themselves.

Choosing the right plants is the key to  draw butterflies.  Virtually any flower that provides fragrance and nectar for them to drink will bring butterflies to your garden, but there are some plants that are more attractive to our winged friends than others.  Asters, Monarda (bee balm), Rudbeckia (black-eyed susan), Gaillardia (blanket flower), Hemorocallis (daylilies), Eupatorium (Joe-Pye weed), Lavender, Phlox, Echinacea (coneflower), Salvia, and Coreopsis all attract several different species of butterflies to Wiese Acres.

Sweet William (Dianthus barbatus) is a beloved flower for all butterflies.  One time I looked out the window and saw my Sweet William swaying to and fro like it was in a gale force wind.  Since everything else was still, I had to go investigate.  The plant was actually standing still like all the others around it, but the blossoms of the Sweet William plant were so covered with butterflies that when they flitted around, it looked like the entire plant was moving.


Asclepias, or butterfly weed, is aptly names.  It is the host plant for monarch butterfly caterpillars.  I have several of these planted throughout the garden.  The caterpillars generally strip the plant bare of everything but its stems by early August.  The plants don't look very attractive at that time, but I console myself with knowing what will happen in just a few short weeks.  When the monarch butterlifes begin to hatch, they fill the yard with color.  When they first emerge, they are a little slow moving and voraciously hungry, so you can get very close to them without scaring them off.  I can spend hours watching them flit around, drinking deeply.  They especially seem to love Joe-Pye weed for one of their first meals. 

The children's theme of the garden is carried through in plants such as "Children's Festival"  and "All God's Children" daylilies and fun flowers, such as "Mexican Hat" (ratibida) and snapdragons.  I believe the key to a successful children's themed garden, though, is to make it kid friendly.  There are plenty of trees for children to play around, pathways to walk on, and durable plants that won't complain too much if little feet stray off the path. 

Wednesday, March 27, 2013

Theme Garden Design - Nostalgia Garden

Wiese Acres Nostalgia Garden
The older I get, the more nostalgic I become.  A stroll through the Nostalgia Garden brings memories of many happy times and has at least one thing to remind me of something I didn't like so much - just in case I ever become so nostalgic that I think I might like to relive that part of my early years.

Wiese Acres Nostalgia Garden


A nostalgia garden should be filled with things that evoke memories of simpler, happy times in life.  Most of the things in the Wiese Acres Nostalgia Garden are remnants of our childhoods.  There is the cast iron pumpjack like I used to wrestle with at the windmill, the galvanized tub that served as my husband's bath tub until they moved to a house that had a fully equipped bathroom, and the log bench formed from the remains of the ancient, massive cottonwood tree my brothers and I played around as children.  An old cream can stands sentinel in the garden and reminds me of trips to town to the Arrow Creamery, where there was always sure to be a dish of ice cream out front for me after the week's cream production was delivered to the back.


Wiese Acres Nostalgia Garden

Most of the memorabilia in the Wiese Acres Nostalgia Garden are readily identifiable to anyone who sees them and for many, it evokes similar memories.  The meaning of other things, such as the stepping stone path, are known only to a few, giving it a special touch for those who recognize it.  (My mother was the ultimate "make do" person and created much beauty from whatever was available to her.  Thus, the pathway through the Nostalgia Garden is a "make-do" pathway, created from an assortment of other projects' leftovers.)

The trees and plants are also reminders of simple, happy times.  The Golden Willow tree is surrounded by lilies of the valley, reminding me of visits to an elderly friend's garden as a child.  In the spring, when those lilies are blooming, I can close my eyes, take a deep breath of their wonderful fragrance and almost hear Mom and Mrs. Hannan visiting about the gardens and what their plans for the day would be.  The quaking aspens offer their rustling sound in the slightest breeze, reminding me of times spent camping with my sister and her family in the Colorado mountains. 

You'll find descendants of iris and peonies that were brought to North Dakota from Missouri by my grandmother in the early 1900's.  There are daylilies divided from Mom's garden and a duplicate of the Hansa rose she grew just outside the dining room window of the old farmhouse.  You'll see an occasional wood violet tucked in among the other plants, a reminder of Dad's love of walking along the river on the farm and enjoying their perky little violet colored flowers.

North Dakota native sunflowers and native tall grasses form a "wall" across the north side of the garden, creating a cozy "room" for the seating area.   Those sunflowers and grasses waving in the breeze serve to remind me of the pastures and hayfields where I spent many wonderful hours playing and working as a kid.

And the reminder of the things I didn't like so much?  A poultry waterer and feeding trough - just to remind me how much I disliked the chores of caring for chickens.

There are no right or wrong things to incorporate into a nostalgia garden.  Whatever creates a sense of happy nostalgia for the gardener is the right thing for that garden.  Of course, with plant materials, you need to be mindful of their light, water, and soil needs, but otherwise, the sky's the limit.

Tuesday, March 26, 2013

Theme Garden Design - Sun, Moon and Stars Garden


Wiese Acres Sun, Moon and Stars Garden

We have the Music garden in honor of our daughter.  That was easy.  It’s a little more challenging to build a garden theme around our son’s chosen profession.  There just aren’t a lot of plants or garden décor developed around anthropology.  Thankfully, he has a passion for a hobby that does lend itself to a garden theme.  Since he was just a couple years old and Grandpa took him outside to look at the sky one late summer evening, he’s been enthralled with stars, planets, galaxies, and moons.  So, the Wiese Acres Sun, Moon and Stars Garden is in his honor.

 The central feature of The Sun, Moon and Stars Garden is the fire pit where we enjoy roasting hot dogs and savoring the gooey, sticky mess of S’Mores on quiet summer evenings.  It’s where we all have front row seats to watch fireworks on the 4th of July.   And, my son and I make it an annual event to stay out late, drinking hot chocolate or tea and watching the Perseid meteor shower one night in mid-August.

The perimeter of the garden is lit with solar lanterns, and glow-in –the-dark miniature moons held on stakes pop up in various locations within the planted area.  Star-shaped solar lights are strung in the small maple tree that anchors one corner of the garden.  A cast iron sundial keeps track of time and a Mr. Sun plaque spins lazily in one corner.  Gazing balls under the maple tree form a replica of our solar system.
 
Wiese Acres Sun, Moon and Stars Garden
When you step off the cedar bridge which marks the entrance to the garden, you are greeted by the bright yellow springtime blossoms of “Northern Sun” forsythia.   Just off to the right, the beautiful “Sunrise Sunset” and “Harvest Moon” roses bloom their hearts out much of the summer.  “Center Glow” ninebark  shrubs form the back border of the garden and “Rosy Rocket” barberry are planted in the front.  In the hotter, drier area of the garden, “Moonlight Serenade” sedum does well, next to “Ice Star” daisies and “Baby Sun” coreopsis.    “Siloam Sunburst” and “Spacecoast Freaky Tiki” daylilies complete the arrangement.

 
Choices of plants with sun, moon or star names are nearly unlimited.  The Wiese Acres Sun, Moon and Stars Garden is a xeriscape garden in full sun,  so my plant choices are from a selection of drought resistant, heat tolerant plants. 
 
A sun, moon and stars garden could be adequately furnished with shade plants, such as pulmonaria “Mrs. Moon”, "Sunset" fern, and hosta “Blue Moon”.  For gardeners who prefer annuals, there are choices such as moonflower, sunflower and star flower.

Likewise, garden décor fitting this theme is relatively easy to find or to create by using your imagination, such as creating a solar system with gazing balls.

I’m looking forward to evenings spent by the firepit, either enjoying the fire or just lying back in the lounge chair and watching the moon and stars drift through the sky.
 
                                          Ice Star daisies