Tuesday, June 11, 2013

Vacation

Wiese Acres Lilac hedge
The Wiese Acres blog is going to be taking a little bit of a vacation from writing.  With gardening in full swing after nearly 9 inches of rain, weeds running rampant, a garden bridal shower to prepare for on Saturday and a wedding to complete preparations for before July 5, time has become a precious commodity.  I will resume writing twice weekly sometime shortly after July 5.  Between now and then, I may post brief updates as I can.

This has been a strange year and my flowers remain about three to four weeks behind their normal bloom schedule.  The lilacs are in full bloom yet, at nearly mid-June.  This is their most glorious year yet.  The colors were vibrant, the flowers, large, the leaves healthy, and the fragrance was heavenly.  I'll be sad to see the season end for them.

My daughter wanted to use peonies in some of the wedding flowers, since that was one of her grandmother's favorite flowers.  I told her last winter I didn't think that would work because the garden peonies would be done blooming and trying to order peonies in and have them stand up in the July heat would not likely be successful.  She resigned herself to using one or two high quality silk peony flowers in with a mixture of other live flowers for the memorial bouquet.  Last weekend, I was able to tell her with pretty good assurance that she would, in fact, have real peonies from the garden to use for her July 5 wedding.  Who would have thought?  Hmmm.  Now what will we do with those silk peonies we bought?

Well, I'll figure something out for the peonies after I'm done enjoying the beautiful days of summer.  I love this time of year when the days are long.  In fact, on a clear night when the moon is out and the stars are shining, it never really seems to get pitch dark here.  I could spend the entire night out in the quiet of the gardens, listening to the toads buzz and the frogs croak, an occasional owl hoot, and the leaves rustling in the breeze.  Until the mosquitoes drive me inside, that is. 

Thursday, June 6, 2013

Sweet Potato Planting Time


My sweet potato slips arrived yesterday.  By tonight, the garden should be dried enough that I can get them planted.  Yes, I grow sweet potatoes in North Dakota.  I even grow celery here, but that's a topic for another blog.  While Mother Nature only allows us a short growing season, we have daylight and warmth for many hours a day during that short season, so we can grow things that it seems shouldn't be possible.   The trick is getting the soil warmed up before planting and choosing the right varieties for northern climates. 

Sweet potato varieties range from 90 to 150 days to maturity.  Obviously, I want varieties that are closer to the 90 day maturity than those that need 150 days.  There are four varieties that seem to do the best with our season length- Beauregard, Centennial, Georgia Jet, and Varaman. 

Beauregard is a 90 day sweet potato with smooth, light red skin and deep orange flesh.  It is a very high yielding variety and while many of the potatoes are finger-sized when dug, I usually find at least two or three on each plant that are five to six inches long and three inches or so around.  Even the small ones are absolutely delicious, though.

Centennial is another 90 day sweet potato that has coppery colored skin and the deep orange flesh we all recognize as a sweet potato.  Centennial doesn't yield quite as much as Beauregard, but the flesh of the Centennial is a litle bit finer-grained, moister, and in my opinion, tastier.

Georgia Jet is known as the most reliable northern producer and I have had good luck with it in my garden.  Georgia Jet has a deep red skin, moist flesh, and excellent flavor.  It produces nearly as well as Beauregard for me.

Vardaman is a 100 day variety.  This is my first year growing this variety so I don't have a lot to review yet.  It is a bush type sweet potato, so it can be grown in smaller spaces than the other varieties.  It is marketed as a high yield potato with excellent flavor.  Vardaman's foliage is a distinctive purple, so it will be an attractive addition to the garden.

Sweet potatoes are started from slips, not seeds.  You can start your own slips by cutting a potato and soaking it in water.  This takes time and patience, neither of which I am able to find most days, so I order my slips from a reliable grower. 

Sweet potatoes like a loose, well organically amended soil and they don't like to be planted in soil that is less than 55 degrees F.  They will grow well in sand but tend to languish in heavy clay.  My planting area has been amended for many years and has a high organic matter content that the sweets seem to like.  Sweet potatoes are heavy potassium (potash) feeders, so I will work a little organic potash into the soil before planting.  The don't like high nitrogen levels - if the N is too high, the sweets will grow lush, beautiful foliage, but no tubers.  And, while sweet potato leaves are edible and seen as a delicacy in some cultures, I prefer the tubers myself.

I will lay a strip of black landscape fabric in the planting area and make sure it is lying tightly on the soil.  Then I'll cut eight inch long slits about every two feet.  Through each slit, I'll make a small depression in the soil, then dig a hole that will allow me to insert the rooted area of the slip.  I'll cover the rooted area of the slip, leaving a small depression in the soil to capture water.  I cover the exposed leaves of the slips with a wind and sun protector for the first few days.  I use the one gallon pots that perennial plants are purchased in from the garden centers.  I simply cut the bottom from those pots and stick the cut edge about two inches into the soil.  It's a cheap, easy, and at my place, readily available source for plant protection.  After a few days, I'll remove the protectors and store them for next year.

I'll keep the weeds down, which is made much easier by the landscape fabric, and keep the soil uniformly moist throughout the summer.  Then I'll wait for the fall and harvest time. 

Oh, I can just about taste those sweet potatoes already!

Tuesday, June 4, 2013

Old Fashioned Bleeding Heart


Wiese Acres Dicentra spectabilis

 The weather has not been conducive to working in the gardens.  I love the rain, but I am beginning to think I would love it a lot more if it would just go away for about a week.  No longer than that, but no less either.  Well, maybe next week.  In the meantime, I've been occupying my time with cleaning house and sewing, and that just isn't very exciting to write about - and probably even less so to read about.  So, I'll talk about my bleeding heart, a plant of fleeting but oh, so awesome, beauty.  It finally burst into bloom this week - a full three weeks later than usual, but it is blooming.

There are newer cultivars of bleeding heart available, but my favorite is still Dicentra spectabilis, or the old-fashioned bleeding heart.  It is one of the oldest known perennials in cultivation and many of us remember it from our grandmother's and great-grandmother's gardens.  It lives for many years and grow into huge, bushy clumps over time, sometimes reaching as much as 3 feet tall and wide. 

My Mom had an ancient bleeding heart on the north side of her house.  That bleeding heart began its life in the shady yard of the old farm house and moved to the new house with the folks when they retired to a smaller acreage.  Over the years, pieces of that bleeding heart were given away.  Those "starts" still grace many yards, including mine, throughout North Dakota and maybe even a few in Montana and South Dakota.  Bleeding hearts don't need dividing very often, but they tolerate it well and are happy to send their offspring out to beautify other locations. 

The foliage of old-fashioned bleeding heart is a bluish-green with lobed leaves.  The leaves are held on fleshy stems and the flowers form on leafless stems that arch away from the foliage, often creating the illusion that the puffy, heart shaped blossoms are dangling in thin air.  The blossoms of Dicentra spectabilis are a rosy-pink, with a white tip that dangles from the center of the "point" of the heart.  Another variety of old-fashioned bleeding heart, Dicentra alba,  has an all white flower.

Bleeding hearts need part shade and actually do their best in nearly full shade.  They need a consistent supply of moisture, but no standing water.  The more sun they receive, the more water they need.  Bleeding hearts like a fertile, loose, and well-drained soil and benefit from a helping of peat moss and compost mixed into the surrounding soil each year. 

Bleeding hearts bloom spectacularly in early to late spring, adding a bright spot to a garden that is otherwise largely just green yet at this time of year.  Their bloom time is only for a few weeks, but the cooler and wetter the weather is, the longer it will bloom.  The flower stems, also known as "racemes", can be used as cut-flowers, staying nice in a vase for up to two weeks, if given fresh water periodically.

After blooming, and when the weather becomes hotter, the bleeding heart will go into dormancy until the following spring.  This does not mean it died, so gardeners need to resist the temptation to dig it out and throw it away.  It will magically re-appear the following spring and reward us with even more blooms with each year of aging.  I plant my bleeding heart in amongst the hostas, shade-loving cranesbill and Solomon's seal.  Those plants are just getting started when the bleeding heart is blooming its best and by the time the bleeding heart goes into dormancy, those other plants have reached their full stride and cover the bare spot nicely.

Bleeding heart adds great beauty and evokes many special memories for me.  It's definitely a keeper in my garden!

Thursday, May 30, 2013

Planting Asparagus Crowns


Asparagus may just be one of those things that it is impossible to have too much of - those tender, juicy, tasty shoots that emerge as one of the earliest vegetables of spring are pretty hard to beat.  I know some people claim to not like asparagus, but I am always suspicious that is only because they've never tasted it.   When one of my nephews was about six years old, Mom had prepared a huge batch of creamed asparagus for supper.  My nephew adamantly insisted he was NOT going to eat any "sparegress".  His dad told him this was not "a-spare-a-gus" but instead was "az-pa-raagus".  He ate his first helping of "az-pa-raagus" and asked for more.  Not only is it tasty, asparagus is highly nutritious, with an abundance of the B vitamins, vitamin C, calcium and iron. 

In Tuesday's blog I talked about soil preparation for transplanted asparagus crowns.  The same preparation to create a loose, well-drained soil is critical for new crowns.  A soil that is light and well-ammended will warm up more quickly in the spring, bringing those wonderful shoots to the dinner table that much sooner.

The variety of asparagus planted makes a difference in the type of harvest obtained.  Asparagus plants are male or female.   The male plants don't have the responsibility of producing seed, so they put their energy into producing fatter, more abundant spears.  The absence of seeds also assures they don't become pests when the birds spread the seeds to places where they aren't wanted. 

The Jersey Knight and Jersey Giant varieties are all male or nearly all male plants.  Jersey Supreme is also a primarily male variety that produces spears much earlier each spring than other varieties.  The heirloom varieties, such as Martha Washington, Mary Washington, and Purple Passion, are varieties that have both male and female plants, but tend to be long-lasting good producers.  Purple Passion will produce thicker, meatier spears than the other male / female varieties.

If planting all male varieties, it's recommended to plant six plants per family member.  For male / female varieties, the recommended number is 12.  I like to have enough asparagus to freeze or can for off-season use, so I plan to plant about three times that many.

Asparagus can be started either from seed or from divided crowns.  Starting an asparagus patch from seed is only for people who are more patient than I - it takes three to four years of growth before harvesting any significant quantity of asparagus from a seed- started plant.  Crowns can be purchased as either one or two year crowns and will produce within one to two years.  Crowns should be firm with plump, succulent roots and free of any evidence of disease, such as mold. 

Asparagus crowns are best planted in trenches about a foot wide and six to eight inches deep.  To give the crowns a little bit of a boost, they can be soaked in compost tea for 20 minutes before planting, but this isn't required. Place the crowns in the trenches 1½ to 2 feet apart and top them with about three inches of soil.   Every couple weeks, add another inch or two of soil, until the soil completely covers the crowns and is slightly mounded above surface level to allow for settling.  It is important to plant the crowns deep enough so that as they naturally rise from root growth, the crown does not become exposed.  Planting them deeper also helps anchor the asparagus plant so wind and rain doesn't affect its stability in the ground.

Keep the asparagus moist and weed-free.  Asparagus should not be harvested in the first year after planting.  If using two year crowns, small amounts of asparagus may be harvested in the second year after planting.  Only spears that are the size of a lead pencil or larger should be harvested.  Two year crowns should only be harvested one or two times the year after their first full growing season, and then left to grow for the rest of the summer.  Generally, year three and on, asparagus can be harvested for the full season.

 The harvest season for asparagus is eight weeks from the time of first harvest to last.  Harvesting for longer than that can weaken the plant and decrease production the following year.  The spears should be harvested by cutting about one inch below the ground with a sharp, serrated edge knife, or by holding the spear close to the ground and snapping the spear free of the crown.  If using a knife, caution is required to avoid damaging the crown. 

Asparagus spears should be harvested when they are about six to eight inches tall.  Longer spears may be tough and stringy.  In cooler temperatures, asparagus will usually be ready to harvest every other day.  As the temperatures become warmer, harvesting will likely be a daily event - asparagus spears can grow up to six inches in one day.

At the end of the eight week harvest period, leave the spears to grow into fronds.  These fronds will help nourish the root and get it ready for next year's harvest.  When the fronds have dried off in the fall, remove the dead foliage and destroy it to prevent spreading diseases in the bed.  I recommend top-dressing the bed with one to two inches of compost each fall to give the plants a boost up for next year's production.

But, in the meantime, enjoy that delicious asparagus.

Tuesday, May 28, 2013

Asparagus Dividing and Transplanting


As seems to be par for the course in our part of the world, once the rain started it can't seem to stop.  Not that I'm complaining, but it is causing me to fall way behind on my spring chores.  And this is a year when I really wanted to get a good running start to the season.  The house and yard needs to be in tip-top shape for our daughter's wedding on July 5.  Well, actually, it needs to be in tip-top shape for her garden party bridal shower three weeks earlier that that.... oh my!  I'm running out of time!!

Fortunately, I did get the major job of re-locating the asparagus bed finished before the rain started again.  My old asparagus bed has produced well for about 15 years, but as the trees grew taller and shaded the area more, and as the asparagus clumps started to become crowded, my patch started losing some of its "oomph".  The spears were getting skinnier and fewer, so the old bed has been re-located and some new plants started in an area that should be good for the rest of the asparagus' life.  At least I hope so, because moving asparagus is not a pleasant job. 

Asparagus develops a huge mass of thick, tuberous roots that spread everywhere in the patch.  Most gardening experts, when asked how to transplant asparagus, are likely to tell you to just buy new crowns and start over.  Yes, it's that much work to transplant them.  But, there is enough of my frugal mother in me that I just couldn't bear to see that old bed go to waste.  Plus, I have a sentimental attachment to those asparagus plants - Mom and I dug them from some overcrowded clumps in her garden all those years ago.  So, last fall I began the process of getting ready to transplant asparagus this spring. 

Those preparations started with preparing a new bed area in a nice, sunny location that isn't likely to become too shaded anytime within the next 50 years or so.  Asparagus likes rich, loose, and well-drained soil.  To accomplish that with my clay base, I added an extra helping of peat moss and well-composted manure to an area that had already been heavily ammended annually for the past several years.  We tilled those organic ammendments in last fall and then tilled it again this spring to loosen it up and make sure they were well mixed into the soil.

I also left the old foliage to dry in place last fall, rather than cleaning it off as soon as it was dry as I usually do.  That assured I could see where to dig this spring.  Ideally, asparagus should be moved while it is dormant, but it is pretty tough stuff.  Some of mine was growing nicely before I got it moved, and it's hardly complained a bit since it's in its new location.   In warmer climates, asparagus can be moved in the fall, but here, by the time it goes dormant, we are pretty near to the time when soil temps are too cold to allow good root establishment before winter freeze-up.

The important thing is to not damage the crown of the asparagus as that is the part of the plant that sends up those tasty, succulent asparagus shoots.  You'll almost always need to sacrifice a few of the roots in the moving but the asparagus will survive nicely if the crown is lifted intact. 

Start the process of moving by looking for where the old foliage is most closely clustered together - that is where the crown is located.   Then go about 8 to 10 inches further out from the edges of the old foliage to get the best clump of roots.  Do the initial digging with a spading fork or potato fork.  The tines of the fork will slide between the fat roots and loosen them before using the shovel to begin digging.  Once things are loosened up a bit, start digging down to the bottom of the root mass. 

Dig a circle around the clump, to the depth of the spade.  Then dig under the root system until the clump is free and can be lifted out of the hole.  There is no way to get all the root system so the objective is to get as much of it as possible.  The more root transplanted with the crown, the better chance of survival the plant will have and the sooner the crown will be able to produce large enough spears for harvesting.

Some of my clumps were about two feet in diameter and felt like they weighed 100 pounds.  I worked these out of the hole and onto an old plastic child's sled to move to their new location.  I've found that asparagus generally tells you where it can be divided - once the soil is loose, the crowns will often separate themselves and you can tease the roots apart and move an intact piece of crown to a new planting hole.  Smaller clumps were able to be moved and transplanted without dividing.

The transplants were planted in rows that are approximately 30 inches apart and each plant within the row is about 18 inches from its neighbor.  This should give my transplants ample room for many, many years without being divided and transplanted.  Asparagus plants can live up to 50 years, so it pays to plan ahead.

The roots should be nicely spread in the planting hole.  Begin covering the roots by gently sifting soil over the top of them by hand.  Don't use a shovel to dump a large amount of soil over the top of them at this point.  Once the roots all have a layer of soil to hold them in place, continue covering with a shovel until the crown of the asparagus is covered with approximately three inches of soil. 

The soil should be gently tamped down into the planting hole and the plant should be watered in well.  Asparagus is a pretty care free plant, so other than keeping the bed weed free, giving the plants a good, healthy drink of water every week, and a top-dressing of compost or manure over the top of the bed each fall after the bed goes dormant, asparagus doesn't ask for much to reward you with many tasty meals over the years.

Thursday we'll talk about planting the new crowns I bought this year.


Thursday, May 23, 2013

Caring For Strawberry Beds


Well, on Tuesday we planted the strawberries.  Now, how to take care of them.  Shortly after planting, you should begin to see new leaves emerge, followed fairly soon by flower buds.  Hard as it is for me to do, it is important to pinch off those first flower buds to allow the plant more energy to put towards strong root and plant development.  For june-bearing strawberries, this means you sacrifice the entire first season's crop, but you will be rewarded with much greater production in the following year.  For day-neutral and ever-bearing varieties, pinch off the blossoms for about the first six weeks of growth.  If the plants seem to be growing vigorously after that, it is ok to allow them to produce berries.

Strawberries need at least one inch of water per week.  It is best to water them deeply once a week, rather than giving them small amounts more frequently.  During very hot, dry, windy weather, your strawberry bed may require up to two inches of water per week to keep the soil consistently moist.  Always water your strawberries in the morning, if using overhead watering systems.  Strawberry plants are prone to fungal and bacterial diseases that thrive on wet foliage.  Watering in the morning gives the foliage the opportunity to dry off quickly.  Using a drip irrigation system gives you more flexibility in when you water because the water never touches the foliage, but it is important to not ever have water standing in your strawberry bed.  Not only will that foster diseases, but the strawberry crowns can suffer rot very quickly if the soil is not well-drained.

It is also important to weed diligently in the strawberry bed.  Beds can be quickly overtaken with weeds or renegade grasses, especially quack grass.  Berry production will be significantly inhibited if the plants need to compete with weeds for moisture and nutrients.  Laying mulch between the rows of the strawberry bed can help with this.  I use several layers of newspapers, covered with clean straw and this keeps the weeds down with very little cost to me.  You can also use landscape fabric or any other type of weed blocking substance.  It is not recommended that you use a pre-emergent herbicide, such as Preen, on your edibles.  There is a form of Preen that is formulated for use on edibles, made with corn gluten.  I personally have not seen much difference in weed production in those areas where I've tried the corn gluten products and those where I haven't used any type of pre-emergent herbicide, so I've decided to just save my money.

Runner plants will begin to emerge in early to mid-summer.  These can be left and allowed to fill out the spaces between plantings, but for ease of picking, it is a good idea to keep the rows open.  Any plantlets that crawl over the mulch between the rows can be gently lifted and place back into the row or snipped from the runner and moved to a new location.

Strawberries are prone to fungal diseases, such as root rot, gray mold, powdery mildew and botrytis.  Keeping your bed clean of weeds, allowing for good air circulation, watering appropriately, and keeping the area free of old plant debris will help.  In very wet years, sometimes it is hard to keep the bed healthy, in spite of your best efforts.  If you must, you can use a copper based organic fungicide to control the disease and not sacrifice your entire strawberry crop.  It is always important to follow the instructions for use and not use the produce any earlier than the recommended time frame.  Just because the copper fungicides are "organic", does not mean that they are safe for humans to consume.

I have very few problems with insect pests in my strawberry bed.  The same cannot be said for bird pests.  Some weeks, I am very fortunate to find a single berry that does not have "bird pecks" in it.  I don't begrudge the robins and the orioles, the cedar waxwings, and assorted other fruit eating birds a few of my berries to share.  But, I do get irritated when they peck holes in every single berry and then leave the rest of it to rot.  To add insult to injury, they then go to my pond to drink and use my furniture there as their own private outdoor bathroom.  Arghhh!!!! 

To deter those little feathered devils, it works best to use bird netting over the entire bed. I place stakes around the bed for the netting to rest upon so that the berries are beyond the reach of the beaks.  Then I stretch two layers of net in different directions.  I've found that a single layer does not deter them - they find a way under it or peck their way through the plastic netting until there is a hole large enough for them to get through.  If they manage to peck their way through the first layer, they usually get caught in between and have to stay there until I take mercy on them and let them free.  In the interim, they raise such a ruckus that it deters other birds from heading that way.  The net gets tacked down with landscape staples to keep them from getting underneath.  It is a pain to have to uncover the bed each time I need to pick berries, but those sweet, juicy, bird-peck free berries are usually worth it! 

Someday, though, I am going to build an enclosed, covered fence around the entire berry patch.   Then I'll sit inside it and laugh at the birds while they are forced to watch the berry juice running down my chin!

Tuesday, May 21, 2013

Planting Strawberries

Yummy!
Last week we were in a fairly severe drought with high risk of fires from hot, dry and windy conditions.  This week, it is wet and soggy everywhere and many parts of the state are experiencing flooding from the heavy rains of the last few days.  I have a hard time ever complaining about rain, though.  I'm not sure there is such a thing as too much rain in North Dakota - the old saying "Even on its wettest day, North Dakota is only two hot, windy days away from a drought" rings too true.

Unfortunately, I didn't get all my seeds planted before the rain came, but I can live with that because we needed the rain that badly.  Last week, I tilled an area to plant some new strawberry and raspberry starts.  By the time I was done tilling, I think I'd inhaled enough dust to start a garden in my lungs.  Now, my new berries should get a good start with warmer weather and refreshing rain.

Strawberry plantlet formed along stolons
I've grown strawberries for several years but it was time for some new plants.  Strawberry beds need to be reujuvenated every three years or so.  The plants may still look healthy after that time, but they stop producing the quantity and the quality of fruits that they should.  You don't necessarily need to invest in new plants every two years, though.   The new plantlets that form along the stolons or runners can be gently snipped from the parent plant and transplanted to a fresh location. 

When rejuvenating your strawberry beds with the plantlets, you simply take the freed plantlet and set it gently into a soft part of the soil.  There may already be tiny roots forming at the base of the plantlet that can be gently covered with soil, watered in, and left to grow.  If you do not need to move your strawberry bed to a new location, you can simply tap the bottom of the plantlet down into the soil and let them grow.

If you are planting in a new location, starting with the proper conditions will lead to much greater success.  Strawberries need full sun - six to eight hours of bright, direct sunlight each day.  They also require well drained soil.  You should stay away from locations where you've recently grown strawberries, tomatoes, peppers or eggplants, as these all harbor the same diseases that can decimate your strawberry bed.

Choosing a strawberry that does well in your location is also important.  The local University extension services usually have good information as to which varieties have done well in trials for a variety of conditions. 

There are three types of strawberries which bear different quantities and sizes of berries at different times.  Day-neutral varieites are those that don't care about the length of the day and produce fruit and plantlets the entire time that temperatures stay between 35 and 85 degrees.  While they produce for a long period of time, the berries are smaller and fewer than other types of berries.  They will begin producing their first year of planting, which is a real plus for an impatient gardener like me.

Everbearing strawberries aren't really "ever" bearing.  They usually produce a harvest in the spring and then again in the late summer to fall.  The buds they produce in early summer produce fruits in the later summer and fall.  Buds produced in late summer and fall will produce the next season's earliest fruits, so while all strawberries benefit from winter mulching in cold climates, it is a must with these to protect your early crop of the following year.  Even though the plant is hardy to zone 3 in most varieties, that bud that will produce the next season's crops is vulnerable to freeze damage that will keep it from producing the next year.  You may get a small late summer / fall crop from these the first year they are planted, but their most prolific year will be the year after planting.

June-bearing strawberries set their buds in the fall, then produce flowers and fruits for a short time the following spring, usually in the month of June.  They stop producing after that flush of berries and put their energy into producing stolons and plantlets for the rest of the summer.  It is necessary to mulch these in cold climates, also.  June-bearing strawberries generally produce larger berries prolifically for their short production time.  They will usually not produce berries their first year of planting.

Once you've decided on the type of strawberry plants, you'll need to decide which veriety to plant.  Day neutral and everbearing are sometimes used interchangeably.  They are different varieties but are probably close enough in growth and production characteristics that for most gardeners, either term works.  For day-neutral / everbearing strawberries, I've found Mara De Bois,  Evie 2, Tristar, Seascape, Quinalt, Ogalla and Fort Laramie are good strong varieties in my garden.  Of these, Mara De Bois is perhaps my favorite.  The berries are small but the flavor is like an explosion in your mouth - they are sweet, intensely strawberry flavored and scented.  Earliglow, Annapolis, and Honeoye are my best producing june-bearers.

Your new plants will either come potted or bareroot.  They should be planted as early in the spring as possible, in a planting hole wide and deep enough so that the roots can be contained in it without being cramped or bent.  Sometimes bareroot strawberries come with humongous lengths of root - these should be trimmed back to about eight inches or so long.  The roots should be fully covered but the crown of the strawberry plant should be right at the soil surface. 

Strawberries love to crawl along the soil surface, so they need plenty of room to do that.  Plants should be placed about 12 to 15 inches apart in rows that are spaced three to four feet apart.  The strawberry bed will look pretty sparse at first, but given room to sprawl, that is exactly what strawberries will do.

Once they are planted, they need to be watered in well and kept evenly moist.  We'll talk more about caring for your strawberry bed in the next blog installment.


Wednesday, May 15, 2013

Spring Pond Care


Wiese Acres Pond
I love my pond.  There is nothing quite so relaxing as listening to the water rush over the rocks while watching the fish lazily swim about.  The downside of being a pond owner is that along with ownership comes responsibility for care. 

I don't drain the pond or remove the fish in the fall.  The center of the pond is approximately three feet deep, so the fish go to the bottom and hibernate for the winter.  I pull the main pump and replace it with a small bubbler pump that sets on the perimeter of the deep part of the pond and use a small pond heater to keep an air opening in the ice. 

In the spring, serious pond maintenance is necessary to remove the winter debris and the nutrient load the pond receives from snow melt and spring rain run-off.  I skim all visible debris and algae out of the pond and drain about one-third of the water, then slowly replace the volume with fresh water.  It is important to replace the water at a slow rate to keep from cooling the water too much for the fish and to prevent too high a chlorine content from affecting the fish.  If you have a very high chlorine content in your water, you may need to add a water conditioner to dissipate the chlorine more quickly.  After the pond is refilled, I replace the beneficial bacteria, using the amounts and frequency listed for whatever type of bacteria I am using and start the big pump to begin circulating the water.  

About every other year, I temporarily remove the fish and place them in a large container I've pre-filled with water from the pond.  I place the container in a shady location with a net covering it to protect the fish from predators.  I also remove all the hardy water plants and set them in a bucket of water to keep the foliage and the roots moist.  Then I have my husband drain the pond completely and pressure wash the muck and the algae off the rocks (he gets the really fun job).  When he's all done mucking around in the mess, I add fresh water and beneficial bacteria and let that circulate for a day or so.  Then I move the fish back to their nice, clean home and get set to enjoy my pond. 

I check plants for any signs of decay, clean any old foliage off them, and divide them if necessary.  I insert a pond plant food tablet in the container and gently lower it back into the deep part of the pond.

Each spring, I check the waterfall hose for kinks or leaks, make sure the cord for the pump is intact, and clean the skimmer and filter boxes.  I wash the biological filters well and replace the old pads with new ones to avoid re-introducing non-beneficial bacteria into my cleaned pond.

Doing the proper spring start up care will make it easier to care for the pond the remainder of the season.  Starting with a nice, clean pond and adding beneficial bacteria on a regular basis (just how often depends on the type of bacteria you use) will help keep things in balance in the pond.  Hitting algae blooms with the appropriate algaecide and keeping the right number of fish and plants for the water volume of the pond will help your pond provide far more enjoyment than work.

Wednesday, May 8, 2013

More Spring Work

Wiese Acres North Yard
This is the only time of year that I kind of wish I didn't live at Wiese Acres.  Just a little bit.  Cleaning the winter debris off the gardens is my least favorite part of gardening, but doing it right is so critical to the success of the gardening season.   I'm taking today off from work at my job to finish up the cleaning work in the gardens so I can start on things I like to do - like planting, dividing, getting the garden decor out, and firing up the water features.

One of the first things I will do after the cleaning is finished is divide any summer or fall blooming perennials that are getting overgrown.  These were marked last fall because I don't always remember when that cute little clump appears in the spring that it had turned into a giant by mid-summer last year.  The rule of thumb is that fall and summer blooming plants are best divided in early spring, and spring blooming plants are best divided in fall.  Daylilies and iris prefer to be divided in August, here in the midwest.

I'll also be preparing the sites to plant my new perennials that are arriving in the mail on an almost daily basis now.  I will "harden" the plants off a bit in the greenhouse before I plant them in the gardens.  We are still having some very cool nights and a hard freeze could damage their tender foliage.  The process of hardening them off a bit more and giving Mother Nature a little extra time to get her spring act together this year will be helpful.  It also will give me a little more time before I need to turn the water on in the irrigation system so there is less worry about a hard freeze damaging the lines.

Newly planted or transplanted perennials need sufficient water, even if they are drought tolerant plants.  No plant is truly drought tolerant until it is well established, usually after the first year or two of growth.  Prior to that, they will require one-half to one inch of water each week.  I'll also spread a layer of compost, topped by organic mulch, around my new plants to keep the moisture more consistent and to keep the roots cooler as the summer heat sets in.

Cleaning and dividing will keep me busy for awhile!

Tuesday, May 7, 2013

Spring Crocuses

Wiese Acres Dutch Crocus (Crocus Vernus)
It's been a long time coming this year, but I am now sure that spring has arrived - my crocuses are blooming their hearts out.  They are amazing little things - they can get nipped with nasty cold at night, end up buried in snow, or baked in the hot sun of unseasonably warm temperatures, yet they still do their best to put on a marvelous spring show.

Crocuses, or croci (croak-eye), are members of the iris family.  They grow from a corm that is usually planted in the late fall for blooms the following spring.  The crocuses I have in my garden are different than the ones I used to search the pastures on the farm for in the early spring - while we commonly call those wild flowers "crocus",  they are really pasque flowers.  They are similar in flower appearance and in bloom time, but the wild "crocuses" are from the buttercup family and have hairy leaves versus the smooth, blade-like leaves of the true crocus from the iris family.

There are over 80 species of crocus, but most of what we see in the garden centers are a mixture of species and varieties.  Dutch crocus, or Crocus vernus is the most common species we see.  The only thing you really need to pay attention to when buying crocus corms is whether they are spring or fall bloomers.  I'll be talking about the spring bloomers today.

Crocus are low-growing, reaching no more than about six inches tall.  The size of the flower depends on the species, but they all are six petalled, cup-shaped flowers, usually in shades of purple, yellow, and white.  They look their best when they are planted in large groupings or drifts.  They prefer full sun, but since they bloom in early spring when the trees are not yet fully leafed-out, they will do well planted under deciduous trees.  They require well-drained soil to keep the corm from rotting during its dormant times. 

Crocuses put on their spring show, store food in the corm for the next season, and then go dormant in the heat of summer.  They require very little care - give them a drink now and then in spring and fall.  Leave their leaves alone after they finish blooming, no matter how scraggly and tacky they begin to look.  Crocus are like most other bulbs and corms in that they need that foliage growth time after blooming to store the nutrients needed for the next year's flowers.  I cover up the foliage by planting later emerging perennials nearby, such as balloon flower (platycodon) in locations that stay sunny; or hostas in locations that become more shady as the trees leaf out.

Crocuses do not require a lot of fertilizer.  If you have even moderately good garden soil, they likely don't need anything.  If your soil is a little on the poorer side, you can top dress the bulbs with bulb food or bone meal, either right after they finish blooming or in the fall.

Crocus are short lived bulbs so they rarely need to be divided, but may need to be replaced every few years.  It is well worth the little bit of effort these bulbs require to have that tough little harbinger of spring greet you when you look at your spring garden.


Thursday, May 2, 2013

Soil Temperatures and Vegetable Seeds

 
Wiese Acres vegetables
It's hard not to get anxious to be out planting the vegetable garden.  I can just about taste the freshly picked lettuce with the sweet cream dressing that Mom always made, or the large, sweet radishes that Dad and I sliced to make radish sandwiches.  But, most seeds are pretty particular about the temperature they want the soil to be before they are planted.  If soil temperatures are too cool, the seeds will lie there and rot before germination has a chance to occur.

Cool season crops generally tolerate planting in soil temperatures between 35 and 40 degrees.  That is pretty early in most locations, but here's the rub with even these crops:  they might germinate and grow in cold soil, but the green part of the plant still will not tolerate air temperatures that are much below freezing, as can often occur in these northern climates well into May.

Lettuce, onions, and parsnips are some of the earliest crops that can be planted.  They will germinate in a minimum soil temperature of 35 degrees, but their optimum germination temperature is well above that at about 70 degrees.

Peas, radishes, spinach, swiss chard, turnips, beets, carrots, leeks,and all the cole crops (broccoli, cabbage, cauliflower, etc.) will germinate at a minimum soil temperature of 40 degrees, but prefer the much warmer 70 degree soils, as well.

Wiese Acres cabbage
The conventional wisdom that potatoes should be planted on Good Friday might work well in some places, but given that potatoes' minimum germination temperature is 45 degrees, most years Good Friday is going to be just a tad bit early.

Warm season crops need soil temperatures of 50 to 60 degrees to germinate before the seed rots.  These include beans, cantaloupe, corn, cucumbers, eggplant, peppers, tomatoes, summer and winter squash, pumpkins, and watermelons.

If you use treated seeds, soil temperatures are not as critical.  If they are anywhere close, the seeds will probably just lie dormant without rotting until the soil warms enough.  For untreated seeds, which is what I prefer, it is well worth the time to actually check the soil temperatures before planting, because untreated seeds can rot very quickly in cold, moist soil.

Soil thermometers can be purchased at any garden center pretty cheaply and they are probably worth the few bucks investment.  Theoretically, any thermometer that can be inserted into the soil to a depth of four to six inches is able to monitor soil temperatures. 

As a rule of thumb, I don't plant anything in my heavy clay soil until at least mid-May and seedlings don't get transplanted until Memorial Day weekend.  That is when I am pretty sure that soil temperatures are going to be adequate to support germination and the likelihood of a hard freeze killing all my baby plants and having to start over is greatly diminished.

Tuesday, April 30, 2013

Quack Grass - Ugh!

I finally was able to get out into some of the gardens this past weekend.  I couldn't do any transplanting or planting yet because when I attempted to dig into the soil, my shovel encountered ice.   So, I concentrated on cleaning dead foliage and other minor sprucing up in those areas where it wasn't too muddy to work.
Quackgrass in strawberry bed

I had some welcome surprises.  I found four nice, baby juniper trees that the birds must have brought with them as a thank you gift.  Those will be dug out and transplanted to a more suitable location.  But, then I found a not so welcome visitor:  Quack Grass!  Scientifically known as Agropyron repens, quack grass is a pest that grows nearly everywhere in the United States.  It especially seems to like the Burleigh County desert where I live. 

Quack grass spreads by both root and seed.  The creamy white, three to eight inch long seed spikes appear in August.  Each spike contains 20 to 30 seeds, that once in the soil, can remain viable for up to five years.  And, that isn't the worst that quack grass has to offer.  Within two to three months of germination, the plant begins to form rhizomes which can spread up to 300 feet from the parent plant.  That's a lot of territory that can be covered by one quack grass seed.  But, wait, it gets even worse.  Once those rhizomes are developed, if you damage them with a spade or rototiller, every piece of rhizome that you cut off becomes another plant, with another 300 feet of rhizomes or thereabouts.  It doesn't take very long for quack grass to take over the world.

The key to controlling its spread by seed is to cut the grass down before seed heads have a chance to develop.  The key to controlling the spread by rhizomes is glyphosate, marketed most commonly as Round-up.  The problem with glyphosate is that it is non-selective - it will kill anything green that it comes in contact with.  If the quack grass is in an isolated area, you can spray the glyphosate.  Quack grass, however, is smart, and it rarely grows in locations where it is that vulnerable.  Instead, it likes to twine its rhizomes around the roots of other plants,  nestle itself amongst the branches of the shrubs and extends its roots 50 feet beyond the last topside evidence of it, fooling you into thinking you've gotten it all, when it is really just lying in wait for its next assault on your gardens.

But, I digress.  Back to controlling the nasty stuff.  In locations where I can't spray, I've found a couple ways to still get at it.  I mix glyphosate about one-fourth stronger than the recommended mixture (quack grass is tough and I've found a little more strength in the glyphosate knocks it down a little better) and pour it into a small bucket.  I dip a  very small paint brush into the glyphosate and dab it onto the blades of the quack grass.  Any kind of paint brush will do, but I prefer the foam ones.  They drip less while holding more solution to dab onto the grass blades.  If there is other foliage around that I don't want to take a chance of dripping the glyphosate onto, I cover those with plastic, which I can carefully move from plant to plant as I attack the quack grass. 

You can also wear a heavy, chemically resistant rubber glove and just dip your fingers into the solution and wipe them along the blade of grass.  You need to take the same precautions from dripping on desirable plants using this method as you do with the paint brush method.  I think I have better control with the foam brush, so that is my method of choice.

Quack grass will generally need multiple applications of glyphosate.  Glyphosate works on actively growing plant tissue.  Only a small percentage of the quack grass rhizome is actively growing at any one time.  The application of glyphosate will kill that part of the rhizome, but within a few days, a previously dormant part of the rhizome will send up shoots of grass and start spreading in the garden.

Fluzifop is another chemical means of controlling grasses in perennial plantings.  It is marketed as "Grass-B-Gon" and can be used in most perennial plantings to kill grass infestations without harming favorable plants.  The exception to this is "monocot" plants or those plants with grass-like leaves, like daylilies, iris, and lilies.  Grass-B-Gon will damage and may actually kill these plants.  Grass-B-Gon can be used on edibles, like asparagus and rhubarb, but the produce should not be used for one year after the application.  As with glyphosate, you will need multiple applications of fluzifop to completely eradicate quack grass.

You can also dig the quack grass out of the garden, but you really do have to be careful to remove every tiny piece of the fleshy rhizome.  Even the tiniest piece will start an abundance of new quack grass plants.  The rhizomes are a yellowish white color, about 1/8 inch around and they have joints every inch or so.  They are so tough, they can actually grow up through asphalt.

All plants, even ugly ones like quack grass, require photosynthesis to survive.  Cutting all evidence of green growth back to the ground as soon as it appears will weaken the root system over time.  This requires diligent monitoring and quick death to the green growth to prevent it from providing any nutrition to the rhizomes, to eventually kill them.

I will be employing a combination of all these techniques to rid my gardens of this monster.  And I will be doing it next year.  And the year after...  until the quack grass realizes that I am more stubborn than it is.

Thursday, April 25, 2013

Hardy Hydrangea Care

Wiese Acres hydrangea
There are different schools of thought on the best places to plant your hardy hydrangeas.  Some sources say in northern climates, they need full sun to bloom. Others say morning and / or late afternoon sun, but shade in the hottest part of the day.

My experience is that in most full sun locations in North Dakota, there is also full wind.  The two together are a little much for the hydrangeas in my yard.  I plant mine in nice loamy, well-drained soil in part shade, namely where they are shaded from the hottest midday sun.  I’ve had some in full sun and find that they tend to sunburn and wilt during the heat of the day.  I end up with a plant that is chronically stressed and can’t do its best.  Most of my hydrangeas are planted in a location where they receive either dappled sun all day long; direct sun from morning until early afternoon; or morning and late afternoon / evening sun.  The exception is my Limelight.  That one thrives in full sun, but in a location where it is somewhat sheltered from strong winds. 

I’ve learned by trial and error where the various hydrangeas do their best.  Hydrangeas are one of the rare shrubs that has a small, compact root ball and is very forgiving of being moved from one location to another.  I start mine in sheltered, part shade, rather than in the full sun they supposedly tolerate. If a mature hydrangea doesn’t bloom well, they may be a bit too shaded and need to be moved to a slightly sunnier, but still protected location.   
 
Transplanting is best done when the shrub is dormant, either early spring or late fall.  If transplanting is done in the fall, allow at least six weeks of time with soil temps above freezing to allow roots to establish themselves, and then mulch it heavily the first year.

All hydrangeas like to be planted in well-drained, fertile, loamy soil.   Whether planting new shrubs or transplanting existing shrubs, they should be planted to the same depth they were planted, either in the container or in their previous location.  The hole should be about twice the diameter of the root ball, and should have a good amount of rich, organic matter, such as compost, mixed into the planting hole.  As a rule of thumb, I replace about 1/3 of our clay soil with rich organic matter (compost)when planting shrubs, trees, or perennials that like a good, loamy soil.

 I add a couple inches of compost around the base of my hydrangeas each spring to give them that rich, organic matter they need to do their best.  This also works as mulch and helps keep weeds at bay.  Hydrangeas may also need some supplemental fertilizer to bloom their best.  A balanced liquid fertilizer can be fed in early spring and then about mid-July, or you can work an extended release fertilizer into the soil in spring and leave them be after that.  It is important in northern climates to stop feeding hydrangeas by August.  Too much fertilizer later in the summer will encourage a flush of new growth which will not have time to mature and harden off before freezing temperatures.  Young growth is very vulnerable to frost damage and death. 
 
 Hydrangeas like to be kept evenly moist, but not soggy.  When watered, they should be watered deeply and less frequently rather than a little bit more often.  I use drip irrigation and give the hydrangeas about one inch of water one time each week.  In very hot, windy weather, I may need to increase the rate or the amount to keep that even moisture, but I never go to smaller amounts of water more frequently.  Because hydrangeas tend to have shallower, more compact roots to begin with, I don’t want to encourage even shallower root development by frequent, shallow watering.

Hydrangeas rarely need any more extensive pruning than trimming out dead wood in the spring.  They can be pruned to maintain a shorter, smaller stature, if you wish.  Paniculatas and arborescens bloom on new wood, so pruning can be done pretty much anytime except when the flower heads are forming in the spring.  Rather than pruning for size, it is better to not plant a hydrangea that will want to grow to 10 feet tall in a location that will only support a six foot tall shrub.  Choose a more suitably sized hydrangea to start with, rather than having to commit severe pruning against your shrub every year.

Hydrangeas are relatively disease free.  If moisture is allowed to stand on the foliage, there may be some problems with powdery mildew or rust.  Mild cases can be treated with just good hygiene around the plant and pruning back overgrown areas to allow for better air circulation.  Severe cases may need treatment with a fungicide.

Choosing the right hydrangea for the right location and giving it the right amount of water and fertilizer will re-pay you with a gorgeous, relatively care-free, dramatically flowering shrub.

Tuesday, April 23, 2013

Hardy Hydrangeas


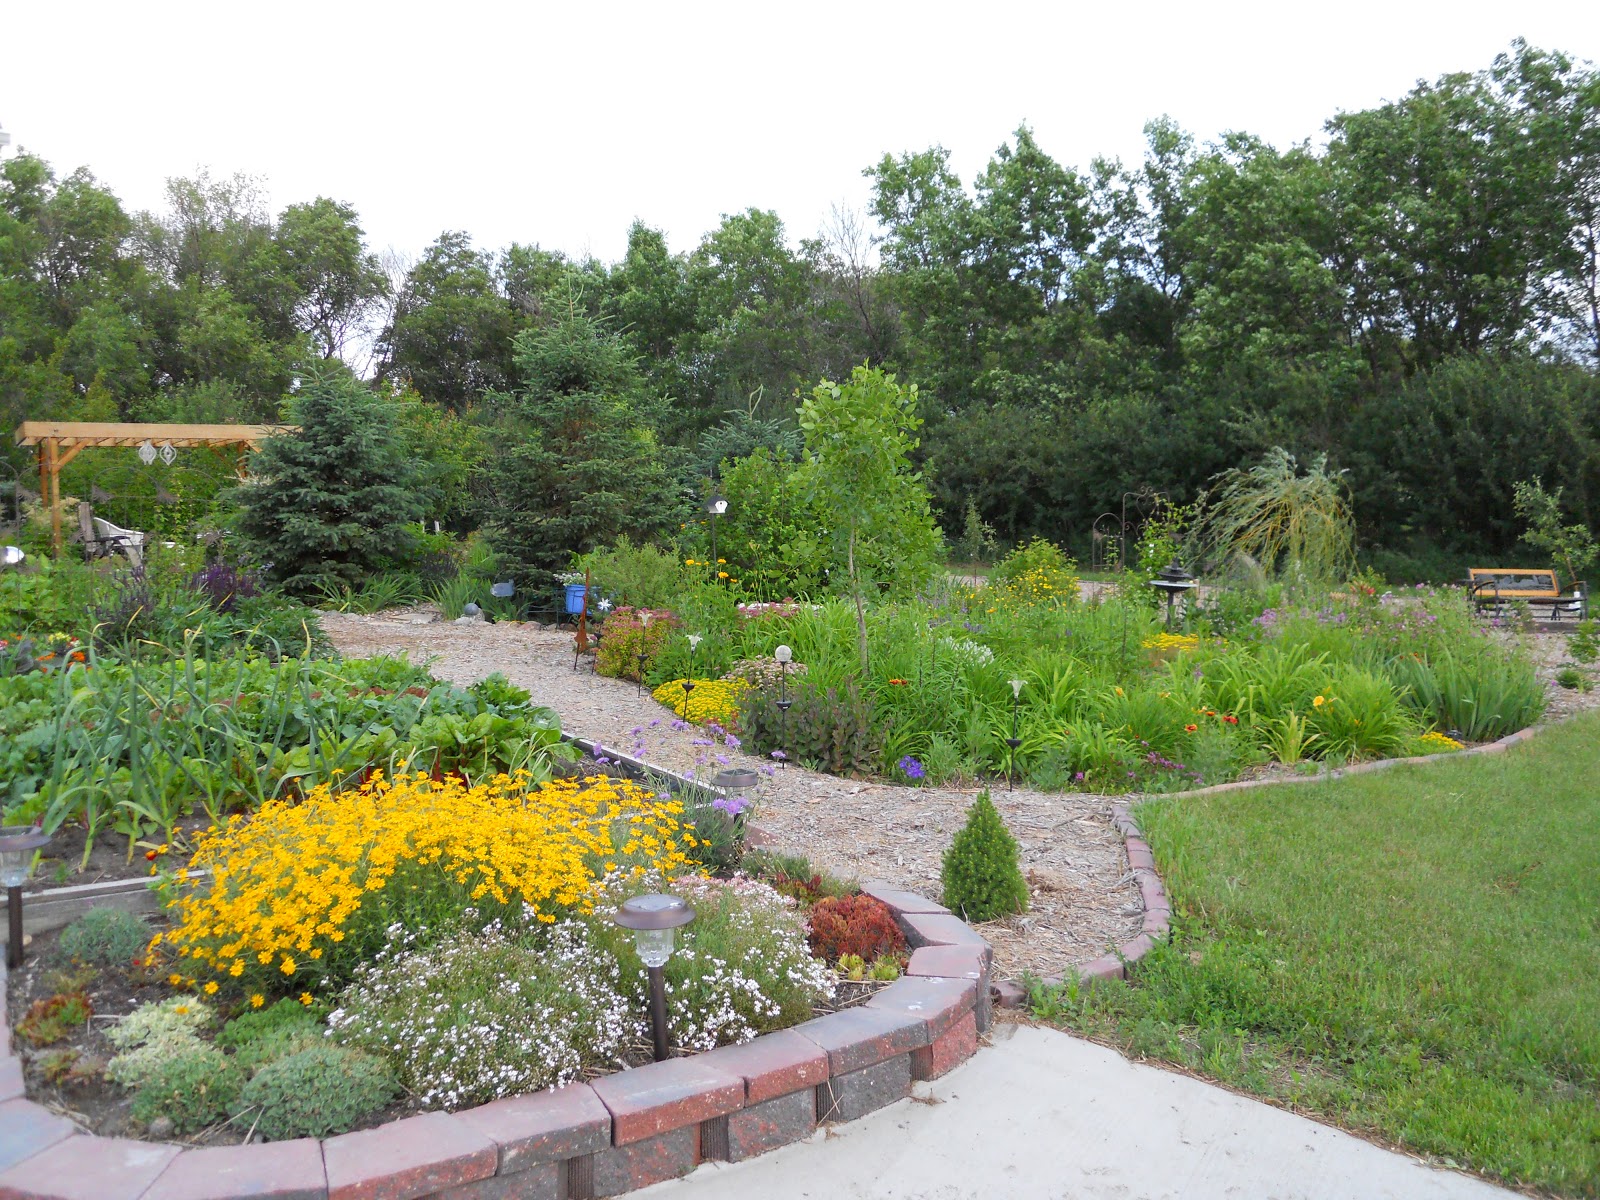
Pink Diamond Hydrangea

Hydrangeas are great flowering shrubs, if you choose the right variety for your growing conditions.  If not, both you and the hydrangea could be in for life of misery.  There are two species that do well in zones 3 and 4:  Hydrangea arborescens and Hydrangea paniculata. 

A lot of Hydrangea macrophylla or "big leaf hydrangeas" are marketed as hardy to zone 4, but in truth, they are really only reliably bloom hardy to zone 5.  These are the Endless Summer, Forever and Ever, and similar cultivars.  These lines are bred in Minnesota, which seems like it should be close enough to North Dakota to make it work here.  But, we get just enough colder actual temps that these don't always bloom well for us.  The big leaf hydrangeas are those that have the large "mophead" flowers that change color depending on the pH of the soil.  We see these in the garden centers covered with beautiful flowers, usually blue because everyone wants a blue flower.  We take them home and plant them and after the flowers we bought are spent, we never see the same plant again.  Most big leaf hydrangeas marketed for northern climates bloom on a combination of old and new wood and they set their buds on the old wood the summer before they actually bloom.  The problem is that these buds are very sensitive to extreme cold and often freeze off, unless they are heavily mulched.  In the spring, the plant will begin to grow new wood and you'll likely end up trimming the old wood off because of winter kill.  Later in the summer, you might get a few blooms on the new wood, but it won't likely won't produce like it did when it was raised in those perfect nursery conditions before it came to live with you.  In just the right spot, and with just the right growing conditions, you might have luck with the big leaf hydrangeas in zone 4.  But, then there's that rule about a plant not requiring more care than your children...

You can have beautiful hydrangeas without all the work and worry that I've found to be associated with the big leaf varieties.  Hydrangea arborescens or the smooth leaf hydrangeas are some of the hardiest, doing well even into zone 3.  There are varieties that grow from three to five feet tall and bloom reliably and profusely from June through September.  The flowers are round and come in a cream color.  The flowers stay on the stems and dry to a tan that will stay on the shrub throughout the winter.  They can also be cut and used in dry flower arrangements.  "Annabelle" is the most common cultivar and is seen in many yards throughout the northern part of the United States.  "Radiata" is very similar in growth to "Annabelle" but has a lacier appearing flower cluster.  Characteristic of these shrubs are the huge, heavy flowers that actually weigh the stems down, giving the entire shrub a weeping or draping effect. 

Hydrangea paniculata blooms later than h. arborescens, generally beginning its bloom season in July, but then persisting throughout the fall.  This species has large cone-shaped flowers that will also dry and stay on the stems throughout the winter.  There are over 30 cultivars of h. paniculata rated for zone 4 or colder. 

The oldest and most common is the "Peegee", also known as "Grandiflora".  Peegee blooms a little later, generally beginning towards the end of July or early August in my garden.  The blossoms open with  a greenish-white color, but progress from this to a creamy white to a pink tinge as they age.  These conical flowers can be as long a foot each on mature, well-established shrubs.

"Pink Diamond" is another cultivar that is reliably hardy and a good bloom producer for me.  The petals have a lacier look than those of Peegee, opening the greenish white but age through to a beautiful rich "diamond dusted" pink.

"Limelight" is another great producer in the Wiese Acres gardens.  It is a very hardy shrub that lives in a location that receives almost full sun without getting sunburned or wilting in the heat of day.  It produces dramatic cones of creamy yellow- green tinged flowers that stay that color until they are quite mature, when they turn to a more pinkish color.  Limelight grows to about six feet tall and four to six feet wide.  "Little Limelight", also sometimes marketed as "Little Lime"  has similar habits but stays a much smaller three to four feet.

"Pinky Winky" is a descendant of "Pink Diamond" but has bi-colored pink and white flowers that are held on strong stems so they stay upright, even with a full sized flower.  It is a tough, reliable bloomer and has a deeper green foliage for a striking contrast with its two-toned flowers.

"Little Lamb" is a cultivar that is marketed as a "compact" shrub.  That may be just a bit deceiving.  Little Lamb can grow to six feet tall, but generally stays within about four feet spread.  What is compact about it is the flower clusters.  Each flower is smaller, making for a much denser and more compact appearing umbel.

"Quick Fire" is a nice addition because it blooms a full month earlier than most of the other paniculatas and then blooms right through fall with white flowers that turn to a deep rose as they age.    "Invincibelle Spirit" blooms all season long with a large, deep pink blossom.  "Incrediball" is similar to Annabelle in growth but sports even larger blossoms.

One relatively new variety I tried last year is "Vanilla Strawberry" which is supposed to produce three colored blossoms of white, pink and rose through much of the summer.  The jury is still out on this one.  In spite of adequate moisture and protection from hot afternoon sun, I'd come home to find it severely wilted just about everyday.  I'm going to give it a chance to clean up its act this year, but if it doesn't do better, I think it will not be a long term addition to Wiese Acres. 

There are many other cultivars of h. paniculata and most of them are worth a try in your garden, if you have space.

Thursday, I'll discuss care of hydrangeas to give you the best results in your northern gardens.

Monday, April 22, 2013

Pre-emergent Herbicides and Mulch

Wiese Acres perennial alyssum
Even though temperatures have been 20 to 25 degrees below normal, most of my gardens still have about 18 inches of snow on them from the massive blizzard of April 14 and 15, and what isn't covered with snow is still the winter brown, the calendar says it is spring.  I am confident that at some point Mother Nature will look at her calendar and say "Oh, shoot, I missed spring.  I better get busy."

So, anticipating spring work right around the corner, I will begin to publish the Wiese Acres blog on Tuesdays and Thursdays of each week.  The beginning of spring is the beginning of a season of mostly outdoor work.

As soon as I can get in the gardens, I will be cleaning the old foliage off, sprucing up the mulch a bit, and spreading some Preen.  Preen is a pre-emergent herbicide that works quite well to keep those pesky elm and maple tree seeds, as well as wild lettuce, pigeon grass, dandelions, and other weeds from germinating in the mulch.  It doesn't keep them all down, but it sure helps. 

I also use Preen in some of the beds, but I wait until after the perennials and any favorable self-seeders have gotten started. That means I don't suppress as much of the spring flush of weeds in those beds, but it keeps the later population in check.  It's a price I gladly pay to have some self-seeded Bells of Ireland, rose mallow, poppies, snow on the mountain, and a few other annuals that add so much to the perennial beds.   If you want seedlings to be safe from the pre-emergent herbicide, you need to wait until they have at least one set of "true" leaves - leaves that really look like the plant rather than the rounded leaves that emerge first when the seed germinates.

I don't use the combination pre-emergent herbicide combined with fertilizer.  Most perennials beds, in our clay soil, don't appreciate extra fertilizer.  They get all they need from the nutrient rich clay and the composting foliage and mulch they get each year.  In sandy soil, they tolerate additional fertilizing better, but even then, they prefer to get it from additional organic matter such as compost, decaying foliage or mulch.

There are brands of pre-emergent herbicides other than Preen, but I prefer Preen because it is easy to apply and stays where you put it quite well.  I also like that I can buy it in large containers at a lower price at some of the warehouse selling clubs, like Costco and Sam's Club. 

Preen does market a corn gluten based product that is safe for use on vegetable, fruit, and herb gardens.  I find that it isn't nearly as effective as the Preen I use on the mulch, so I save my money and just pull weeds in the edibles gardens.

Happy Spring (whenever it gets here).

Sunday, April 21, 2013

Container Gardens - Keeping Them Looking Good

Wiese Acres Petunias
Even with the right soil, the right plants, proper watering, and fertilizing, container plants need grooming to continue to look their best.  Grooming consists of pinching, deadheading, and general clean-up activities to keep only the healthiest parts of the plant on display.

Pinching is the process of cutting or pinching off the growing tip of a plant.  This process is used when a plant becomes too tall and leggy;  anytime you want to encourage a plant to become fuller and bushier; of if you want to maintain a specific shape with your plant.  Pinching will also help keep in check the growth of any of those plants that want to take over your container world.

To "pinch", you simply grasp the small portion of the plant you wish to remove between your fingers and snip it off, either with your fingernails or a small shears.  For soft stemmed plants, your fingernails will work just fine, although that is why my fingernails seem to have developed a permanent green tinge by the end of the summer.  If you don't like the idea of green fingernails, or for woodier stemmed plants, like vines, a small pruning shears works great.  If you want to create a bushy plant, you might need to do this on several stem ends.  Pinching does not need to be done daily - only when the plant starts to look like it could benefit from being shortened and fattened up a bit.

Deadheading is the process of removing old flower heads from your plants.  These spent heads are not only less beautiful than the flower itself, but they can also harbor diseases and undesirable insects.  In addition, as the spent flower head remains on the plant, it begins to develop seeds.  When the plant begins to put its energy into seed development, it has less to nourish new and existing flowers so your plant may stop blooming.  Deadheading can also be done either with your fingers or with a grooming shears.  The entire flower stalk should be removed, though, so for many plants, this is most easily accomplished with a shears. 

Geraniums are one frequently used container plant that it is best to snap the spent flower stalk off with your fingers, rather than using a shears.  The geranium has a thick, fleshy stem that is easily damaged by shears and the flower stalk is attached to the stem in a way that it easily snaps off with just a little tug.


Wiese Acres Begonias
There are some plants which are considered "self-cleaning" and don't require deadheading.  Million bells, begonias, vincas and impatiens fall into this category.  Now, even though they are self-cleaing,  the spent flower actually falls off the stem and should be removed from the area to avoid harboring diseases.

Other than pinching and deadheading, checking for pests and diseases and removing the occasional damaged leaf or flower should keep your containers looking great. 

Grooming your container plants is relatively easy to do and doesn't require much time.  Whenever I walk by my containers, I snip or tug a few less than beautiful spots.  I often will carry a small bag or pail with me when I am walking the yard with my morning coffee and just pinch and drop.

Starting with the right type of container, using the right soil mix, choosing the right plants, then watering, fertilizing, and grooming appropriately will help you build containers that will provide beauty and enjoyment all season long.

Saturday, April 20, 2013

Container Gardens - Proper Fertilizing

Wiese Acres
Container gardens require frequent watering and have a limited amount of soil, so they require regular fertilizing to keep the plants healthy and performing well the entire season.  Fertilizing can be accomplished in a number of ways.

Liquid fertilizers mixed with water according to label instructions should be applied during watering at least every two weeks, or with a half strength fertilizer solution every week.  Fertilzing is best done when the soil in the container is somewhat moist to avoid damaging vulnerable plant roots.  I like to use a fertilizer that has a higher content of phosphorus, the "P" component of the N-P-K formulas, for containers of blooming plants.  Phosphorus is what promotes blooming and I want my container gardens to bloom profusely.  A higher phosphorus content fertlizer is also preferred for vegetable container gardens to promote more energy for fruit and vegetable production.  Higher nitrogen (N) formulas promote foliar growth, so they are best for herb and other foliage gardens.  For my shade containers where I use hostas, coral bells, and ferns, I also use a higher N formulation.

As an alternative to fertilzing every week or two, slow -release fertilizers can be worked into the soil when the container is planted or anytime after.  Slow-release products contain water soluble fertilizer enclosed in a semi-permeable resin coating, either in pellet or stick forms.  When the coated pellets or sticks come in contact with water, small amounts of the nutrients are released into the soil and made available for the plant's use.  Whenever the container is watered, it is fertilized at the same time.  Most of these products are designed to release nutrients for your plants for three to four months, which in North Dakota will take you through an entire growing season. 

Remember I told you I sometimes use hybrid tea roses for the "thriller" in some of my containers?  I discovered a very effective, easy way to fertilize because of that.  I use slow release rose fertilizer spikes with a 9-12-9 formulation for the roses planted in my gardens.  One year, I had an extra spike, so I broke it into two pieces and placed them on either side of the hybrid tea rose in one of my large containers.  The million bells that I used for the "filler" in that container outgrew and outbloomed anything else I had in containers by at least two to one.  And the best part was, I didn't have to do a thing more to feed that plant for the entire season.  That's my kind of container gardening!

If you use liquid fertilizer, you should occasionally use plain water and soak the root mass to the point where water runs freely from the drainage holes.  This process, called "leaching" will flush out excess fertlizer salts and keep them from burning the leaf edges or roots of your plants.

Some potting mixes come with fertilizer already mixed in with the soil.  These are slow-release fertilizers so it is important not to add more slow-release fertilizers to the mix until after the three to four month period of effectiveness.  Too much of a good thing is too much for your plants to handle.  I do find that these don't always promote the level of blooming I want in my flowering containers, so I will add a high P liquid fertilizer to my watering routine about once a month or so. 

When fertilizing, it is always important to follow the dosing instructions on your particular fertilizer.  Over-fertilizing will burn the plant roots and render them unable to draw nutrients into the plant.  Under-fertilizing will keep you from enjoying your plants to their maximum.  If you have to err on one side or the other, you are much better off under-fertilizing.  That can be corrected by simply adding a little more.   Over-fertilizing is difficult to correct.  Once the leaf edges or roots are burned, you can't do anything to fix that.  You can help prevent further damage by leaching the excess fertilizer out of the soil.

Proper fertilizing will help keep your containers lush and beautiful for the entire season.