Thursday, January 30, 2014

Sweet Corn- Su? Se? Sh-2? What Does It All Mean?

Dad
My Dad loved to grow just about everything, but I do believe sweet corn was his favorite.  When I first started to help my Dad in the sweet corn field, what kind of  sweet corn to plant wasn't much of an issue.  I don't recall the variety name, but it was always Trojan brand.  That was the brand that produced the biggest, juiciest, sweetest ears.  Dad's sweet corn patch was always planted out in the fields, safely away from the field corn, but with plenty of space.  I also don't recall anymore how many acres he planted, but it seemed like the sweet corn field went on and on forever. 

When the corn was ready, word went out around the community, and people would come from all the neighboring towns to buy sweet corn by the bushel.  I was the youngest in the family, and by default, the job of selling that sweet corn fell to me.  People would drive in the yard, I'd leave a note on the door for future customers to come on out to the field, along with directions on how to get there, and I'd jump in with the customer and we'd go pick.  I remember the price going from $1.75 a bushel early on in my sales career to $3.75 the last year I was in charge of sales.  That kept me busy for a couple weeks just before school started each summer. 

That corn was a standard (su) cultivar.  It had the traditional flavor of sweet corn and that nice, crisp yet tender texture.  The downside of that corn was that when it was "ready", each ear lasted only a couple days in the field and then it started to get a little too firm and too starchy.  Once picked, it really was only at its best if cooked almost immediately.  In su cultivars, the sugars in the kernels begin to turn to starch right away and it quickly loses its sweetness.  Close to suppertime each day during corn season, I would hop in the 1936 Hudson Terraplane that was our farm knockaround vehicle, prop myself up on pillows so I could see over the top of the steering wheel,  and drive to the field to pick enough for a big kettle full of corn.  We'd clean that corn and throw it in a kettle of boiling water as soon as we got it home.  There was nothing like that corn, dripping with melted real butter and a little dab of salt and pepper.  Yum, yum, yum!

Times have changed though, and people no longer are able to guarantee that those ears of corn will be cleaned and cooked within minutes of picking.  So, new cultivars that hold their quality longer have been developed over the years.  These are the sugar-enhanced (se) and the shrunken-2 (sh-2) varieties.

The sugar-enhanced (se) cultivars have a higher sugar content than the su cultivars but not as high as the sh-2 cultivars.  The se varieties have a nice, tender kernel and retain their sweetness for longer after picking than standard varieties, making them more suited for commercial sales.  These varieties generally are planted about a week later than su varieties and can be stored for a couple days after picking.

The sh-2 varieties are called that because of the shrunken appearance of the seed when it is dried.  These are also known as the "super sweet" varieties.  The sh-2 varieties are about twice as sweet as su varieties.  They need to be planted later than even the se varieties, as they need warm soil temperatures to germinate.  The ears stay fresh in the garden longer than other varieties, as well as having a longer shelf life after picking, sometimes staying sweet for as long as a week after picking if kept in the right conditions.  The downside of the sh-2 varieties is that the kernels tend to be a little tough and they need to be isolated from all other corn varieties to keep from cross-pollinating.

Synergistic varieties are a combination of se and sh-2, with about 75% se kernels and 25% sh-2, combining the sweetness and keeping qualities of the sh-2 varieties with the tenderness of the se kernels.  Synergistic varieties also need to be separated from se and standard varieties.

All sweet corn varieties need to be isolated from field corn, popcorn and ornamental corn, but sh-2 varieties need to be separated from se and standard varieties by about 250 feet and out of the path of prevailing winds.  In the average home garden, this isn't always practical so the choice between the  sh-2 or the se and standard varieties needs to be made.  Personally, I prefer the se varieties because of the good sugar content while still having tender kernels.  The se varieties seem better for canning and freezing, as well.

I plant a variety of se and su varieties with varying maturity rates.  That way, we can enjoy that delicious fresh sweet corn for an extended period of time.  I have some old standby favorites that I plant every year.   "Bodacious" is my favorite se variety.  It produces ears with large, sweet, yellow  kernels in about 80 days.   Delectable is another favored se variety.  It is a bicolor, with white and yellow kernels, very sweet and tender.  It produces an average of two to three good sized ears per stalk and matures in about 84 days.  For an earlier se variety, I sometimes plant Sugar Buns, which matures in about 75 days, with 7 1/2 inch ears covered with sweet, creamy yellow kernels.

Early Xtra Super Sweet and Northern Xtra Sweet are sh-2 varieties that do well for me and produce very early, in about 65 to 70 days.  I like to plant just a small patch of this to get us started on the sweet corn season.

We plant the bulk of our corn to mature about the third week in August.  It's become a tradition that Wiese Acres throws a big barbecue supper and corn feed one Saturday evening during sweet corn time.  We invite about 150 people to share summer's bounty with us and enjoy a beautiful summer evening with good company, leisurely strolls through the gardens, and, of course, all the sweet corn we can eat, dripping with real butter and lightly sprinkled with salt and pepper.

Hmm.  My stomach is growling just thinking about it! 


Friday, January 24, 2014

Chasing the Winter Blah Away

It feels like it's been a long winter, and unfortunately, here in North Dakota, we have a long ways yet to go.  It's certainly been a volatile one so far... 40 degrees above zero one day; then 20 degrees below zero the next day.  We've had several episodes of freezing rain followed by snow and wind.  Oh, yes, we've had wind.  A few days ago, we had several hours of sustained winds at 50 miles per hour and gusts clocked at upwards of 75 miles per hour.  It's downright irritating.

There's something about being able to surround yourself with a sea of vibrant, growing green, though, that helps even the coldest, windiest day seem not quite so bad.  I love my four season room that allows me to do that.   This morning, I looked at the thermometer that hangs in my kitchen before going out to do my "chores" with the animals.  It showed negative 13 degrees.  Brrrr.  I headed to my four season room, where the temperature was a balmy 72 degrees, the humidity was a comfortable 55%, and the only wind came from the ceiling fan.  Now, that's my kind of climate.

Some of the plants are starting to show the strain of the short days of winter - leaves are looking a little pale, growth has slowed or stopped, and those sun-loving blooming plants are noticeably short of colorful blossoms.  Sometimes, when we are having a particularly gloomy stretch of days, I add some high intensity grow lights to help them along.  I set the lights on a timer for 12 to 15 hours a day and let the plants think that spring is closer than it really is.

The more shade tolerant plants seem to be doing just fine, and I'm pretty confident that those that are looking a little peaked now will perk up as the days begin to get noticeably longer and we leave the winter season behind and head into spring.  Until then, they are a whole lot greener than anything outside.


Friday, January 17, 2014

Over-Wintering Tender Roses Indoors

Each spring, I buy some cheap hybrid tea roses - you know the ones that come wrapped in sawdust and cardboard paper, then stuffed in a plastic tube?  I plant those in containers as my "thriller" and enjoy long-stemmed tea roses for the summer.  In the fall, I usually just let them die a natural death in the long, cold winter. 

Last spring I spent a little more on my container roses.  For my daughter's wedding, I purchased three more expensive roses:  Bride's Dream, Maid of Honor, and Promise.  They did beautifully and I decided they were worth trying to save.  Initially I planned to trim them back, remove them from the containers and bury the entire rose under several inches of soil, topped by a thick layer of mulch.  This is a process commonly known as the "Minnesota Tip" method and many rose gardeners in harsher climates swear by it. 

That plan didn't quite work out for me.  We had a nice, long Autumn and those roses stayed green and blooming throughout September.  Then, in early October, all my gardening plans got derailed by an early wet snow that caused extensive damage to many of our trees and resulted in many, many hours of clean-up work.  Before I knew it, the soil was frozen and there was no chance left to perform the "Minnesota Tip".

Most rose experts will tell you not to attempt over-wintering roses indoors.  They are prone to pests and disease and just don't do well.  Since I knew they were doomed for sure if I left them outdoors, though, I decided I had nothing to lose.  So, I brought them, pot and all, into the garage, where the temperature remains at about 50 degrees over the winter.  I placed them in a protected area where the frigid air that comes in when the garage door opens is less likely to reach them.

I trimmed the bushes back to about 10 inches, gave them a good bath with a sharp spray from the garden hose to knock off any hitch-hiking pests, and then set them up under grow lights on a timer for 15 hours per day.  I decided to be pro-active about pests and diseases, so I scratched a little bit of systemic houseplant pesticide into the top of the soil.  I watered them well and kept them spread far enough apart so there could be good air movement around each plant. 

Initially, I watered them about twice a month, keeping them a little on the dry side.  In early December, they started to grow.  Shortly before Christmas, I noticed that they were developing buds.  Since they clearly wanted to grow, I began watering more frequently.  To help the buds develop, I started giving them a basic rose fertilizer every other watering. 


Last week, I picked a bouquet of beautiful roses.  Let me tell you, that was a great feeling as the actual temperature outside was hovering around negative 20 degrees with wind chills creating a "feels like" temperature of negative 48. 


I don't know if this method will always be so successful but as of now, I have healthy, happy, blooming roses and I have great plans for them come spring.

Friday, January 10, 2014

Transplanting Orchids

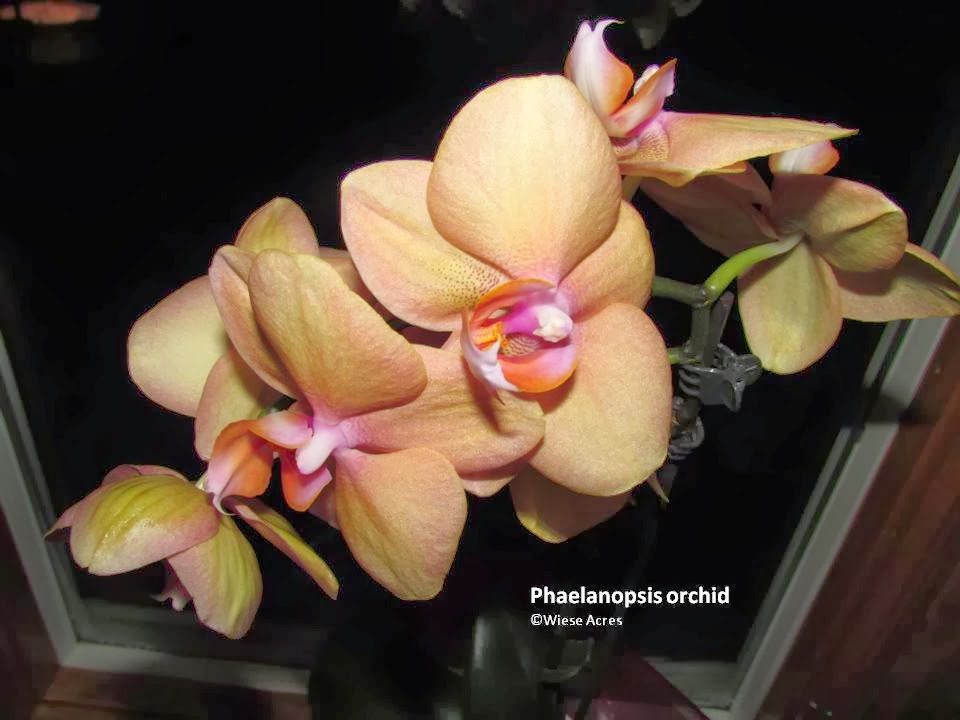
Remember those orchids I just couldn't resist when I walked through the garden center last year about this time?  Well, they've been thriving and it appears it's time to give them a larger place to grow.

Orchids benefit from regular transplanting.  In their native environment, orchids are epiphytes, or air plants.  Their roots hang from trees in the jungle, exposed to air and high humidity.  When potted, they need to be in a mix that allows lots of air to get to the roots and retains moisture without being "soggy".  As potting mix decomposes, it packs in more tightly around the roots and limits the amount of oxygen that is available to the roots.  As it decomposes, it also retains more water and may cause root rot.

If an orchid's health begins to decline, it is likely in need of repotting.  Repotting does stress the orchid, so it's best to not allow the decline to become too marked before making the decision to repot.  Another indication that it's time to repot an orchid is when you see the roots begin to climb out and spill over the sides of the pot. 

The best time to replant an orchid is after it has completed its bloom cycle and is starting to put out new root growth.  It's not advisable to transplant plants when they are in bloom, but if the potting medium is worn out and retaining too much moisture, it might be better to take the risk of losing a few blooms than to risk losing the entire plant.

Using the correct potting medium for the type of orchid is important.  The potting medium is what encourages root health, and no matter how beautiful the leaves of the orchid may look, if it does not have a good, healthy root mass, the orchid will not produce the beautiful flowers that we covet.  Orchids can not be planted in regular potting soil.  The most common potting mediums are a mix of bark or coco husk chips, charcoal, and vermiculite or aliflor (a lightweight clay type material).  Orchids can also be planted in peat moss, but watering must be done very carefully with this type of medium as peat moss holds more moisture for longer periods of time.  Once the correct potting medium is chosen, it should be soaked overnight before using it for transplanting.  This will give the orchid roots a nice, moist environment right from the start.

 Orchids do not like to be in too large a pot.  If the pot is too large, there aren't enough roots to absorb the moisture from the potting mix, causing it to stay too wet for too long.  Unlike many other plants, an orchid won't increase root growth to take up the extra space and  moisture.  Too much pot space leaves the roots setting in a soggy mess and at risk of rotting.  An orchid that is in the correct size pot should dry out and need watering about once a week.  If you are watering with the recommended amount of water and the potting medium is staying wet for much longer than that, it is probably in too large a pot.

The root ball should be nice and wet when removed from its pot for transplanting.  This will help loosen the roots from the sides of the container and loosen the potting medium from around the roots.  This can be accomplished by soaking the entire pot in room temperature water for a few hours before attempting to remove them from their containers.

Once the roots and potting medium are good and wet, lift the entire root mass gently upward.  If roots are still clinging to the sides of the container, use a very sharp, clean knife to run around the inside of the pot to loosen them. 

Once you've removed the orchid from its current pot, you'll be able to tell if it needs a larger pot or not.  If all the roots are in good condition and fill the pot, then it is probably ok to go up one pot size.   If the roots are in poor condition, they should be trimmed and put back into the same pot size.  My orchids were in 4 inch pots, with nice, healthy roots, so I transplanted them into 5 inch pots.


The old potting medium should be gently loosened from around the roots.  The roots should be rinsed with clean, room temperature water  and any unhealthy roots trimmed away with a sharp scissors or knife.  In the photo with the loosened roots, you can see that the ends of some of the roots had lost their nice green color and turned almost white.  This indicates that those root ends had been receiving too much water.  Those were trimmed back to the nice, healthy, firm green part of the root before transplanting.

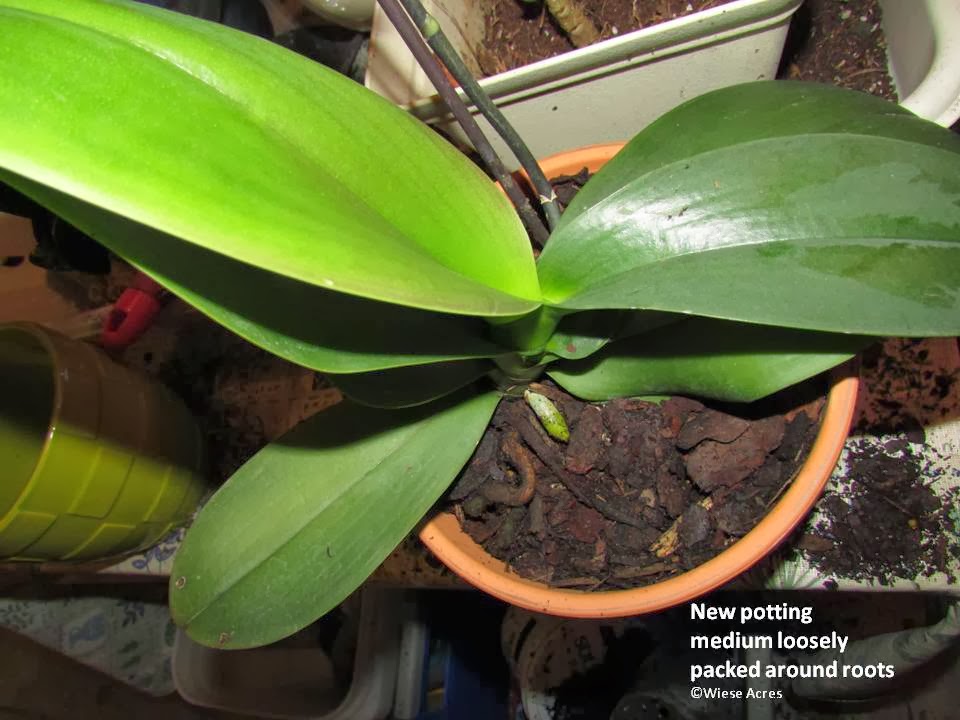
I put a thin layer of potting medium on the bottom of the new pot and then spread the roots evenly around the pot.  Some sources suggest using broken pot shards or gravel, but this isn't really necessary if you have a shallow, well-draining pot.  The orchid should be planted at the same depth it was in the old pot and more or less potting medium can be added to the bottom of the container to accomplish this.  Fill potting medium in around the root mass, gently pushing medium between the roots with your fingers.  Fill around the edges of the pot until the orchid no longer "wiggles" in the pot.  The roots need to be secured in the potting medium to encourage new growth.


A stake should be used to support any flower stalks or floppy leaves to avoid movement that places stress on the root mass. 


The newly transplanted orchid should be set in a protected place out of direct sunlight for a week or so after transplanting.  After that, it can be moved back into a location with bright light but not direct afternoon sun and watered normally.   Then watch for the new flattened stems with the little "mittens" on the end - that's the flower stalk that will soon be covered with blossoms.


Friday, January 3, 2014

Amaryllis for Valentine's Day

Most people view amaryllis (Hippeastrum spp.) as a Christmas season plant and they do beautifully in that capacity. I like to spread my winter color out a bit, though, so I concentrate on the readily available beautiful poinsettias for Christmas and coax my amaryllis bulbs to put forth their best efforts around Valentine's Day.

That means I need to start preparing them right around Christmas time. Generally, an amaryllis will put forth new growth within a week or so after planting and bloom within about six to seven weeks. They are easy to grow and bloom beautifully for a period of several weeks, with each individual blossom lasting up to a week.

 Amaryllis bulbs can be saved from year to year. When they finish blooming,  continue to water and fertilize them regularly and as soon as all danger of frost is gone, move them to a sheltered spot outdoors.  Continue to water and fertilize them regularly throughout the growing season. When hard, killing frost is predicted in the fall, bring the potted amaryllis in, place them in a cool, dark spot and stop watering them. Once the foliage has gone dormant, trim it off and store the bulbs for about a six week rest period.  

Around Christmas, bring the bulbs out of storage. If the bulbs are not crowded in their pots, add a top-dressing of compost to the pot, just enough to fill the container to within about one inch from the top and still leave about the top one-third of the bulb exposed.  Place the pot in a warm, sunny location, and begin watering regularly. If the bulbs are crowded, or the soil is very compacted, they should be re-planted.

Remove the bulbs from the old container, shake off the old soil and prune any roots that are not nice and plump, solid and white.  Sometimes, there will be smaller bulbs growing around the sides of the old bulb.  These bulbs can be gently separated from the parent bulb and potted on their own.  They may not bloom the first year or so, but eventually you will have another beautiful amaryllis plant.


The bulbs should be planted in a container large enough to allow the roots to be spread nicely.  The circumference of the pot should allow about 1 to 1 1/2 inches on all sides of the bulb.  Fill the container about 1/3 full of good quality potting soil, then place the bulb on top, spreading the roots on top of the soil.  Cover the roots carefully and fill the container with potting soil until only the top 1/3 of the bulb is exposed.  The small "baby" bulbs can be planted individually or in groups in container, following the same procedure as for the parent bulbs.


After planting, water and place the container in a warm, sunny location and wait for the flower stalk to emerge within a few weeks.  Typically, the flower stalk emerges before the leaves begin to emerge and the flowers will bloom a few weeks later.

Thursday, December 19, 2013

Christmas Trees and Their Multiple Uses

I love Christmas.  I love the decorations, the music, the feelings, the crazy hustle bustle of the season.  I don't even really mind most of the fake evergreen smells that come out in candles, air fresheners, little scent sticks to hang in your artificial tree to help you pretend it's real, and a variety of other means.  But there is nothing I love more than the smell of fresh, real Christmas trees. 

When artificial trees first came on the market, they were marketed as a more environmentally friendly way to celebrate the season, rather than cutting down all those real trees.  What we didn't talk about was the fact that those artificial trees don't look good forever.  After a few years, they become tattered and ratty looking and we decide to shop for a new tree.  Those tattered trees end up in the landfill, where they take many, many decades to decompose.  They use up beneficial nutrients from the soil as they are decomposing, however, they don't add anything back to the soil in the process.   That's a lose-lose.

Real trees are a renewable resource.  Across the country, for every real evergreen harvested, at least three new seedlings are planted.  Now, being a gardener, I know that not every one of those seedlings lives and grows to become someone's Christmas tree a few years down the road.  But, those that do survive serve multiple purposes.  As they are growing, they are helping to clean and oxygenate the air around them; they are providing shelter for wildlife and birds; they are beautifying the fields in which they are grown; they end up beautifying our homes after they are cut; and finally, they can help us out with some of our winter chores in the gardens.  That's a win-win.

Once it's time to remove the tree, we bundle it up in a huge plastic bag and carry it out to the garage.  There, I unwrap it and start the work of cutting off all the branches.  The bare trunk gets thrown out into the wood pile.  The branches then become mulch for the roses, perennials, young trees, or whatever else needs a good sturdy layer of mulch that isn't likely to be blown around by the North Dakota "breezes".  The branches catch the snow and make a nice insulating layer over the vulnerable plants, but they don't become packed down like other mulches can.  This allows more oxygen to get to the plants and creates a better overall environment for them.  In very harsh winters, if we have any birds that decide to stay in the north country over the winter months, I will place suet packs or pans of sunflower seeds or safflower seeds in amongst the piles of branches and the birds can safely enjoy their own winter buffet.

Another benefit of using the evergreen branches for mulch is cat control.  My kitties are pretty good about not using the garden areas for their beds or litter boxes in the summer, but in the winter, they just look for whatever snow is easy to dig in.  They are not inclined to dig around in the prickly, stickery evergreen branches, though, so I can keep them out of vulnerable garden areas.

When spring arrives, I give the clump of evergreen branches a good whack or two to knock loose needles down to the ground, where they will become rich compost over the course of the summer.   The branches and any clinging needles get tossed into the compost pile.  The trunk of the tree, minus the branches, gets cut into firepit size pieces so the enjoyment of that Christmas tree can last well into the summer.  The trunk can also be chipped and used for mulch in the gardens.

I am not anti- artificial tree, (I love Christmas enough that I decorate several Christmas trees each year and some of them are artificial trees) but all in all, that real Christmas tree is a great investment.  And you just can't replace that true evergreen scent.

Friday, December 13, 2013

Poinsettias and Animals

Twerp (he's not really a grumpy cat - just looks that way)
It's commonly thought that poinsettias are poisonous and will kills animals, especially cats, if they ingest them.  A member of the euphorbia or spurge family, poinsettias will exude a white, milky sap when the leaf or stem is injured in any way.  That sap is very irritating, causing burning of the mouth with excess drooling, and may cause some vomiting, but it does not commonly kill animals. 

Many animals know intuitively what will harm them and they will stay away from things that are not good for them.  Once in awhile, one will decide to "test".  We had a cat who tried to have our poinsettia for a snack.  Taffy was a cat with above average intelligence - about everything but plants.  She never met a plant she didn't think she needed to taste.  So, when I brought the poinsettia home, she watched it carefully until I left the room.  Then she quietly stalked it for awhile, sneaking ever closer and closer.  When she determined that the time was right, she pounced and got a big bite of a nice, big, red leaf.  Soon, she was drooling, shaking her head, and meowing pitifully.  The symptoms went away in a surprisingly short period of time, but in all of Taffy's 21 years, she never forgot that first taste of poinsettia.  Every year, when those red plants came into the house, she gave them a wide berth and would slink into another room  and sulk until she was sure it wasn't going to attack her.

Llilies are commonly seen in holiday bouquets and can be very toxic to animals.  Even small amounts of a lily can cause kidney failure in cats.  Virtually all plants in the lilium family are toxic to animals.  A common one seen at Christmas time is the amaryllis and with their strappy, floppy leaves, animals sometimes have difficulty resisting them.  Daffodils and all other members of the narcissus family are also highly toxic to animals and should be kept away from them.

Holly berries, mistletoe, and rosemary can also be toxic to dogs and cats. When Christmas  holly is ingested, it can result in severe gastrointestinal upset.  If ingested, most dogs and cats smack their lips, drool, and shake their heads excessively.   American mistletoe is less toxic than the European varieties, but is still harmful to pets   It causes mild gastrointestinal irritation if ingested in small amounts.  In large amounts, low blood pressure, ataxia (walking drunk), seizures and death have been reported.

Another hazard to pets this time of year is the Christmas tree.  Christmas trees are mildly toxic. The tree oils can  be irritating to the mouth and stomach, causing excessive drooling or vomiting. The tree needles are not easily digested either; possibly causing GI irritation, vomiting, gastrointestinal obstruction or puncture of the gut itself. The degree of reaction depends on how much is consumed. Many times, pets don't consume mass quantities of tree material before they figure out it isn's setting well with them. 

With a little bit of planning ahead and some extra watchfulness, it is possible to enjoy both the plants of the holidays and pets.  Keeping toxic plants or flower arrangements in a separate room where kitty or puppy is allowed to be unsupervised is the best way.  For puppies, setting it on a table or stand that he can't reach will work also.   A few minutes of precautionary measures can save you a lot of heartache, especially with the more toxic plants like lilies, mistletoe, and holly.

Tuesday, December 10, 2013

Poinsettia Care

It's that time of year when the gorgeous blooms of the poinsettia (Euphorbia pulcherrima) plant are everywhere.  As a thank you gift for the preparation work I do for our company Christmas party, my employer provides me with a beautiful huge poinsettia to brighten my home.  My challenge is to keep it as beautiful throughout the season as it was when it arrived.

The first challenge is simply getting it home.  Since Christmas happens in December and December happens in the depths of winter in North Dakota, poinsettias don't much appreciate being transported in any manner that involves going outdoors.  Any exposure to temperatures below 60 degrees is likely to cause leaf drop.  Since the bright colors of poinsettias actually come from the leaves and not the flowers, leaf drop is a big deal!  Exposure to temperatures below freezing, even for a very short time, will cause the leaf edges to blacken and curl, and may kill the plant. 

Poinsettias should be securely wrapped, preferably in a layer of paper, then a layer of plastic.  The packaging should completely enclose the poinsettia so no drafts reach any of the plant.  The vehicle in which the plant will be transported should be warm and parked as close to the door as possible to avoid having the plant exposed to cold temperatures for any longer than absolutely necessary.

Once home, the plant needs to be placed in a sunny location that is free from drafts, either hot or cold.  A south or west window is ideal, but a poinsettia may do well in an east window.  North windows generally will not provide sufficient light to keep a poinsettia looking its best.  The plant should be close enough to the window for good sun exposure, but not so close that the leaves touch the window pane or any cold air coming off or through the window reaches the plant.

Ideal room temperature for poinsettias is 65 to 70 degrees during the day and slightly cooler at night, however, not below 60 degrees.  Too cool a location encourages root rot and leaf drop, neither of which are conducive to a long-lived beautiful poinsettia.

Correct watering is also critical to a poinsettia's health.  If allowed to get too dry, a poinsettia will drop its leaves prematurely, leaving you with homely, blah green stalks.  Too much watering leads to root rot disease, which will cause collapse of the entire plant.  It is best to check the soil in the poinsettia pot daily, especially in homes that must be heated for the winter.  Winter air is more arid anyway, and the process of heating it from frigid cold to a temperature comfortable for humans and plants draws even more of the moisture from the air.  When the top half inch or so is dry to the touch, the plant should be watered until water drains freely from the drainage holes in the bottom of the pot. 

And here, it's wise to say a word about those beautiful foil wrappers that cover the not so beautiful green or black plastic pots.  A horticulturalist will tell you those wrappers should be removed and thrown away.  A home decorator will say "no, no, no.  You can't spoil the beauty of the poinsettia with that ugly green (or black) pot!"  Since there is a little bit of the characteristics of both a horticulturalist and a decorator in me, I've learned to compromise.  I remove the foil wrapper briefly, use a knife or scissors to poke a few drainage holes in the foil, replace the foil around the ugly pot, then set the whole thing in a decorative saucer. 

The recommended water amounts vary based on the size of the pot.  The following table can be used as a guide:

Pot Diameter (inches)    Fluid Ounces of 
                                         Water per Watering .     

4                                               6
5                                               9
6                                             12
7                                             16
8                                             20

Keeping the right amount of moisture, giving the poinsettia enough sun, and keeping it free from drafts will provide you with those beautiful red, or pink, or even white leaves well into the spring.                 

Thursday, December 5, 2013

Winter Blossoms

The temperature is minus 9 degrees, the snow is falling and the wind is blowing.  Brrr.  I thought it might be a good time to share some winter color with others who are living in the deep freeze right now.  There are a number of houseplants that give us beauty and bright colors for the dreary days of winter.   Here are just a few to brighten your day.  I hope you enjoy looking at them as much as I do.


Tuesday, December 3, 2013

Chlorosis in African Violets

A couple months ago, I noticed yellowing of the older, outer leaves of my African violet.  The leaves were plump, flexible, and had no signs of insect infestation.  That was a good sign.  The fact that the leaves were yellow instead of green was not - yellow leaves are not normal on an African violet.  I thought I knew what the problem might be, but I did some research to make sure I wasn't missing something.
African violet with chlorotic leaves
Yellowing of African violet leaves can be caused by a number of things.  A common cause of lower leaf yellowing is root rot.  In addition to the yellowing, root rot causes the leaves to droop and generally look unhealthy.  Eventually those leaves become mushy and brown.  Other than being the wrong color, my violet's leaves looked pretty healthy, so I was pretty sure I could rule out root rot.

Yellowing leaves can also result from too much light.  This usually causes the leaves to be smaller, look "crinkly" and feel leathery.  That wasn't the case with my violets.  This violet was furthest from the light source and violets closer to the window were not affected, so I didn't think it was too much light.

Yellow leaves can also be a result of too little light, however, this generally involves rangy, lanky growth of the whole plant.  My plant is low-growing and compact, so it is probably getting sufficient light.

There is a condition in African Violets which are cultivated under grow lights.called leaf bleaching. Lighter areas with a slight pinkish tone develop on the leaves directly exposed to the light. The only way to treat this condition is to stop using grow lights and begin using sunlight.  My violets grow in natural light in an east window, so leaf bleachng is ruled out.

That left me a nutrient problem to consider.  African violets need a good, well-balanced feeding regime to do their best.  They also need frequent re-potting, about twice a year.  I admit it - I didn't feed my indoor plants very faithfully over the summer months, so it's likely my violet is suffering from chlorosis.

Chlorosis presents itself as a pale discoloration of foliage. The leaf veins often retain their color while the rest of the foliage loses the green.  This usually results from a lack of nitrogen, potassium, sulfur and/or iron available to the plant. It can also result from a calcium deficiency, however, that is usually first noticeable in new growth, or the leaves in the crown of the plant.  Nutrient deficiency occurs because the plant isn't getting enough fertilizer, or enough light to conduct photosynthesis to use the available nutrients.   I'd already established that the lighting was ok, so the likely culprit seemed to be malnutrition - I was starving my African violet! 

My violet was probably hungry simply because I wasn't feeding it sufficiently, however, another common cause of chlorosis in African violets is "pH lock-up." This happens, when the pH of the soil is either too high or too low, and the plant isn't able to utilize the nutrients.   So, even though the mechanism is different, the plant is still starving.   Abnormalities of pH come from poor quality potting soil which starts off with too much or too little of one ingredient or another.  Another common cause is watering with softened water, which increases the fertilizer salts that collect in the soil.  I don't use softened water so that can be ruled out as a cause.  I am guilty of using a cheaper potting mix that I knew right from the start was not very good quality, so that, combined with my failure to feed, could be the culprits.

The only way to diagnose pH lock-up with any certainty is to pH test the soil and the water run-off  after fertilizing.  I didn't want to take time to do that and since I was pretty sure it had something to do with nutrients, it didn't really matter if it was from lack of fertilizing or if it was from pH lock-up.  The treatment was going to be the same.  I haven't re-potted my violets for about nine months, so it was clearly time to do that.

I carefully removed the violet from the pot and knocked as much of the old soil off the roots as I could without causing root damage.  Then I re-potted in fresh, quality potting mix specially formulated for African violets. 

I didn't divide the violet, as it hadn't grown much and I didn't want to stress it anymore than it already was., so it didn't need a different sized pot.  After allowing the roots to settle in for about a week, I began a fertilizer regime with a special formula for African violets that is urea free and balanced with equal amounts of N-P-K.   With weekly fertilizing, it is important to use ONLY the concentration of fertilizer recommended for weekly dosing.  It is tempting to use higher concentrations of fertilizers to make up for my previous neglect; this will put the plant into shock and potentially burn the foliage, possibly even killing the plant.

Once treatment for chlorosis caused by nutrient deficiency is started, the plant will be begin a fairly dramatic recovery.  Within just two weeks of replanting and one week of starting a good, healthy fertilizer regime, my plant is already beginning to "green-up".  While there is still a yellow tint to the oldest leaves, they are beginning to show more color and the center leaves are becoming a darker green.  And, I promise that next summer I will try very hard to be a better African violet owner...

Wednesday, November 27, 2013

Mulching Strawberry Beds for the Winter

Mulched strawberry bed
The very last gardening job performed before I can go into my version of winter hibernation is mulching the strawberry bed.  Even though strawberry plants are rated as winter hardy to zone 3, they need some additional protection to bear fruit consistently in any climate where temperatures drop below 20 degrees.

Strawberry flower buds, which produce next year's crop, begin to form in late summer.  If they are left exposed over the winter, the cold temperatures damage the flower buds, leading to poor or no fruit production the following summer.  The crowns of strawberry plants are also susceptible to frost damage if left exposed, which can ultimately kill the plant.   And, finally, with the many freeze and thaw cycles in our winters, mulch protects the plants from actually being "heaved" out of the ground with the expansion and contraction of the soil during freeze and thaw cycles.

Knowing just exactly when to place the mulch on the strawberry bed can be pretty tricky.  You don't want to cover the plants with mulch while they are still actively growing as it can cause mold and rotting to occur.  The strawberry plants should be exposed to cold temperatures long enough to go through a "hardening off" process which makes them less vulnerable to the freeze and thaw cycles of winter and to crown rot.  They should not be exposed to prolonged periods of temperatures below 20 degrees and temperatures in the low teen's can kill the flower buds and even the crown of the plant pretty quickly. 

As a rule of thumb, once the first half inch or so of soil is frozen, or when the temperature is consistently dipping into the mid-20's, it's time to get the mulch out.  Here, this can happen as early as mid October, or as late as early December.  This year, it happened in mid-November.  We had a cold snap that froze the ground and started the actual temps dipping dangerously low.  Fortunately, Mother Nature cooperated and last Saturday provided us with an absolutely beautiful day - sunny and temperatures in the low 40's - to work outside.  We dug out the pitch forks and wheelbarrows and went to work.

Three to four inches of straw will settle to two to three inches.
I use loose, clean straw for my mulch, but you can also use shredded newspapers, coarse sawdust, pine needles, or row cover fabric.  The important thing is to not use anything that will compact and form a mat over the strawberry beds. suffocating the plants.  I prefer straw, because while it settles enough to create a strong, protective blanket, it doesn't mat down into a dense covering.  In the spring, I can rake the straw into the walkways between the strawberry rows and use it for summer mulch to keep the weeds down.  That saves me a lot of removal effort and makes the summer mulching easier, and I am a big fan of anything easier.

The straw should be spread thickly enough so that after settling, there is still a two to three inch covering over the plants.  Raised bed plantings need to have a four to six inch layer of mulch to have adequate protection. If wind is likely to blow the straw around, a piece of chicken wire or other lightweight material can be laid over the top of the straw.

Once the mulch has been placed, the last job of the season is done, and I can go curl up by the fireplace with a good book and a spot of tea.

In honor of Thanksgiving, this will be the only blog article published by Wiese Acres this week.  We will be spending Thanksgiving in my hometown, with my sisters, brothers, aunts, uncles, nieces, nephews, in-laws, and friends.  It will give us time to reconnect with folks we don't see nearly enough in these busy lives of ours, and help us to reflect on and be thankful for our many, many blessings. 

Thursday, November 21, 2013

Storing Summer Bulbs, Corms, Rhizomes, and Tubers


I live in a climate where tender bulbs, corms, rhizomes, and tubers do well for summer color but don't survive our chilly winters if left outdoors.  So, each spring, I plant them and each fall I dig them up, bring them in and store them for the winter.  I love the glorious summer blooms of gladiolus, dahlias, cannas, calla lilies, and pineapple lilies, so I'm willing to do the extra work.

It's a pretty easy process, really.  After the fall frosts kill the foliage, but before it gets cold enough to freeze the part of the plant that is below the soil surface, I dig them.  I knock off as much of the soil as possible.  In a dry year, that might be all I need to do.  In a wet year, when our heavy clay soil tends to cling to everything, I toss them in a wheelbarrow, fill it with water, and wash the soil off. 

Once the soil is off, I put the bulbs, corms, rhizomes, or tubers (for ease of writing, from here on, I'll simply refer to them all as "bulbs") in a bucket filled with a 10% bleach solution (1 cup bleach to 10 cups water), and let them soak for 15 minutes or so.  The bleach solution kills any bacteria, fungi and molds the bulbs might have picked up from the soil and  helps preserve them for the next year. 

After the bleach soak, I lay the bulbs out in single layers, on a piece of newspaper and let them dry well.  Once they are fully dry, they are ready to put in their winter beds.  I've found that they overwinter best when stored in peat moss. but sawdust works, too.  They need to be stored in a container that allows air to circulate and doesn't collect moisture.  A paper box will do, but I've had the best luck using a plastic bin that I've drilled air holes into the ends.  The plastic doesn't pick up moisture from the cool air temperatures like carboard can.  It also lasts from year to year, so I don't have to spend time each fall searching for a storage container.

Pack the bin, starting with a layer of peat moss, then a single layer of bulbs, top it with peat moss, place a single layer of newspaper over the top of the peat moss, top the newspaper with more peat moss, add another single layer of bulbs,  and just keep repeating that process until either all the bulbs are stored or until the container is full. 

I use the newspapers to separate the layers because  that way I can keep the various bulbs separated into varieities.  It also makes it easier to  periodically check how things are looking over the winter storage time.

The filled container is then stored in a cold, dark place where it will not freeze.  I store mine under the shelves in our cold storage room, where the temperature stays about 40 degrees all the time, but a temp anywhere between 40 and 50 degrees is fine.

It is important to check your stored bulbs at least monthly during the storage period for any signs of rot or over-drying.  If they appear to be overdrying, you can moisten the peat moss very, very slightly, and make sure that each of the bulbs is fully covered with peat moss.  Over-drying, also known as dessication, can occur if storage temperatures are too high, so if possible, move them to a cooler location.

If signs of rot begin to appear, if it is only a small area, you might be able to trim the bad area off and salvage the rest of the bulb.  Allow the trimmed edge to dry slightly and then store the salvaged bulb separate from the unaffected bulbs.  Do not allow any bulbs showing signs of rot to stay in the bin with healthy bulbs, as the rot can quickly spread and destroy your whole store of bulbs.

Tuesday, November 19, 2013

Apple Pie Filling

Canned Apple Pie Filling

Now, I know this is a blog about gardening, but part of fruit and vegetable gardening is preserving the bounty.  We had a great crop of apples this year, and it requires some creativity to use all of them.  Apple pie is my husband's favorite and he would be quite happy if every apple was made into pie.  However, eating apple pie three times a day probably isn't the best diet for us, and, besides, my freezer is full to overflowing.  So, I decided to try my hand at canning apple pie filling.

When canning anything that has thickening in it, you need to be sure to use research tested recipes.  I know, I know - our mothers and grandmothers canned using their own recipes for years and years and none of us ever died from them.  Maybe that was luck or maybe it was because we had fewer pathogens being moved around the country back then than now, but either way, I have decided in the last few years not to take chances. 

I found a great recipe from our North Dakota State University Extension service.  It uses Clear-jel for thickening and this is an important factor.  Clear-jel is a special type of cornstarch and is the only type of starchy thickener recommended for canned products.  It can be used for canned fruit pie fillings because the acid in the fruit doesn't cause it to break down.  It also doesn't thicken enough during the processing to interfere with distribution of the heat throughout the product, so that bacteria is killed during canning.   It leaves no aftertaste and the thickened product is nice and clear, without the milky appearance that regular cornstarch can leave.  I've had trouble finding Clear-jel locally, but have found several sources on-line.

Here's the recipe:

Apple Pie Filling

For each quart of pie filling:

3 1/2 cups of fresh, peeled, pared and sliced apples
3/4 cup plus 2 T. sugar
1/4 cup Clear-jel
1/2 tsp. cinnamon
1/2 cup cold water
3/4 cup apple juice
2 T. lemon juice

Place sliced apples in an acidic solution to prevent browning.  Drain and drop apple slices in boiling water and heat for one minute after water returns to boiling.  Drain, but keep heated fruit in a covered bowl or pot.  Combine sugar, Clear-jel and cinnamon in a large kettle with water and apple juice.  Cook on medium heat, stirring constantly, until mixture thickens and begins to bubble.  Add lemon juice and boil one minute, stirring constantly.  Fold in drained apple slices and fill jars immediately.  Leave one inch of head space.  Wipe rim of jars, tighten lids, and process in boiling water bath for 25 minutes at altitudes of 1000 feet or less; 30 minutes at altitudes of 1001-3000 feet; and 35 minutes at 3001-6000 feet.

When ready to use, pop the lid, scoop into a prepared pie crust, and bake till the crust is done and filling is bubbly.  Enjoy!

Thursday, November 14, 2013

Planting Garlic in the Fall

Garlic plant (internet photo)
Since I’m an “instant gratification” kind of gardener, fall planting is not my favorite.  There’s just something about putting things in the ground in the fall,  knowing that you won’t see any signs of that labor until many months later, that doesn’t speak instant gratification.  Having my own fresh garlic straight out of the garden for cooking and pickling makes it worthwhile, though, and planting in the fall assures that I will have an abundant supply by the time pickling season starts.

 Traditionally, garlic in North Dakota is planted on Columbus Day  - sort of like potatoes are planted on Good Friday and corn needs to be knee high by the 4th of July.  Well, I didn’t get my garlic planted on Columbus Day.  And I didn’t get it planted the week after Columbus Day.  Or even the week after that.  We had 8.75 inches of rain the first part of October.  My garden was a muddy mess.  I’m not too worried about missing the deadline, though.  I’ve never gotten my potatoes in on Good Friday and sometimes my corn just doesn’t make it to knee high by the 4th of July (whose knees are they talking about anyway?) and I’ve still had good crops.  With fall planting, there is a bit more of a push to really get it done, since the bulbs need enough time with soil temps above 45 degrees to set good roots.  It’s also important not to plant too early, since planting while soil and air temps are too warm will foster tender above ground growth which will be destroyed with freezing temperatures.

 Things were still pretty wet in the garden by the end of October, so I had to alter my garlic plans slightly.  I had planned to plant my crop on the very edge of the big vegetable garden, right next to where I will plant my cucumbers next year.  I was hoping that way, when I finish picking cucumbers, I’d see the garlic and think, “oh, gee, I should take some of that in, too”, rather than remembering that I need garlic after I'm back at the house ready to make pickles.  (As one ages, one has to make accommodations, I guess).   Instead, I planted my garlic in a raised bed that has much better drainage than my garden to be able to get it in the ground in time to have that adequate rooting time.

 Garlic requires soil with high organic matter and good drainage.  Too much moisture will cause the cloves to rot before they begin to grow.  I added about two inches of well composted sheep manure to the raised bed; then sprinkled some 10-10-10 all-purpose fertilizer over the top of the compost, and tilled both into the existing soil.  After tilling, I raked the soil smooth and made planting rows about 16 to 18 inches apart.  The heads of garlic are separated into individual cloves and then the cloves are placed, unpeeled, into the row about every four to six inches.  If planting the larger cloves of elephant garlic, the cloves should be planted about six to nine inches apart.  Cloves are set in the soil with the pointy tip up and then covered with about 1 ½ to 2 inches of soil.  Even though the soil was nice and wet, I watered the area where I planted, to settle the soil around the cloves and get them set for starting root development.

 Garlic is really a wimp when it comes to competing with other nearby plantings and weeds, so it’s important to give it enough space from which to draw nutrients and moisture, and to keep the weed population down.  I’ll spread about six inches of clean straw mulch over the top of the planting when the soil has cooled to the point where mulching won’t create enough heat to start the bulbs’ growth cycles.  That will suppress any brave weeds that might try to grow there yet this fall, and it will protect the garlic bulbs from the freeze and thaw cycles so prevalent in our North Dakota winters.  In the spring, I’ll remove all but about two inches of that mulch.  The rest, I’ll leave in place to continue its weed suppression duties and to help maintain moisture in the bed.

Next year, I’ll provide adequate moisture to keep the soil moist but not wet.  Garlic is actually quite drought tolerant; that is, it won’t die during dry conditions, but it won’t yield nice, large, flavorful heads without adequate moisture.  On the other hand, too much moisture will cause the bulbs to rot in the ground, so adequate drainage and controlled watering is critical. 

Some warm temperatures come spring, plenty of sunshine, the right moisture level, and controlling the weed population should guarantee me a good supply of garlic for cooking and pickling, beginning in about mid-July of next year.


Tuesday, November 12, 2013

Garlic for Northern Gardens


Internet photo
Garlic is a member of the onion family.  It is actually a perennial, but is usually grown as an annual.  After all, we grow it to eat.  To eat it, we have to dig the bulb.  When we dig the bulb, well, let's just say the plant is not appreciative and won't continue to grow as a perennnial.  :)  Garlic produces a bulb that is made up of several cloves, sometimes a dozen or more per head or bulb.  Each clove is covered with a thin, papery skin. 

There are two types of garlic – softneck and hardneck.  Hardneck garlic is generally the most productive type of garlic in North Dakota gardens, although both varieties grow here.  Softneck garlic stores better and longer than hardneck, and if you like to braid the stalks for drying or for decoration, you will need to plant softneck.  Softneck garlic doesn’t form flower scapes, so the strap like leaves are easily braided.  This lack of flowering also causes the bulbs to mature more quickly and each bulb produces a large number of cloves.  They are less hardy than hardnecks, however, and might suffer winter kill in a harsh, open winter.

Softneck garlic is sometimes referred to as “artichoke garlic”.  Varieties of softneck garlic that seem to do well in North Dakota are Silverskin, which produces bulbs about two inches in diameter and can be stored for 10 to 12 months at room temperature.  New York White will often have some purple streaking in the bulb.  New York White is a good producer, but does have a tendency to bolt, which greatly diminishes the size of the bulbs.  Red Toch is another variety that is quite attractive, with bulbs that are streaked red and pink.

 Hardneck varieties are hardier than softnecks, so they are usually quite productive in North Dakota, regardless how harsh the winter might have been.  They form fewer cloves per bulb than the softnecks, but the individual cloves are generally larger.  Hardneck varieties include Asiatics, Creoles, Glazed Purple Stripes, Marbled Purple Strips, Porcelains, Purple Stripes, Rocamboles, and Turbans.

Chesnok Red (internet photo)
The hardiest of the hardneck garlics for more northern climates, are the Purple Stripes, which include Chesnok Red.  I’ve had very good luck with Chesnok Red in my garden, with good production, excellent hardiness, a very good garlic flavor, and, it's pretty!  Premium Northern White is a Porcelain variety that has also done quite well for me.  Other Porcelains that thrive in harsh winter climates are Leningrad and Romanian Red.  Marbled Purple Stripe varieties Bogytar, Metechi and Siberian are also said to grow well in northern climates, however, I have not personally tried those in my North Dakota garden.

In my garden, I tend to grow more of the hardneck than softneck varieties because of their hardiness.  Since I use much of my garlic for pickling, the poor storage life of the hardnecks isn’t as much of an issue.  I never know what the North Dakota winter will bring, so I play it safe with the hardier varieties, although, I usually plant a few softnecks – just to say I can.

Each year, I save the biggest and best of my cloves for planting in the fall.   The new garlic plant is essentially a clone of the parent plant, so if it grew nice, large, flavorful cloves one year, it will likely produce the same in following years, provided the growing conditions are favorable.  In the next blog installment, I'll talk about planting garlic.