Tuesday, February 14, 2017

Growing Raspberries, part 2

internet photo
While one can usually pick up a container of fresh raspberries at the grocery store, there is a great deal of satisfaction for me in seeing those berries, just bursting with flavor and juiciness, hanging heavily on the canes. There is a little work involved in getting those berries to produce in your garden, though.

Last week, I talked about raspberry varieties for northern gardens and some general raspberry knowledge that is useful to the home gardener. In this article, I'm going to talk about planting those raspberries.

As with most plantings, the key to success is starting with the proper site and good soil preparation. Raspberries like a sunny, well-drained location. They prefer sandy loam rich with organic matter, and a pH range of 5.5 to 6.5, or slightly acidic. That said, they do very well in my moderately alkaline clay soil. The key is to keep them in a location where water drains away, rather than sets and makes for soggy soil, and to keep the proper levels of organic matter in the soil. In clay, approximately 5% organic matter is a good range. In sandy soils, you can get by with about half that amount.

internet photo
I keep the organic matter in good supply by adding a top-dressing of about two inches of well-rotted sheep manure or other high quality compost each fall. I don't use horse or cattle manure on the perennial fruit and vegetable beds. Sheep digest any weed seeds they consume and render them unable to germinate. Other animals do not have that ability, and there is nothing worse than an infestation of Canada thistle or bindweed in your raspberry patch! The bags of composted manure that you can buy at garden centers are generally hot composted, which dramatically reduces the weed seed population that can sneak into your garden.  They are pretty safe to use, regardless of the source animal.

Adding organic matter and tilling it in for a year or even two years before you plant is helpful in incorporating the organic matter and also getting rid of any weeds that may be in the area. Having the soil tested if you don't know how much organic matter your soil contains or what the pH is might save you a lot of headache in the future. You can obtain instructions and soil test kits from your local land grant university extension office. They will even tell you what you need to add to make your soil the best it can be!

You should also stay away from garden plots where you have grown tomatoes, potatoes, peppers, and eggplant within the last four years. These plants can all harbor verticillium fungi that loves to attack raspberry roots.

I should mention, too, that while it is not a key to successful raspberry growth, there is one other thing to remember in choosing your site that is the key to not wanting to pull your hair out when you find raspberry suckers in the middle of your formal perennial garden (or any place else you don't want them). And believe me, pulling your hair out just might be easier than getting rid of rogue raspberry roots. Choose a site that gives your raspberries room to spread their roots, and where you can easily cultivate or otherwise eradicate unwanted raspberry suckers.

If you are planting more than one variety of raspberry, it is advisable to keep black raspberries separate from red or yellow varieties to minimize the spread of diseases. Black raspberries are more likely to carry these diseases, and they are very attractive to the aphids which carry those diseases from plant to plant.. If you have no space to keep them separated, you can do the next best thing by planting the black raspberries downwind, based on your prevailing wind direction at the planting site. This will keep the aphids from being blown to your other raspberry varieties as easily.

Red and yellow varieties can all be planted together, however, if you want to keep your varieties separate, you will want to give them plenty of space. If you plant multiple varieties close together, over time they are likely to become indistinguishable from each other, and the more aggressive varieties will choke out the less sturdy plants.

If you have friends or neighbors who grow raspberries, you probably know someone who is willing to give you some starts. This is tempting, but it can also be risky. This is tempting, because, after all, who can resist free plants? But this is risky because those plants are much more likely to harbor hidden diseases that they will bring into your patch. I recommend that in this case, you spend the money to buy from a reputable nursery or grower who can guarantee that the plants you receive are disease free and "virus-indexed". Raspberry mosaic viruses can devastate your patch and older plants from home gardens are much more likely to harbor these diseases.

Raspberries should be planted in early spring, after all danger of killing frost is past. About two weeks before you plant the raspberries, spread some 10-10-10 fertilizer over your planting area and till it in. You should apply enough to provide about two pounds each of nitrogen, phosphorus, and potassium per 1000 square feet of planting area. I like to till the soil again immediately before planting, to break up any clods that may have formed and to nip off any brave weed seedling that might have tried to get a foot hold.


internet photo
Most raspberry starts come as bareroot. They like moisture, so it is a good idea to wet the roots well before sticking them in the soil. This can be accomplished by soaking them in a bucket of water for an hour or two. I prefer a little less "wet" so I like to moisten newspapers well and wrap them around the roots. This way, I can also gently separate the roots and wrap the plants in their own individual paper while I have them in a protected area.  I don't have to pull the whole clump out of a bucket of water and mess with the roots while they are exposed to the sun and wind. I keep the newspaper in place until I am ready to put the root into the ground, leaving the roots to have much less exposure to drying elements before planting.

Raspberries can be planted in rows or hills, depending on space and your personal preference. If you plant in hills, you will want to leave ample space on all four sides of each hill to be able to cultivate with whatever equipment you plan to use. If you plant in rows, bushes can be spaced about two to three feet apart within the row, but the rows should be far enough apart to easily pick between and to run whatever cultivating equipment you plan to use between the rows.
internet photo

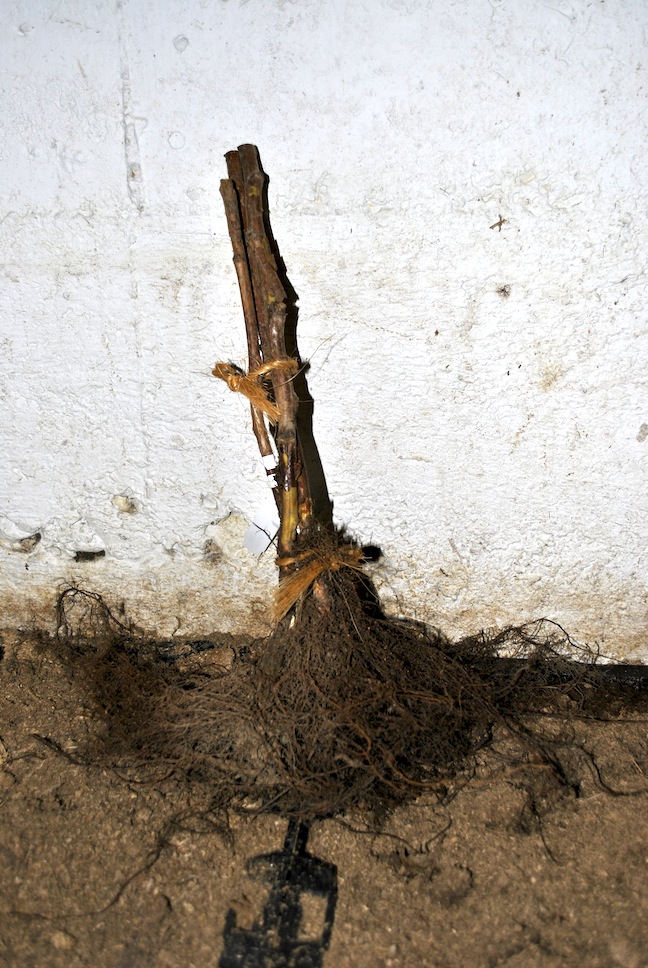
Set the roots firmly in the soil, keeping them at the same depth they were in the nursery when they were dug, or that they are in the pot if you are planting potted starts.  Pat the soil firmly around the roots and water well.  Trim the canes back to about eight to ten inches. Water well, and keep uniformly moist throughout the growing season.


internet photo


Red raspberries will spread from suckers that grow up from both the crown and the roots.  Those suckers will grow together to form a solid hedgerow, whether you plant them in rows or hills. They should be cultivated periodically to keep the base of the hedgerow no more than 12 to 18 inches wide to facilitate picking and pruning. Black and purple raspberries send out suckers only from the crown of the plant, so they do not form hedgerows. They are more easily maintained in hill plantings than red raspberries, and the hills should be planted about four feet apart.

Most raspberries do best with some sort of support. In the next blog installment, I'll talk about trellising, pruning, and other maintenance for raspberry plants.

Saturday, February 4, 2017

Growing Raspberries


internet photo
There is nothing better than wandering across the grass, climbing over the little rabbit fence, and reaching for a plump, juicy, sun-kissed raspberry. If a little juice runs down my chin when I bite into that luscious berry, so much the better. Add to that the fact that raspberries are highly nutritious - packed full of Vitamin C, fiber, and antioxidants - and you just might have the perfect back yard fruit.

Raspberries are relatively easy to grow, and with a little care, you can have home-grown raspberries for a good long time. There are two types of raspberries: summer- bearing, and ever-bearing or fall-bearing.  Summer bearing produce one large crop per year in the summertime on last year's canes and ever-bearing or fall-bearing produce on both last year's canes and the current year's growth, so you can harvest two crops, one in the summer and one in the fall.

Summer-bearing varieties usually begin producing in early summer and produce for about two to four weeks. Fall-bearing varieties typically begin producing in mid-summer and produce up until a killing frost, or in the case of this past year when a killing frost came very late in the season for us, until the shorter days of autumn and winter in the north country discourage further fruit set.

Raspberry roots are perennials, which mean they come back year after year in their hardiness zones. The canes, which grow from buds on the root, are biennial, which means each cane lives for two years. Some raspberry varieties produce fruit on the canes the first year of growth; others produce fruit only on canes that are two years old.

Those which produce fruit on the canes the first year are called "primocane" raspberries, and are also identified as "fall-bearing" because fruit ripens late in the season. You can harvest fruit from those varieties the first year of planting, the first crop generally in July or early August, and the second crop later in the fall.  The first year canes become "floricanes" or second year canes the next growing season, and they will produce a crop again in early to mid-summer, but it is usually a marginal crop at best. Many growers prune all the canes down in the fall so that the next year's growth is all primocane, helping the raspberries to produce better.

An old standby primocane variety for zone 4 and warmer is "Heritage". Heritage produces large crops of good-sized berries that are good for eating fresh, freezing, canning, jams and jellies.  "Anne" is a yellow-fruited variety that has a hint of an apricot taste. Anne is good for eating fresh and freezing, but is not the best for canning or jams and jellies because it does not retain a nice color when heated. "Polana" is similar in taste and color to Heritage, but the fall crop ripens several weeks earlier, so it may be a better option for those areas where killing frosts come earlier in the fall. Polana is rated hardy to zone 3, so it is one of the hardiest of the primocane raspberries. Another earlier ripening variety hardy to zone 3 is "Autumn Britten".  Other zone 4 hardy varieties include "Polka", another Polish variety similar to Polana; and "Joan J", an early producer that has the distinct advantage of being borne on a thornless bush. "Caroline" produces a nice, large berry with an intense flavor. I find that this variety, while rated for zone 4, needs to be in a very sheltered location or have the root mulched in the winter. "Himbo Top" produces very large, deep red berries that hold their color better than most varieties. It is a favored variety for farmers' markets and roadside stands for that reason.
"Heritage" raspberries (internet photo)
"Anne" (internet photo)

Raspberry varieties which produce fruit on two year old canes are called "floricane" raspberries. The first year of growth on the canes will be only vegetative - there will be lots of green leafy growth, but no flowers or fruits. The next year, those canes will bloom and set fruit, while new vegetative canes begin to prepare for the next year's fruits.  There are more zone 4 and colder varieties of floricane raspberries than there are of primocane, and the nice thing about those varieties is that they come in early, mid, and late season fruiting, so you can extend your growing season significantly with a selection of several varieties.

Boyne is an early season floricane variety that is hardy to zone 3. It produces good amounts of nice, sweet berries that make excellent jam.  They are not a real firm berry, so must be handled carefully in picking and storage. Prelude is another early season variety hardy to zone 4 with excellent flavor, but also not a real firm berry.

"Killarney" (internet photo)
Killarney is an early-mid season producer that is a little finicky about growing in colder climates. I like the fact that it has very sturdy canes that stay upright even when loaded with fruit, making the berries easier to pick (and I am all about anything easy). Killarney has been around since the early 1960s, and while it is a zone 4 hardy variety, it has done well in my zone 4 but sometimes zone 3 climate. It does benefit from a protected location.

Latham is a North Dakota favorite and is really the workhorse in my berry patch. It is a mid-season fruiting variety that was released by the University of Minnesota in the 1920s and has been a favorite of home gardens ever since. The fruit is medium size and a light red that turns a deep burgundy color if overripe. Lack of cohesion of the drupelets (the little round balls that cluster together to form the berry itself) is a problem with Latham, but for jams and jellies, which are excellent when made from Lathams, that is not a problem.

Nova is another mid-season variety that was released from a breeding program in Nova Scotia in the early 1980s. Nova is tolerant of both extreme cold and heat, reliably hardy to zone 3, and is a heavy producer of medium to large red berries that have a longer fresh storage life than many other varieties. It also has the advantage of having fewer thorns than most varieties.

Encore is a late mid-season producer of large, firm red berries excellent for canning and freezing that grow on sturdy, nearly thornless canes. Now, if you have ever picked raspberries, you have a pretty good idea of why I am telling you about thornless and nearly thornless canes. While I love my Lathams, I hate that I have to pick those microscopic little thorns out of my finger tips for days afterwards.

There aren't any red raspberry varieties that are reliable producers for late season summer bearing in northern climates. Royalty is a purple variety that does ok in protected areas of zone 4, producing large, purple berries in August. The bushes are very prolific and will need trellising to stay upright.

Black raspberries are not as hardy and will need winter protection in anything colder than zone 5. Black raspberries should be planted separately from red and yellow varieties, as they are a closer relative to the wild varieties and tend to be more susceptible to pests and disease. Jewel is one of the hardiest black raspberry varieties.

In the next blog installment, I'll write about planting and care of raspberries.

internet photo


Monday, November 21, 2016

Growing and Preserving Horseradish

Prepared horseradish (internet photo)


Horseradish is a delicacy. Now, I know some folks don't agree with that, but according to the Horseradish Information Council (yes, it really does exist), there are about six million gallons of prepared horseradish consumed each year. That means a lot of people must like it. Horseradish even has its own international festival, celebrated each May in Collinsville, Illinois, where nearly 60% of that six million gallons of horseradish is grown.

Horseradish was introduced to this country by our German ancestors, which is probably why I can't ever remember a time when ground, creamed horseradish wasn't served with any pork dish, and especially ham. It was only when I was a little older that I was introduced to how wonderful it tastes with roast beef or prime rib.

Horseradish is a low fat condiment that is loaded with flavor for just about any type of meat. It may also kill harmful bacteria that found its way into the food. That same antibacterial action, coupled with natural diuretic properties, can help treat urinary tract infections. Some people believe it helps muscle and joint aches and pains. It is also guaranteed to clear your sinuses and unstuff your nose if you get too strong a whiff or take a big, savory bite.

Common horseradish (internet photo)

Horseradish is in the Brassicaceae family, a relative of cabbage, mustard, and broccoli. It is a perennial, hardy in zones 2 to 9. It grows best in the colder zones, as it needs a definite winter chilling period to produce dormancy and retain its best flavor and texture. There are two varieties of horseradish: common, which has large, crinkled leaves; and Bohemian, which has smooth, narrow leaves.

Horseradish grows in most soil types, but it must have good drainage. If the root sets in water logged conditions, it will rot.  Horseradish is a heavy potash feeder, so it may benefit from some extra compost or other source of water soluble potassium. The plant prefers to grow in full sun, but will produce just fine with part shade.

Think carefully about where you wish to plant horseradish because you will likely have it there - and in the surrounding areas - forever. Horseradish spreads by its roots, and even a tiny piece left in the soil will produce new plants. Never till an area where there might be horseradish roots - you likely will end up with horseradish everywhere!

Music Garden
Somehow, a tiny horseradish plant got started in my Music Garden a few years ago. Now, having grown up on a farm where horseradish made valiant attempts to take over the entire river bottom each year, I knew I had to get that plant out of there as soon as possible. I dug. And dug. And dug some more, until I was sure that I had every piece of that root out of there. We enjoyed the horseradish with our Christmas ham, and I was feeling good about things. Until April, when I found suspicious looking green shoots, spreading about three feet in all directions from where I dug all that horseradish out. Every year, I dig until I am sure I have it all. The next spring, I find more and more of it in that garden.

Horseradish is an impressive looking plant with its broad, paddle like green leaves. It just does not belong in the Music Garden. This fall, I dug all the desirable plants out of that area, rinsed the roots well to make sure there wasn't so much as a thread of horseradish root on them, and moved them to the nursery bed. Next spring, I will take the glyphosate broad leaf weed killer to every sign of horseradish I see. I hope that by next Fall, I have finally overpowered it so I can put my perennial flowers back in that bed.

To plant horseradish, you use plants or root cuttings, planted in either spring or fall. Take a piece of root about three inches long. Loosen the soil well to about a foot deep and large enough around that when held at a 45 degree angle, the top of the root will be about two inches below the surface. Add a shovelful of organic matter to loosen and enrich the soil before setting the root. One plant usually supplies more than enough horseradish for a family.

Once planted and established, horseradish needs very little attention. If you want the plant to look more ornamental, you can water it during periods of drought to keep the leaves from looking tattered and brown. Otherwise, just let it grow.

Horseradish root (internet photo)
You can usually harvest horseradish root the first year after the planting year. In North Dakota, conventional wisdom says you can harvest horseradish root in any month with an "r" in the name. I typically harvest mine in late October or early November, so it is still nice and fresh at Christmas time. In general, it is best to wait until frost kills the foliage, whenever that happens to be in your location.

To harvest, dig carefully around the main root. Remove the soil and loosen the side roots that shoot out from the main stem. You need to dig pretty deep to keep from breaking the root tip and leaving it in the ground. You will want to leave a bit of root in the ground for next year's crop. In my experience, this is not something I really have to think about - it just happens, but I give you that piece of advice just in case you are better at digging the stuff out than I.

Once dug, I brush off as much of the clinging soil as I can and then allow the roots to dry. Once the dirt is dried, I wipe the roots with a dry cloth, getting them as clean as possible. Then, I wrap them in paper towel to keep moisture from collecting right on the root, wrap the covered root in perforated plastic wrap,  and store in a cool dark place, like a crisper drawer. You can usually successfully store the root for three months or more.

To prepare it for use as a condiment, peel the root using a vegetable peeler or sharp knife. Cut it into 1-inch cubes and grind it. Make sure you have a well-ventilated area in which to do your grinding. My mom used to process many quarts of horseradish each fall. She would set up the meat grinder outdoors and grind away.  If we happened to come around the corner of the house at just the right time, we would end up nearly choking.  A whiff of freshly ground horseradish can be breath-taking - literally.

I have used a blender, food processor, and the meat grinder attachment of my KitchenAid mixer to process horseradish. I prefer the food processor, as you can obtain a finer grind, and the cover keeps most of the fumes contained until you are ready to open it. For a finer blend, add a couple tablespoons of water and some crushed ice to the bowl with the horseradish root, and process until it is the desired consistency. Open the container carefully - the fumes will be very potent when that cover first comes off.

Grinding horseradish in blender (internet photo)
The grinding crushes the horseradish cells and releases the volatile oils that produce the "heat". Those oils can be stabilized by adding vinegar. If you prefer a milder horseradish, add a few teaspoons of vinegar as you are grinding it. If you wish for a stronger, hotter flavor, allow the ground horseradish to set for a period of time. The longer you leave it set before stabilizing it with vinegar, the more "power" your horseradish will have. Most people find that waiting about three minutes between grinding and adding the vinegar give a nice degree of heat without it being overpowering.

Mix one cup of horseradish, 2 to 3 tablespoons of vinegar and a half teaspoon of salt. Stir together or pulse in the food processor, then pack tightly into glass jars. Don't use plastic containers, as the plastic can react with the horseradish and give it an off taste. Ground horseradish will stay fresh in the refrigerator for four to six months. It can also be canned or frozen, however, I find the quality remains best if it is just refrigerated after grinding.

When I want to use some as condiment on meats, I remove the amount I need from the jar and drain some of the liquid off. Then I add just enough cream to make a sauce and a half teaspoon or so of sugar to cut the vinegar taste. You can also mix it with sour cream or yogurt and some fresh herbs to use as a vegetable dip; or mix some into softened butter and other herbs to taste to serve on grilled steaks. You can stir small amounts into mashed potatoes to give them a little "zip". I like to stir a small amount of horseradish into barbecue sauce and use it on grilled foods. When using in hot foods, add after cooking, as cooking will neutralize the flavor of the horseradish.

Whatever way you find to use it, horseradish is good for you. It is high in vitamins, phytonutrients, and fiber, and aids in digestion by increasing the secretions in the mouth and intestines. Its high vitamin C contents may help boost your immunity and protect you from colds and flu. It's hard to beat a condiment like that!

Horseradish ready for storage (internet photo)

Saturday, November 12, 2016

Fondly Remembering Summer

Wiese Acres -  Summer 2016

Crocuses in Spring

Bleeding Heart - Dicentra

Bleeding Heart

Helleborus

Heuchera, Hosta, and coleus in shade planter

A comfortable seating area just off the pond

What you do with a leaky bird bath

Hostas, Heuchera, and ferns

All my favorite books from my childhood, specially made by my
sister-in-law to place in the Nostalgia Garden

Garden books

Clematis

The water lilies are beautiful this year

Love the soft pink and yellow of this one

The Sun, Moon and Stars Garden

The Morning Garden

Mom's boat

The English Tea Garden

Rather than throwing my Easter lily bulbs a couple years ago,
I stuck them in the dirt. Look what they have done for me!

The Memorial Garden

Yes, Lady really does stay on the path in the gardens

Fall planters

The begonias love the shade of the box elder maple trees

The Welcome Garden

The Children and Butterflies garden in fall

The entrance to the Woodland Fairy Garden

Painted Lady enjoying the sedum

The Woodland Fairy garden

Friday, November 11, 2016

Autumn 2016


One of the construction projects that ran late,
but oh so wonderful now that it is done!


I have been very delinquent in writing for my blog this year. In spite of an early spring, I started out the season a couple months behind because of some late running construction projects here at Wiese Acres that kept me out of the gardens. I didn't catch up all summer long! Thankfully, autumn decided it was going to be fashionably late this year, so I can finally see the light at the end of the tunnel. Tomorrow, I will clean off all the dried peony, daylily, and iris foliage and finish putting the gardens to bed for the winter.
We also remodeled my summer kitchen and made it twice as big.
The added space and convenience was well worth the delayed garden work.
 There were some other reasons why I never caught up this summer. We began the season very dry. In North Dakota, when it is dry, the desirable foliage putzes along while the weeds flourish. We didn't have the nice, lush perennial foliage that shades and crowds out the weeds by late June to early July. Thus, I battled weeds most of the summer. Add to that the fact that we had more wind this summer than anyone should have to bear, and every gust brought Canada thistle, dandelions, and sowthistle from the untended acres across the way. It made for wheelbarrows full of weeds being hauled out to the garbage. (No composting for those buggers!)

Late in the season, the rains began, which helped the perennial gardens catch their full glory and the vegetable garden began to inundate us with produce. In addition to gorging ourselves on fresh produce all summer, preserving all that we can possibly use (probably this year and next), and selling at a few Farmer's Markets, I was able to donate over 200 pounds of produce to needy families who don't have the space to grow their own. It's a good feeling to have all that food! Except for the back - that doesn't feel so great after bending over to pick all the produce.

The fruits (and vegetables) of my canning labors
I also had two gardens which needed to be completely replanted this year. One because I had removed everything from it last fall so that I could kill a nasty infestation of quack grass, and the other because the trees have grown to the point where the sun loving plants needed to be replaced with shade lovers. That, of course, meant that I had a lot of sun loving plants that needed new homes. So what is a gardener to do? Start a new garden bed, of course.

The new area that joins
 the Memorial and Nostalgia gardens
I moved some of them to an expansion between the Memorial and Nostalgia gardens, and the rest went to a new bed which is the beginning of the landscaping around our new barn. All in all, I was kept very, very busy over the summer, and winter hibernation has never looked quite so good.

As I write this on November 11, though, hibernation can't quite begin yet.  The strawberries are still producing, although not very much because we are already down to only about 9 1/2 hours of daylight.  The strawberries don't much care that the temperatures have been in the 60s and 70s if they aren't happy about the daylight. As soon as the foliage goes dormant, those strawberry plants will need to be covered with some type of mulch to protect the crowns over the winter. This year, instead of using straw, which can bring undesirable weeds into the garden, I am going to use shredded leaves and hope for the best. Once those are spread, I can officially go into garden hibernation until it's greenhouse time in the spring.


Sometimes, I need a garden fix during that hibernation time, and that is why I take lots of photos of the gardens throughout the summer. I love going back to see what things looked like in each of the months of the growing season. I'll be happy to share some of those photos with you in the next blog installment.


Monday, April 25, 2016

Spring Rains Bring Out The Green- Spring Lawn Care

Wiese Acres Plum Blossoms
After an unusually mild winter, with temperatures sometimes 40 or more degrees above normal, and little or no precipitation, early Spring has not given us our usual lush green hillsides. Last week, we finally got some precipitation and oh, what a difference it's made. Today, the grass is the brilliant emerald green that only Spring can bring. The tree leaves are bursting open and the earlier fruit trees have exploded into full bloom. Yesterday, it started raining at around 10:00 AM.  It rained off and on all day, and is still raining this morning. During the last lull, I ventured out to the rain gauge and found we'd had about 2.25 inches of rain. What a spirit lifter!

It does mean, though, that it will be time to do something with the lawn grass soon. Yes, I know a lot of people have already gotten their mowers out and given their lawn its first (or maybe even second) haircut of the season. I know there are a lot of really ambitious folks who have already applied their Spring dose of weed and feed. Here? Not yet. There are a couple reasons for that.

One is that I simply am not so in love with grass maintenance that I want to start it any earlier than I absolutely must. But, secondly, and more importantly, there is such a thing as jump-starting your grass too early in the season.

In North Dakota, and most other places where Spring arrives in late March or so, you can generally begin mowing your lawn in mid to late April without many problems. The downside of getting at it too early is that once the grass is cut short, it opens more of the ground to the sun, giving all those weed seeds lurking under the grass blades the exposure to sun they need to germinate. A cold snap will keep the grass from growing, but doesn't seem to faze the weeds. Since it isn't advisable to put weed killer or fertilizer down on your grass until at least mid-May here in zone 4, that might just mean that you spend more of your Spring fighting weeds than you do enjoying your nice lush lawn.

Mowing too early also has the potential to damage the vulnerable new growth. Grass that has been given the opportunity to "toughen up" a bit will tolerate the insult of the lawn mower much better. Those cut ends are even more vulnerable than the rest of the grass blade, so a cold snap can do damage to the grass itself.

Regardless of when you mow, it is important that your mower blades be good and sharp and that the blade is level on the mower. Sharp blades cut the grass cleanly rather than fraying the ends, and this allows the grass to "heal" more quickly. Uneven blades leave, well, uneven lawns.

There are two schools of thought on how short is short enough for the first mowing. There are the "scalpers", those who mow it as short as possible to get all the dead grass cleaned up. This technique does tend to give you a more immediate beautiful rush of new, green growth. Those who don't like this method feel that the short term gain isn't worth the long term work it creates. Remember that thing about exposing the weed seeds to the sun they need to germinate? Rest assured, the weed seeds clap and cheer when they see that mower blade coming right down on top of them.

The other school of thought is that you should not take more than the top 1/3 of the grass blade with any mowing. This causes less trauma to the grass and leaves some cover on the ground to keep weeds in check. After the first couple mowings with this method, you will have accomplished the same results as that first scalping, but without quite so much risk of weed germination.

Fertilizer should not be applied until the grass is in its active growth cycle. Here, the recommended time for Spring fertilizer application is the middle to the end of May. Conventional wisdom says this should be a Memorial Day weekend activity. Most grasses don't begin active growth until daytime air temperatures are consistently in the 60s and nighttime temperatures are in the 50s. That generally equates to soil temperatures around 60 degrees, which is what is necessary for consistent grass growth. Fertilizing too early does nothing for your grass, even if it makes you feel better.

Lawn should be dethatched if the thatch layer is more than 1/2 to 3/4 inch thick. Thatch is the dead grass and roots that build up at the soil level. If you dig up a small plug of soil several inches deep and look at it horizontally, the spongy brownish layer next to the soil surface is the thatch.  If you compress it and it remains 1/2 to 3/4 inch thick, it is time to dethatch. Ideally, you should have mowed your lawn two to three times before you think about dethatching.

Power raking is one method of dethatching. A mechanized rake is run over the entire lawn, tearing up the thatch as it goes. Unfortunately, it can also tear up the good grass. It does less damage if you cut the grass very short (about one inch tall) before running the rake over it. You may need to "baby" your grass with extra water and vigilant weed control for a time after power raking.

Core aeration is another method that not only helps thatch decompose, it also helps loosen compacted soil. Core aeration perforates the soil with many small holes, pulling up a plug of dirt out of the hole. This allows air, nutrients, and water to reach the grass roots better and hastens the composting process of the thatch. This works best for less severe thatch problems. A very deep thatch may require both raking and aerating.

If you choose to dethatch or aerate, these should both be done prior to putting on a weed control product. Both processes bring weed seeds to the surface where they can germinate, and by putting the pre-emergent herbicide on after, you can eliminate many of your weed problems.

Yes, lawn grass is a lot of work. I much prefer my perennials - I'll work hard on them for a couple  months and then sit back and enjoy. Grass, on the other hand, is very needy and demands attention at least once per week all summer long.

But, for now, it's still raining, so I can just sit back and think about taking care of that grass. It isn't good to work on your lawn when the soil is too wet. Thank you, Mother Nature, for the moisture and the reprieve.

Wiese Acres Flowering Crabapple


Wednesday, February 24, 2016

Heuchera Favorites

Spring has been teasing us the last couple weeks. When daytime temperatures are in the 40s and 50s and night time temps barely drop below freezing, it is easy to believe the promise of spring. The trees are budding, my oregano has grown to a harvestable size, and the iris and tulips are poking their heads out of the ground. It's tempting to get as ambitious as those trees and perennials, but anyone who's gardened in North Dakota for any length of time is well aware that this is just Mother Nature's idea of a practical joke. We will have temps well below freezing, and chances are pretty good that we will get snow sometime before it is really planting time. So, I am forcing myself to "garden" in my head. I am still planning that new area where I killed the quack grass last year, and its areas of morning sun and afternoon shade lends itself well to Heuchera.

As I mentioned in the last blog article, I already have nearly forty varieties of these lovelies in my yard. While not quite as prolific with new varieties as daylilies, it does seem like Heuchera hybridizers are trying to run a close second to them. Terra Nova Nurseries in Oregon is known for its perennial breeding programs, and they are constantly developing new varieties of Heuchera, with improved colors, stronger constitutions, or just plain something different. There are several newer varieties that should be available in garden centers this year.

Some of the new varieties I am anxious to see are 'Champagne', 'Forever Purple', and 'Red Lightning',  I can already envision a small section of my garden with their pops of coordinating colors!

Heuchera 'Champagne' (internet photo)


'Champagne'  has medium sized leaves that change from peach to gold over time. Maroon stems hold light peach flowers for much of the season and are favorites of hummingbirds. It grows to about 14 inches tall and wide and maintains its color, even in full shade.


Heuchera 'Forever Purple' (Terra Nova Nurseries photo)

'Forever Purple' has deep purple, glossy leaves that stay nicely colored throughout the growing season. Short spikes of light purple flowers appear in early summer and last for weeks. It is a larger Heuchera variety, growing to the fairly standard 12 inches tall, but with a spread of nearly two feet. The flower stalks are held fairly close to the foliage, with a height of only 15 inches. This Heuchera does its best in morning sun with afternoon shade.

For a bicolor leaf, 'Red Lightning' looks like it will be hard to beat. Large gold leaves have deep red veins running through them, with color that maintains well throughout the growing season. Doing its best in part shade, the foliage of 'Red Lightning' grows 11 to 12 inches tall and 16 inches across with flower spikes extending to about 18 inches.
Huechera 'Red Lightning' (Terra Nova Nurseries photo)
New introductions are sometimes quite pricey, and because they are "untried" I am sometimes a bit shy about buying them right out of the chute. It really hurts to lose a $20 or $25 plant to winter kill, so there are some old favorites that I return to time and time again. These are the ones that I already know will stand up well to our cold (sometimes) winters and hot, humid summers.

Heuchera 'Palace Purple' (internet photo)
'Palace Purple', of course, has been around and proven itself for years. It is a pretty amazing plant, however, it has lost some of its appeal in the face of even more colorful cultivars introduced since Heuchera breeding became popular. It is hard to beat for hardiness, though, so it will always have a place in my garden. 'Palace Purple' has large, star-shaped leaves which range from olive green to a bronzey purple on top and deep purple on the bottom side. It grows in a clump about 12 inches tall with 20 inch stalks of tiny white flowers in early to mid-summer.

Heuchera 'Midnight Rose' (photo from Terra Nova Nurseries)
One that has done well in my Sun, Moon, and Stars Garden, under the maple tree (read difficult growing environment) is 'Midnight Rose'. This is a little smaller Heuchera, growing to only about 10 inches tall, but the pink-spotted dark leaves makes a dramatic statement in the garden. The only downside I have found to this little beauty is that it does not retain its beautiful pink spotted color throughout the entire growing season; instead, the pink spots enlarge to take over more of the leaf and lighten to a creamy color over time. It is still a striking plant and well worth a spot in the garden.
Heuchera 'Galaxy' (Terra Nova Nurseries photo)

'Galaxy' also fits in nicely in this area, At the beginning of the season, 'Galaxy's thick, leathery leaves are a bright red with some lighter, pinkish variegation. Over time, the red darkens and it begins to look like a "beefier" version of 'Midnight Rose', but it gives nice complimentary coloration for a long enough period of time that they work together well in my garden.
Heuchera 'Blackout' (internet photo)

Heuchera 'Obsidian' (Terra Nova Nurseries photo)
For a dark colored Heuchera, I chose 'Blackout' because it is lovely and because the name seemed to fit in well with a Sun, Moon, and Stars theme. While this has been an "ok" Heuchera for me, it is not the replacement for 'Obsidian' that it was touted to be. 'Obsidian' has proven to hold its color a little better and has thrived, where 'Blackout' sometimes looks a little faded and has limped more than thrived. Both offer a nice, deep shout of color to the shady garden,and since different plants thrive in different conditions, if you fall in love with 'Blackout', by all means, give it a try.

There are many, many other Heuchera varieties and most are worth a try. Most garden centers carry a wide variety of Heucheras. For those of you in my area, I know that Plant Perfect has ordered 'Midnight Rose'; 'Obsidian', and 'Forever Purple', along with many other beautiful cultivars that are proven to do well in our area. It's going to be a lovely gardening season!