 |
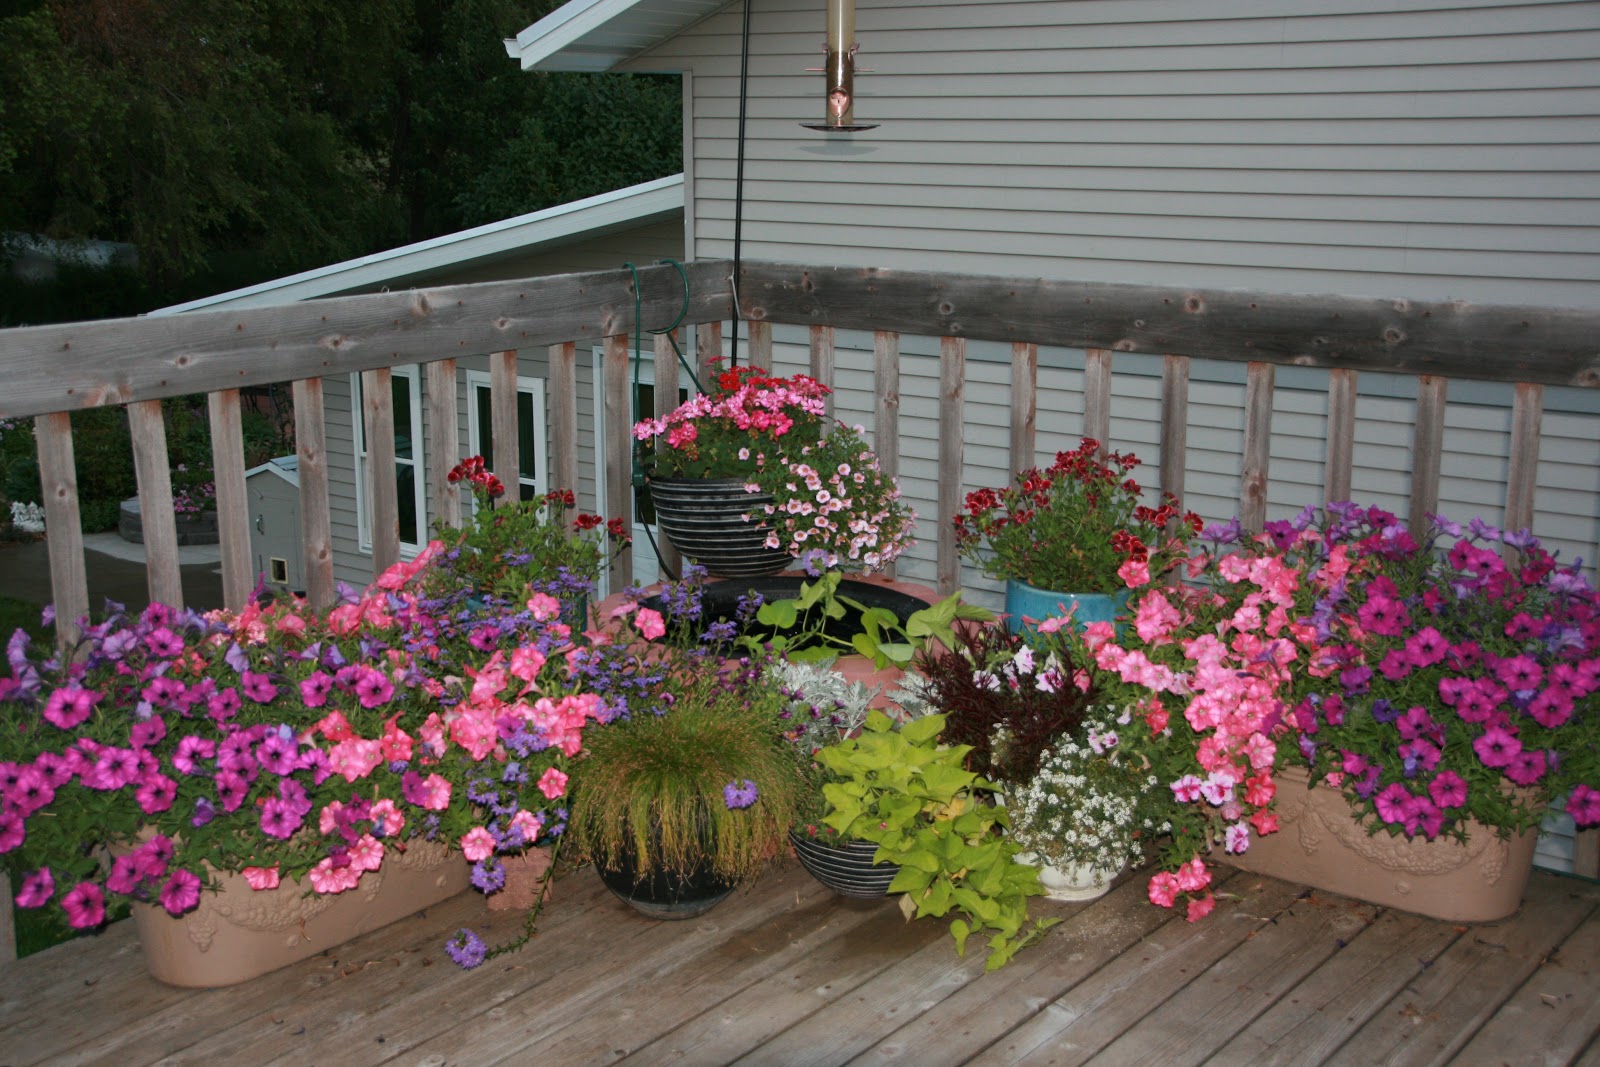
| Container Plantings at Wiese Acres |
Containers also allow you to grow specialty plants that otherwise might not thrive in your climate, like my plumeria and mandarin orange trees. I can move those containers indoors before first frost and keep them safe and warm until the last frost of the next spring happens and I am able to move them back outdoors. Container gardens can also supplement colors, textures, and designs when strategically placed amongst the plantings of in-ground beds. Uses of and places for containers is really limited only by your imagination.
 |
| Container Planting at Wiese Acres |
While I certainly want my containers to look attractive, I am really more concerned with their functionality. I want containers that stay where I put them. I don't want to have to collect them from around the yard after a good, strong wind storm, so I want something heavy enough to stay put but not so heavy that I can't move it if I need to. One solution is to place large planters on dollies with good sturdy, locking casters under them. Then I can simply unlock the casters, move the plant to where I need it to be, then re-lock the casters to hold it in place.
For very large containers, you can reduce the weight by packing styrofoam peanuts (not the water soluble kind) or crushed plastic soda bottles in the bottom 1/3 or so of the container, then placing your potting mix on top. This not only lessens the weight, it decreases the volume of potting soil you need to purchase. Most plants suitable for containers will do just fine with about 12 inches of potting soil. It will also, however, allow the planter to dry out more quickly, because you've removed 1/3 of the soil mass.
That is another one of my criteria for a good container - it has to hold enough soil to maintain adequate moisture for my plants without me having to be out there watering it two or three times a day in the heat of summer. For this same reason, I also favor non-porous materials for most of my outdoor containers. Porous containers, like clay, peat or coco moss, lose water more quickly than non-porous (plastic, ceramic, metal, etc.) containers. They can be lined with plastic to help them retain water, as long as there are drainage holes in the plastic, but that is an extra step I'm not willing to take unless it's a really special container.
Larger pots will keep the roots cooler, making for healthier plants. Using light colored pots also helps keep the soil cool. The darker the color, the more of the sun's heat the container will hold to be absorbed by the soil. The more heat absorbed by the soil, the more water the plant's roots require to keep the plant alive.
Good drainage is critical for healthy container gardens. Try to select only planters that have drainage holes or in which you can easily drill drainage holes. Look also for containers that have either no saucers to catch excess water or saucers that can be easily detached and emptied. I prefer no saucers on outdoor containers. I can't control how much rain Mother Nature might provide and I don't want to have to worry about not getting around to emptying standing water from drainage saucers. Standing water is not good for the plants - it creates ideal conditions for root rot. It also isn't good for us humans - it creates ideal conditions for mosquito larvae to develop into blood thirsty little mosquitoes.
If your favored container doesn't have drainage holes, there are some things you can consider to be able to use the container for plantings: you can drill drainage holes; you can use the container for a water garden; or you can plant bog plants that don't mind having soggy feet. The one thing you shouldn't do is add a layer of gravel to the bottom of the container and consider that it will now have adequate drainage to use as a regular container. Instead of the water draining down into the gravel like we've been led to think, it actually pools in the soil on top of the gravel until there is no air space left in the soil. Then it eventually is forced down into the gravel, where it becomes musty and may harbor fungal or bacterial diseases.
If you have your heart set on a non-draining container and don't want to drill a hole in it, there is one other thing you can do. Instead of planting directly in the container, you can "double-plant". This involves placing the soil and the plants in a smaller container that fits inside the decorative one you wish to use. The inner container needs to be sturdy enough to lift out when watering so it can be allowed to drain before being placed back inside the decorative outer container. (I would have to really, really love that outer container to deal with all that fuss and bother).
Self-watering container with bottom reservoir - (Wiese Acres photo)
 I do like self-watering containers. These are containers that have some method of drawing water from an enclosed bottom reservoir to help maintain more consistent moisture in the soil. The reservoirs typically only need to be filled every few days, or at most, daily in very hot, windy weather, making it less labor intensive to have container plantings. Self-watering containers work especially well for vegetable container plantings as vegetable production tends to rely heavily on consistent moisture supplies.
Once you've selected your container, you're ready for the next critical decision: what kind of soil?
More about that tomorrow.
Someone told me I should put a plastic bag over the top of the styrofoam peanuts before I put soil in the pot. Do you recommend this?
ReplyDeleteI would not recommend a non-porous plastic as it would seriously interfere with the drainage, however, a porous landscape fabric sounds like a great idea to me. I have epxerienced the mess that results when trying to remove styrofoam peanuts from potting mix and it isn't pretty! :)
ReplyDeleteI wish I could do more with containers, but down here they require so much water, and even then the summer heat can still kill the plants.
ReplyDeleteShade containers might work best for you in the southern heat. Also, you can spray insulating foam around the inside of the container before filling it with soil and it helps keep the soil cooler. Just be sure not to cover the drainage holes with the foam. If you do this to the containers with the water reservoir, also make sure not to cover the wicking area, but between the insulation and the reservoir, you might have better luck with them.
ReplyDelete